Session 2: “Shape Safari Adventure”
Architect:
Syed Shayaan Haider - Markhor3D
Learning Objectives
In this session, the students will:
- Identify Basic 3D Shapes: Recognize and name common 3D shapes such as cube, sphere, cylinder, and cone.
- Understand Shape Properties: Explore the characteristics of each shape through hands-on interaction.
- Develop Spatial Awareness: Build simple structures using blocks, understanding how shapes fit together.
-
- Relate 3D Shapes to Everyday Objects: Connect geometric shapes to real-world items, enhancing spatial awareness.
- Enhance Vocabulary: Learn and use shape-related terms in context.
- Engage in Collaborative Play: Work together during activities, fostering social skills.
Teaching Aids
Required Equipment:
- Visual Aids:
- 3D printed 3D geometric shapes. (STL LINK)
- Slides or posters showcasing 3D shapes (pyramids, cylinders, cones, cubes, spheres, rectangular prisms).
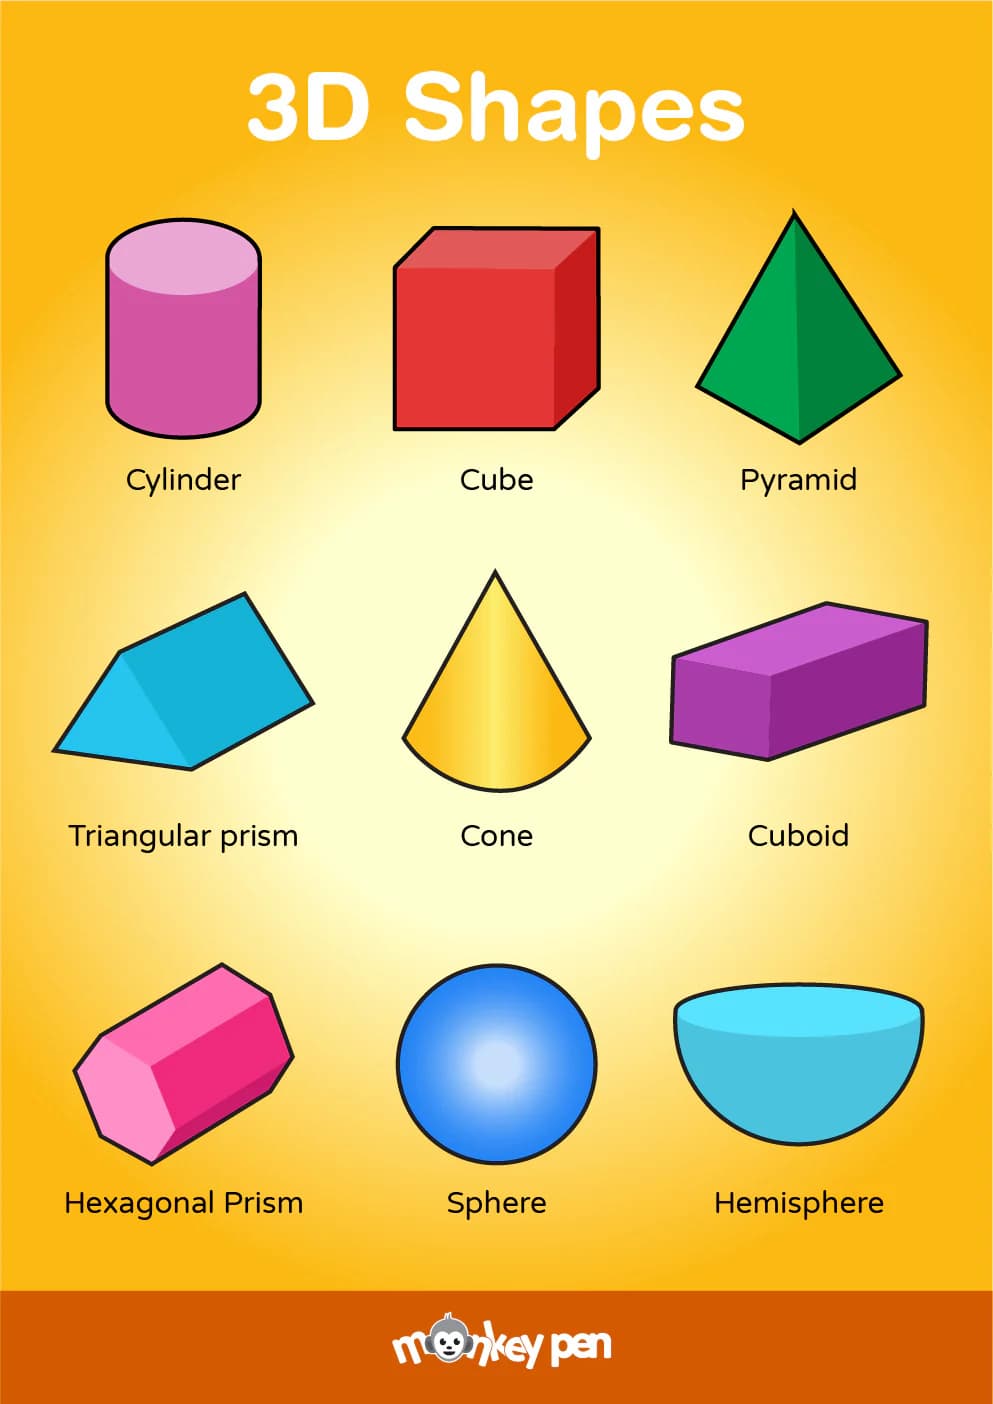
- Images of everyday objects resembling these shapes.
- Interactive Whiteboard or Projector:
- For displaying images and drawing shapes.
- Drawing Materials:
- Paper, pencils, erasers, and coloring materials.
- Worksheets:
- Shape identification sheets and drawing activities (optional).
- Color worksheets (link)
- Whiteboard and Markers:
- For drawing and brainstorming sessions.
Structure and Lesson Plan (Total Time: 50 minutes)
1. Introduction and Warm-Up (5 minutes)
-
Greet the Students:
- “Good morning, explorers! Are you ready for an exciting adventure today?”
-
Introduce the Theme:
- “Today, we’re going on a ‘Shape Safari’ to discover different shapes all around us!”
-
Activate Prior Knowledge:
-
“Can anyone name some shapes you already know?”
-
Allow a few students to respond (e.g., circle, square, triangle).
-
2. Shape Safari Introduction (5 minutes)
-
Set the Scene:
- “We’re going to explore the world of 3D shapes—shapes that aren’t flat but have depth, like the things we can hold and touch!”
-
Introduce 3D Shapes:
-
Show flashcards or models of each shape one by one.
-
Cube: “This is a cube. It has six square faces.”
-
Sphere: “This is a sphere. It’s round all over, like a ball.”
-
Cylinder: “This is a cylinder. It has two circle faces and one curved side, like a can.”
-
Cone: “This is a cone. It has a circle at the bottom and comes to a point at the top, like an ice cream cone.”
-
-
-
Interactive Questions:
-
“Can you think of objects that are shaped like this?”
- Encourage students to share examples.
-
3. Shape Exploration Activity (15 minutes)
-
Distribute Shape Models:
- Give each student or pair a set of 3D shape models.
-
Hands-On Exploration:
- “Take a close look at your shapes. Feel them, turn them around, and see what you notice.”
-
Guided Discovery:
-
Cube Exploration:
-
“How many faces does the cube have?”
-
“Are the faces squares or circles?”
-
-
Sphere Exploration:
-
“Does the sphere have any flat sides?”
-
“Can it roll?”
-
-
Cylinder Exploration:
-
“How many faces does the cylinder have?”
-
“What shapes are the faces?”
-
-
Cone Exploration:
- “What happens if you try to stand the cone on its point?”
-
-
Shape Sorting (Optional):
-
“Let’s sort objects based on their shapes.”
- Provide a sorting mat or areas designated for each shape.
-
4. Shape Safari Hunt (10 minutes)
-
Explain the Activity:
- “Now, we’re going on a safari around the classroom to find objects that match our 3D shapes!”
-
Guidelines:
- “When you find an object, point to it and we’ll talk about which shape it is.”
-
Supervised Exploration:
-
Guide students around the classroom.
-
Examples:
-
Cube: Tissue box, dice.
-
Sphere: Globe, playground ball.
-
Cylinder: Glue stick, water bottle.
-
Cone: Party hat, traffic cone (picture).
-
-
-
Interactive Discussion:
-
“Great find! What shape is this object?”
-
Reinforce shape names and properties.
-
5. Building with Shapes (10 minutes)
-
Group Activity:
- Divide students into small groups (2-3 students per group).
-
Distribute Building Blocks:
- Provide each group with an assortment of blocks in different shapes.
-
Instructions:
-
“Work together to build something using the shapes you have!”
-
“You can make a tower, a house, or anything you imagine!”
-
-
Encourage Collaboration:
- “Share the blocks with your friends and decide together what to build.”
-
Teacher’s Role:
-
Move around the room, offering assistance and encouragement.
-
Ask questions like:
-
“What shapes are you using?”
-
“How are you stacking the shapes?”
-
-
6. Sharing and Reflection (5 minutes)
-
Group Presentations:
-
“Let’s see what each group has built!”
-
Each group briefly shows their creation.
-
-
Positive Feedback:
- “Wonderful job! I see you used cubes and cylinders to make a tower!”
-
Reinforce Learning:
- “Which shapes did you find easiest to stack? Why?”
7. Conclusion and Recap (5 minutes)
-
Summarize the Session:
- “Today, we went on a Shape Safari and discovered many 3D shapes!”
-
Review Shapes:
- Hold up each shape model and have students call out the name.
-
Reinforce Key Points:
- “Remember, shapes are all around us, and we can use them to make amazing things!”
-
Express Excitement for Future Sessions:
- “In our next class, we’ll use these shapes to build even more exciting creations!”
-
Closing Encouragement:
- “Great job, explorers! Keep looking for shapes around you every day!”
Key Vocabulary
-
Cube: A 3D shape with six square faces.
-
Sphere: A round 3D shape with no faces, edges, or vertices.
-
Cylinder: A 3D shape with two circular faces connected by a curved surface.
-
Cone: A 3D shape with one circular face and a pointed vertex.
-
Face: A flat surface on a 3D shape.
-
Edge: Where two faces meet on a 3D shape.
-
Vertex (Vertices): A corner point where edges meet.
For suggestions, improvements, and corrections, feel free to reach out at shayaanhaider@gmail.com