Grade 2 – Session 3: “Melting Moments: Ice and Water”
Architect: Aleeza Ayaz - Markhor3D
Session Length: 50-60 minutes
Session Overview:
In this hands-on session, students will explore how stirring impacts the melting process of ice in water. Using MeasureLab’s temperature sensor, they’ll observe and record how the temperature changes in two beakers—one stirred and one left still. Through live temperature readings, students will discover how stirring distributes heat more evenly, leading to a quicker, more uniform cooling effect in the stirred beaker. By comparing the two, they’ll gain an intuitive understanding of heat transfer and learn how stirring impacts how heat spreads. This experiment fosters curiosity about real-life applications, encouraging students to consider why stirring helps achieve even temperature in everyday situations.
Learning Objectives:
In this session, students will:
- Explore how stirring affects the distribution of heat in water and helps ice melt more evenly.
- Measure temperature changes using the temperature sensor connected to MeasureLab.
- Begin understanding the concept of heat transfer by observing how stirring distributes heat.
- Observe whether the water becomes evenly cold over time in both beakers.
- Understand what “evenly” and “uniformly” mean as ‘spread equally’ in simple terms.
Equipment Required:
- MeasureLab with a temperature sensor
- Two beakers: One for stirring and one to leave still, each with the same amount of ice and water
- Ice cubes
- Stirring rods
- Warm water for both beakers
- Worksheet for recording predictions and observations
Teacher Resource:
Session File: Ml23.plf (59.1 KB)
Teaching Aids:
- Projector (optional for displaying live plots)
Preparation:
This step has to be done before the session on each workstation/apparatus by the teacher/session instructor:
- Make sure that each computer has Physlogger installed and can detect the Measrelab when connected to it using the provided cable.
- Each Measurelab should have access to a power outlet for sensors that require external power. This session uses Temperature Probe which requires external power source to be connected.
- Connect the Temperature Sensor to the Measurelab using the following port:

- Launch the Physlogger application and load the session file provided in the resources section.
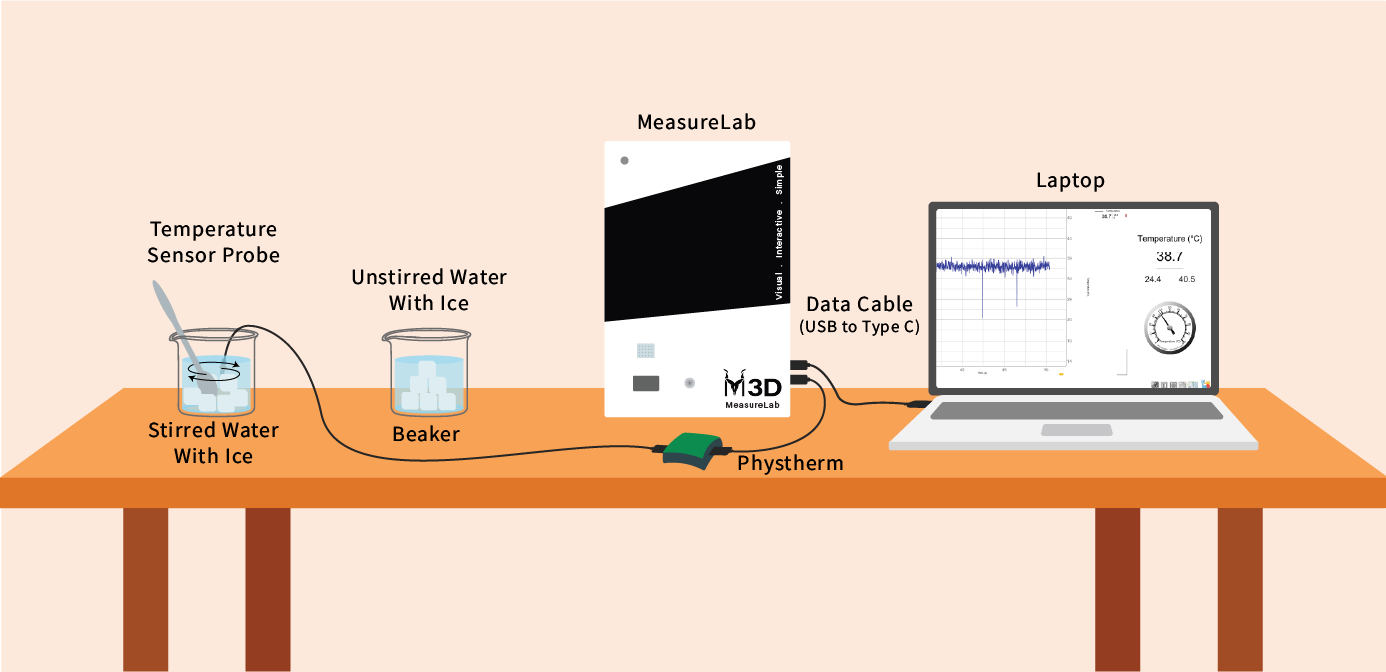
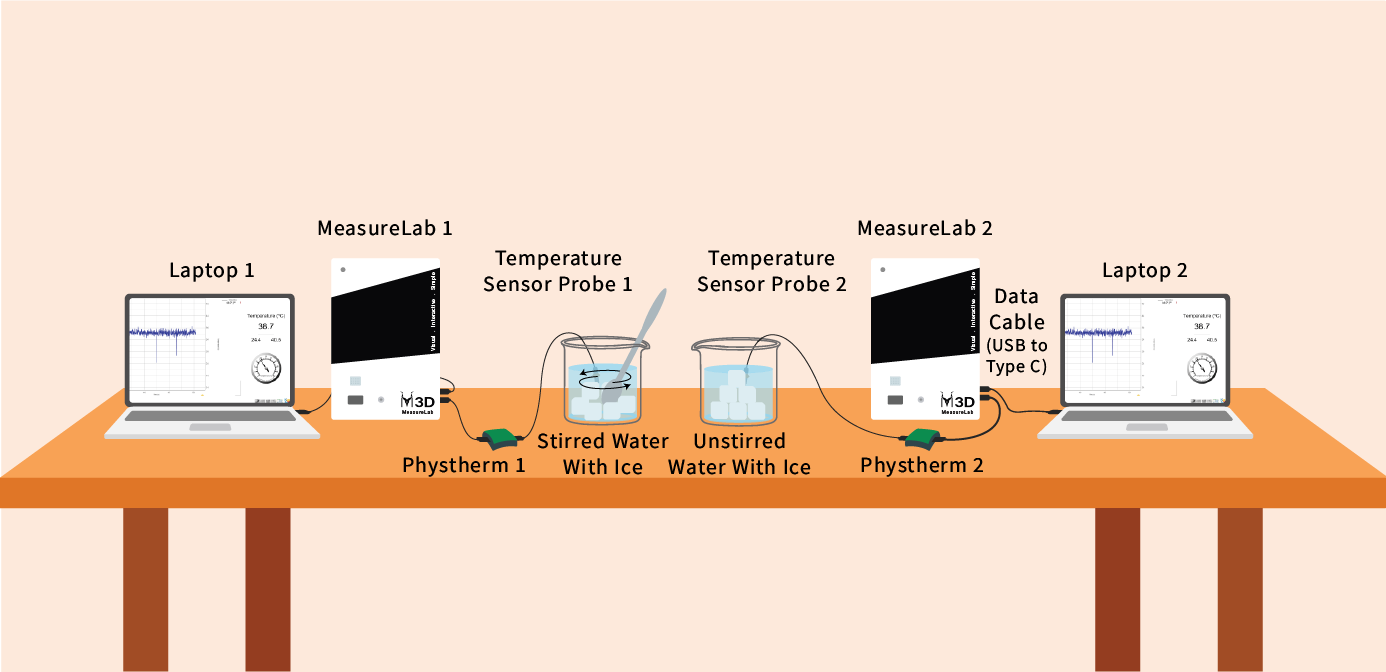
Your setup will look something like this:
For Single MeasureLab:
For Multiple MeasureLab:
Introduction: (10-15 minutes)
You may begin by asking:
“Who here has ever helped in the kitchen? What do you do when you want to cool a hot drink or make ice melt faster in water?”
Let students share their experiences, then introduce the experiment:
You may ask:
“Today, let’s see what happens when we try to melt ice in water. We’ll have two beakers with ice and water—one we’ll stir and the other we’ll leave still. What do you think will happen? Will the water get cold equally in both?”
Encourage predictions on how the water might feel in each beaker after some time.
Hands-On Exploration: (30-35 minutes)
Step 1: Group Setup and Predictions
Each group will have two beakers with the same amount of water and ice cubes.
-
If multiple MeasureLab devices are available:
Split the students into groups so that each group can either monitor the stirred or the still beaker continuously. They will compare findings at the end of the activity. -
If only one MeasureLab setup is available:
Students will shift the temperature sensor between beakers, recording the temperature changes in both while taking turns stirring and observing each beaker.
You may ask:
“What do you think will happen if we stir one of the beakers? Will the ice melt faster or slower than in the other one? Will the temperature be the same in both?”
Students should write down their predictions in the worksheet, focusing on what they expect in each beaker.
Step 2: Measuring Temperature
- Placing the Temperature Sensor:
In groups, students will place the temperature sensor in each beaker (alternating if only one sensor is available) to track changes over time.
You may ask:
“Do you think the temperature will be the same next to the ice at the top and lower down in the beaker?”
- Measuring at Different Levels:
Encourage students to move the temperature sensor to different places in the water—near the ice and lower in the beaker.
You may ask:
“Does the water near the ice feel colder than at the bottom? Why do you think that is?”
Step 3: Observing Live Plots on MeasureLab
As they stir one beaker and leave the other still, students will observe live temperature plots, either on multiple devices or by shifting the probe.
You may ask:
“Look at the live plot. Is the temperature going down faster in the stirred beaker? What do you think is happening inside the water that’s making the temperature change?”
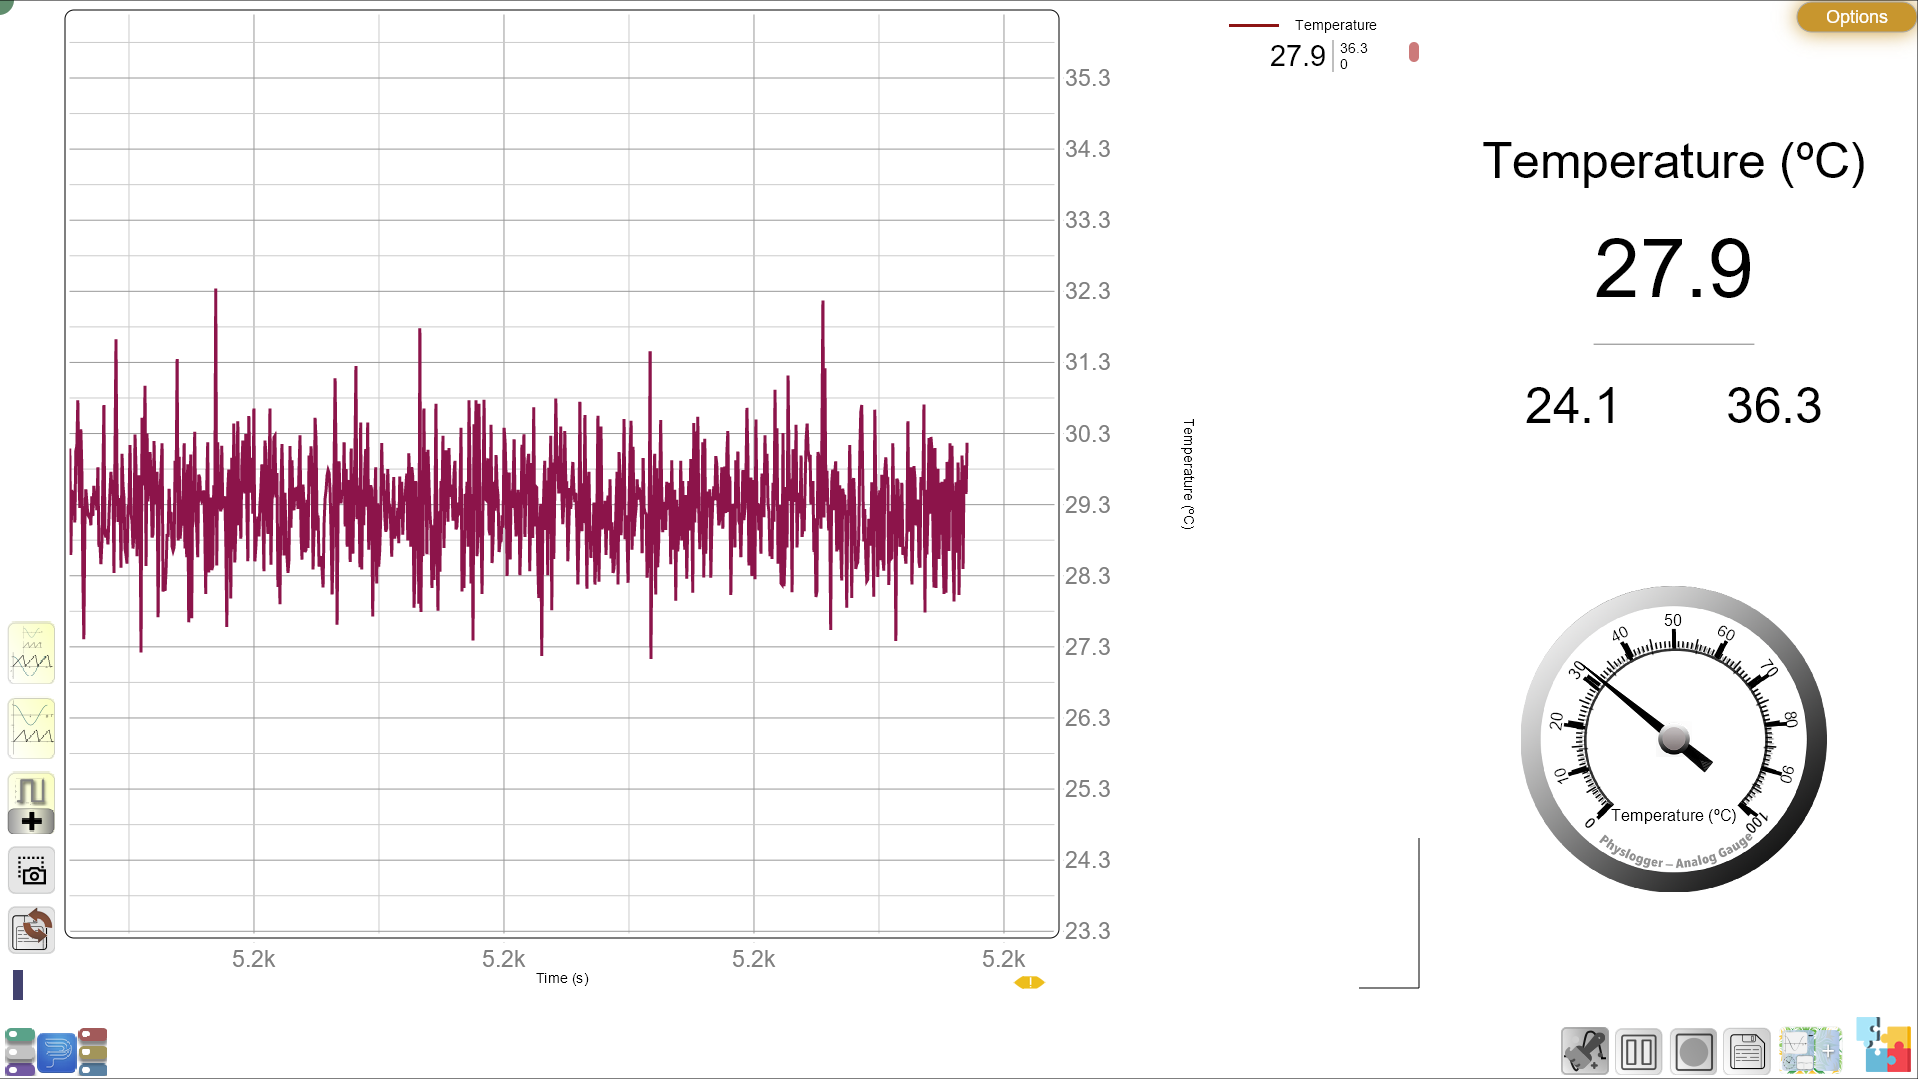
After a few minutes, students will check if the water has become evenly cold (or “uniformly cold”) in both beakers.
You may ask:
“Is the water equally cold everywhere in the stirred beaker? What about in the still beaker? Is it colder in some parts but warmer in others?”
Guided Activity: (15-20 minutes)
Worksheet Activity:
The worksheet includes sections for predictions and observations.
Section 1: Predictions
- What do you think will happen in the stirred beaker?
- What do you think will happen in the still beaker?
- Will the water get cold faster in one beaker, or will it be the same?
Section 2: Recording Observations
| Beaker (Stirred/Still) | Temperature (Near Ice) | Temperature (Lower in Water) | Did the Ice Melt Evenly? |
|---|---|---|---|
| Stirred Beaker | |||
| Still Beaker |
Section 3: Explanation (In Simple Words):
- Why do you think stirring helped the ice melt more evenly?
- Was the water near the ice colder than at the bottom? What did you observe in both beakers?
Summary and Reflection: (5-10 minutes)
You may summarize by asking:
“Why do you think stirring helped the ice melt faster? Why was the temperature more equal (uniform) in the stirred beaker compared to the still beaker?”
You may explain:
“When we stir, we help the heat from the water move around and reach the ice faster, making it melt more evenly. In the still beaker, the cold water stays near the ice, and the warmer water stays at the bottom, so the ice melts more slowly and unevenly.”
Reflection Questions:
- “Can you think of other things we stir in real life to help mix things or make them cooler?”
- “Why do you think the stirred beaker was colder throughout, but the still beaker felt different at the top and bottom?”
Glossary:
- Heat Transfer: How heat moves from one place to another (like from warm water to ice).
- Temperature: How hot or cold something is.
- Evenly/Uniformly: When something is spread equally, like cold spreading in the water.