Grade 3 – Session 6: “Ice Insulators—Keeping It Cool”
Architect: Aleeza Ayaz - Markhor3D
Session Length: 50-60 minutes
Session Overview:
In this session, students will explore how different materials can act as insulators, affecting the rate at which ice melts. Using MeasureLab’s load cell, they will measure the weight of melted ice and observe that, despite melting, the weight remains constant. Through hands-on experimentation, students will learn how certain materials slow down heat transfer, keeping the ice frozen longer. They will make predictions, observe outcomes, and discuss why some materials insulate better than others, using their predictions to guide their learning and encourage critical thinking about the properties of materials.
Learning Objectives:
In this session, students will:
- Explore how different materials affect the speed at which ice melts.
- Use a load cell to measure the weight of melted ice and observe how the weight remains constant.
- Understand why certain materials act as better insulators by slowing down heat transfer.
- Learn from their predictions and compare them to actual outcomes, using incorrect predictions as a learning opportunity.
Teacher Resource:
Session File: ML36.plf (59.1 KB)
Equipment Required:
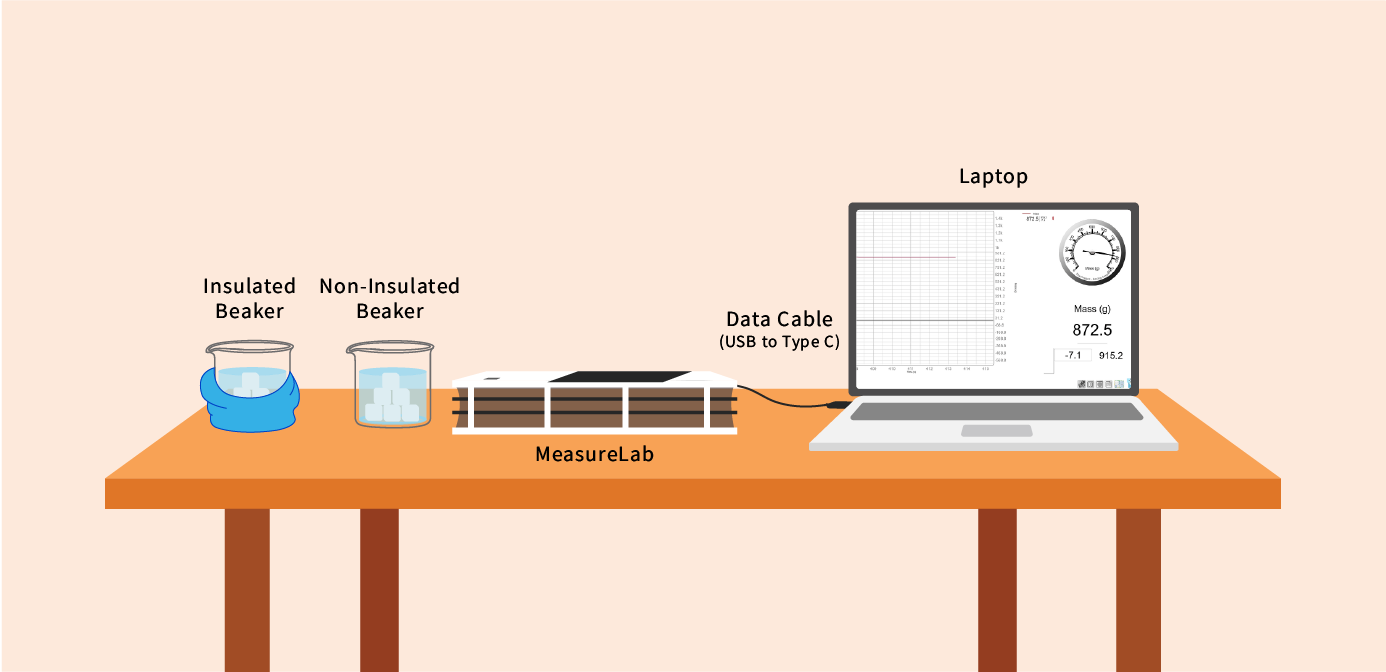
- MeasureLab with built-in load cell.
- Ice cubes.
- Two beakers to place the ice cubes in.
- Various insulating materials (e.g., fabric, plastic, foil).
- Stopwatch or timer.
- Worksheet for recording observations and drawings.
- Pens, pencils, markers etc.
Teaching Aids:
-
Projector (optional)
Preparation:
This step has to be done before the session on each workstation/apparatus by the teacher/session instructor:
- Make sure that each computer has Physlogger installed and can detect the Measrelab when connected to it using the provided cable.
- Each Measurelab should have access to a power outlet for sensors that require external power. This experiment uses Load Cell which does not require external power to be connected.
- Launch the Physlogger application and load the session file provided in the resources section.
Your setup will look something like this:
Introduction: (10 minutes)
You may begin with a simple question:
“When it’s cold outside, why do we wear jackets or scarves? How do they help keep us warm?”
Wait for student responses and build on them:
“Yes! Jackets and scarves trap our body heat inside, stopping the cold from getting in. This is called insulation. Insulation can help keep things warm, but it can also keep things cold—like ice. Today, we’ll use different materials to see which ones are the best at keeping ice from melting.”
Hands-On Exploration: (30-35 minutes)
Step 1: Group Setup
Students will work in small groups. Each group will receive two beakers containing ice cubes wrapped in different materials (e.g., plastic and foil).
Ask questions to spark predictions:
“Which material do you think will keep the ice frozen the longest? Why?”
Encourage students to share their ideas:
“Do you think thick materials are better at keeping things cold?”
Step 2: Observing Weight Changes
-
Place the Beakers on the Load Cell:
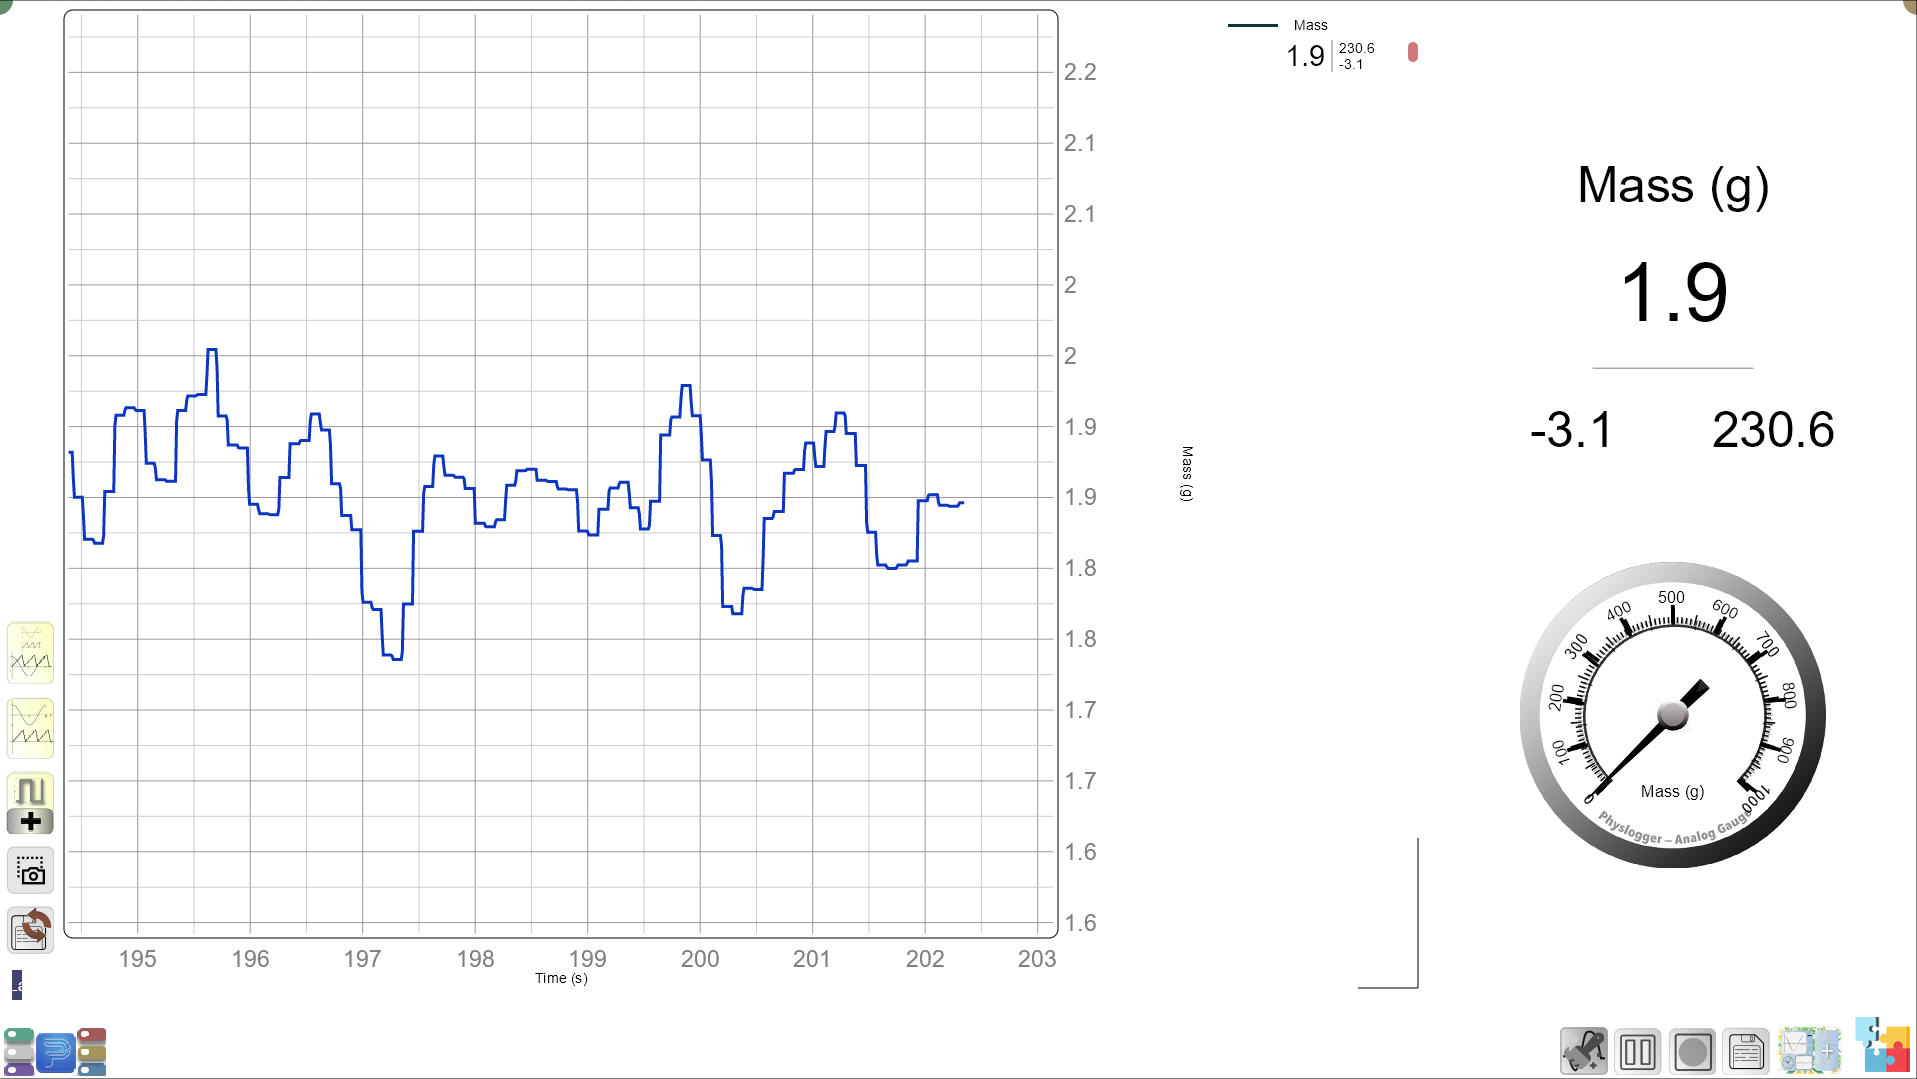
Each group will place both beakers on the load cell. As the ice melts, the load cell will measure the mass of the melted water. Students will notice that even though the ice melts, the mass remains constant. -
Ask students to observe:
“Why do you think the mass stays the same, even when the ice is melting?”
- Checking Insulation Performance:
“Let’s check which material kept the ice frozen longer. Do you notice which one is melting faster?”
- Handling Predictions:
Remind students that it’s okay if their predictions aren’t correct. Incorrect predictions are great learning moments. After observing the experiment, the teacher can explain why one material is insulated better than the other.
For example, the teacher may say:
“I know some of you predicted that plastic would keep the ice frozen longer, but it melted faster. Let’s talk about why foil was a better insulator—foil blocks heat more effectively than thin plastic.”
Guided Activity (15-20 minutes)
Enhanced Worksheet Activity:
The worksheet will include sections for drawing predictions and observations, alongside written responses. This will help students visualize their learning and make the lesson more interactive.
Worksheet Layout Example:
Section 1: Predictions (Draw and Write)
- Draw the two materials you’re testing on the beakers. Which one do you think will keep the ice frozen longer?
- Write your prediction:
Material 1 will keep the ice frozen longer because…
Material 2 will melt faster because…
Section 2: Recording Observations
| Material Wrapped | Did Liquid Appear? (Yes/No) | Time Taken for Liquid to Appear | Which Melted Faster? |
|---|---|---|---|
| Material 1 | |||
| Material 2 |
Section 3: Drawing Observations (Optional):
- Draw what you observed happening to the ice. Which one melted faster? Which material kept the ice cold longer?
Follow-Up Questions on the Worksheet:
- “Which material kept the ice frozen the longest?”
- “Why do you think the weight stayed the same even after the ice melted?”
- “Where do you think we use materials like this in everyday life to keep things cold?”
Summary and Reflection: (5-10 minutes)
Summarize the key points:
“Today, we learned that some materials are better insulators—they keep the ice frozen for a longer time. Insulators work by slowing down how fast heat gets to the ice. Even though the ice melted, its weight didn’t change because it just turned into water.”
Reflection Questions:
- “Why do you think one material kept the ice frozen longer than the other?”
- “Where else do you think we use insulators, like in our homes or in coolers?”
Glossary:
- Insulation: A material that slows down the transfer of heat.
- Load Cell: A device used to measure weight.
- Phase Change: When something changes from one state to another, like ice turning into water.