Session 6: “Finishing Touches: Decorating Our Coins”
Architect:
Syed Shayaan Haider - Markhor3D
Learning Objectives
In this session, the students will:
- Express Creativity Through Art: Decorate their 3D printed coins using various art materials.
- Develop Fine Motor Skills: Practice painting, coloring, and applying decorations.
- Experience Pride in Their Work: Feel a sense of accomplishment by personalizing their creations.
- Engage in a Fun, Hands-On Activity: Enjoy a relaxed, artistic session fostering enjoyment and creativity.
- Collaborate and Share Ideas: Interact with peers, sharing materials and inspiration.
Teaching Aids
Required Materials:
-
3D Printed Coins:
- All students’ coins from previous sessions, printed and ready for decoration.
-
Art Supplies:
- Non-toxic, washable paints (various colors).
- Brushes of different sizes.
- Markers and crayons.
- Glitter glue.
- Stickers (stars, hearts, etc.).
- Small decorative gems or sequins.
- Glue sticks or craft glue.
- Protective table coverings (newspaper or plastic sheets).
- Aprons or smocks for students.
- Paper towels and wet wipes for clean-up.
-
Visual Aids:
- Examples of decorated coins or similar items for inspiration.
Structure and Lesson Plan (Total Time: 50 minutes)
1. Introduction and Setup (5 minutes)
-
Greet the Students:
- “Hello, everyone! Are you ready to have some fun decorating your coins today?”
-
Distribute Coins:
- Hand out the 3D printed coins to the remaining students whose coins were printed during the last session.
-
Explain the Activity:
- “Today, we’ll be adding the finishing touches to our coins by decorating them any way you like!”
-
Set Expectations:
- “Remember to be creative and have fun. There are no wrong ways to decorate your coin!”
2. Demonstration and Inspiration (5 minutes)
-
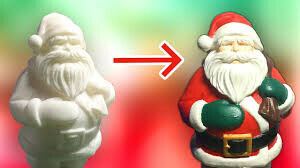
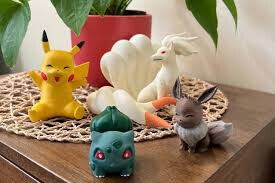
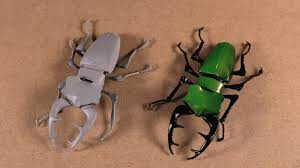
Show Examples:
-
Display decorated coins or similar items.
-
“Look at these examples! You can paint them, add glitter, or stick on some fun stickers.”
-
-
Demonstrate Techniques:
-
Briefly show how to:
-
Use paints and brushes.
-
Apply glitter glue.
-
Attach stickers or gems.
-
-
-
Safety and Cleanliness Reminders:
-
“Make sure to handle the materials carefully.”
-
“Keep your workspace tidy and be mindful of your classmates.”
-
3. Decorating Activity (30 minutes)
-
Distribute Materials:
-
Provide each student with:
-
A set of paints and brushes.
-
Access to markers, crayons, glitter glue, stickers, and other decorations.
-
-
Ensure tables are covered, and students are wearing aprons or smocks.
-
-
Encourage Creativity:
- “You can paint your coin, draw patterns, write your name, or add any decorations you like!”
-
Teacher and Assistant Support:
-
Move around the room to:
-
Assist with opening paints or glue.
-
Offer suggestions if a student seems unsure.
-
Praise students’ efforts and creativity.
-
-
-
Background Music (Optional):
- Play soft, cheerful music to enhance the creative atmosphere.
-
Promote Sharing:
- “If you need a color or decoration that someone else has, remember to ask politely and share.”
4. Drying and Clean-Up (5 minutes)
-
Set Coins Aside to Dry:
- “Let’s place our coins on the drying rack so they can dry safely.”
-
Assist Students as Needed:
- Help carry coins if necessary to prevent smudging.
-
Clean-Up Instructions:
-
“Now, let’s tidy up our work areas.”
-
“Please put the caps back on markers and glue sticks.”
-
“Place used brushes in the water cups for cleaning.”
-
-
Collect Materials:
- Gather all art supplies and store them appropriately.
5. Sharing and Reflection (5 minutes)
-
Group Discussion:
- “Would anyone like to share their decorated coin with the class?”
-
Encourage Students to Share:
- Allow a few students to show their coins (even if still wet) or describe their designs.
-
Positive Feedback:
-
“That’s a beautiful design!”
-
“I love the colors you chose!”
-
-
Ask Reflective Questions:
-
“What did you enjoy most about decorating your coin?”
-
“Did you try any new techniques today?”
-
“Every artist was first an amateur.”
— Ralph Waldo Emerson
6. Conclusion and Recap (5 minutes)
-
Summarize the Session:
- “Today, we had a wonderful time adding our personal touches to the coins we designed.”
-
Reinforce Key Points:
- “We expressed our creativity and made our coins unique.”
-
Express Anticipation for Future Activities:
- “Next time, we’ll continue our creative journey with more fun projects!”
-
Closing Encouragement:
- “Great job, everyone! I’m so proud of your hard work and imagination.”
Additional Notes for the Teacher
-
Preparation:
-
Materials Ready:
-
Ensure all art supplies are prepared and accessible.
-
Cover tables and arrange seating to accommodate all students comfortably.
-
-
Drying Area:
- Set up a space where coins can dry undisturbed.
-
Protective Measures:
- Provide aprons or smocks to protect students’ clothing.
-
Key Vocabulary
-
Decorate: To add details or colors to make something more attractive.
-
Creativity: Using imagination to create something new.
-
Fine Motor Skills: Small movements using hands and fingers.
-
Express: To show thoughts or feelings through actions or art.
-
Personalize: To make something uniquely yours by adding personal touches.
For suggestions, improvements, and corrections, feel free to reach out at shayaanhaider@gmail.com