
MeasureLab Console:
When you open the MeasureLab Kit, you will find the MeasureLab Console, its power cord and a bunch of Digital and Analog Sensors.
A complete list of them is as follows:
- Photogate
- Distance Sensor
- Temperature Sensor Probe
- Solar Cell
- Hall effect/Magnetic Flux
- CO/CO2 Sensor
- Horizontal mounting plate for Load cell
Along with all these sensors, MeasureLab console comes equipped with Built-in Sensors as well. These are as follows:
- Voltage sensor
- Pulse Sensor
- Light sensor
- Humidity Sensor
- Pressure Sensor
- Ambient Pressure Sensor
- Ambient Temperature Sensor
- Sound Sensor
The external sensors are external and have to be connected to MeasureLab using the USB Type C-to-C cable.
1. Getting Familiar with the Attachments:
All the sensors included can be connected to MeasureLab using the cables provided. You can just plug in the attachment and it will start working. But, to use the MeasureLab console, we need to connect it to a computer/laptop.
2. Setting up the MeasureLab:
To turn on the MeasureLab, connect it to a computer/laptop using the provided USB-to-Type C cable. Make sure that you have used the dedicated Type-C port for power.
Once turned on, you can see a white light blinking near it’s ports. Now you can connect any sensor you want in the appropriate port depending on if it is an analog sensor or digital sensor. You can also use some of the built-in sensors such as a light sensor or load cell.
Note for the users:
1. Check Power Cable:
Some of the sensors require the MeasureLab to be connected to a power source. If you have connected such a sensor, make sure you have connected the external power cable or the software will show the following error message:

The sensors that require MeasureLab to be connected to external power are as follows:
- MQ Sensor/Alcohol Sensor
- PhysTherm/Temperature Probe
- Voltage/Current Probes
- Motor
- Heartbeat Sensor
- Magnetic Flux Sensor
- Photogate
- Solar Panel
- Air fan
2. Check Sensor Connection:
If a quantity, which you want to measure using your dedicated sensor, is not showing up in the list of available quantities or is not responding, make sure the wire is properly connected on both ends (the Sensor and the MeasureLab). The wire should click in when you plug it into the sensor.
3. Use the dedicated port:
Each port in the MeasureLab is designed for specific sensors. When you plug in the sensor, make sure that you are using the correct port. The port for each sensor should be specified in the session file in which the sensor is being used.
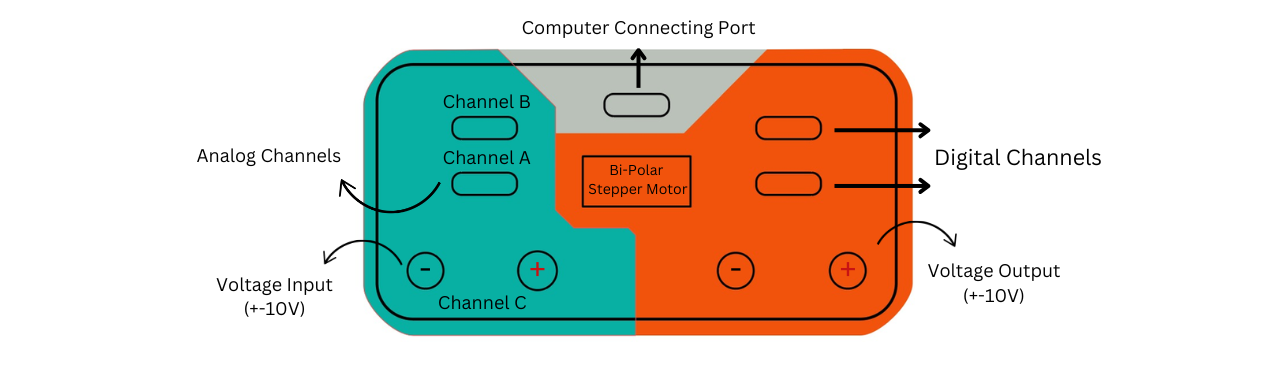
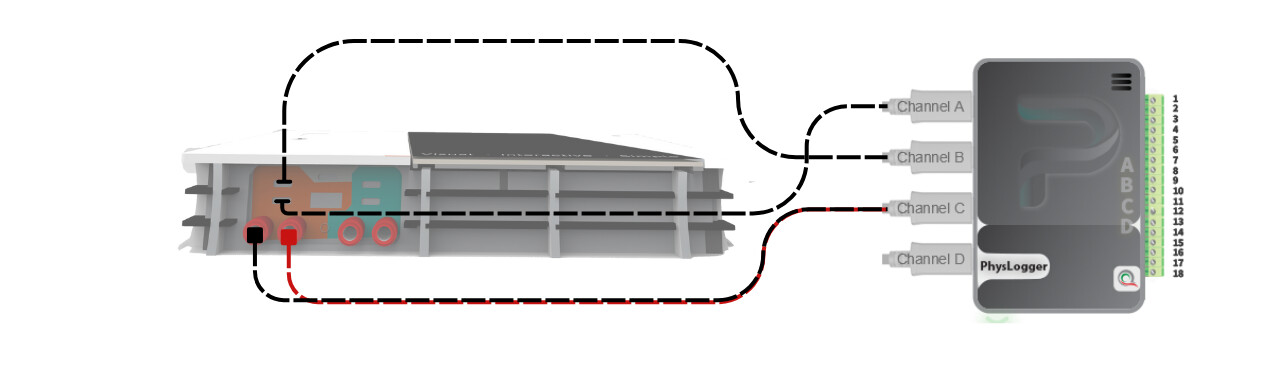
MeasureLab Console provides 4 USB Type-C ports and 2 pairs of Banana Input and Output ports to connect external sensors to it.
Handling the MeasureLab:
-
Measurelab is IP53 designed which offers minimal protection against dust and water sprays. This means that there should be no direct contact with any liquid.
-
If there is a spillage around the MeasureLab station, cleaning it before setting up is advised.
-
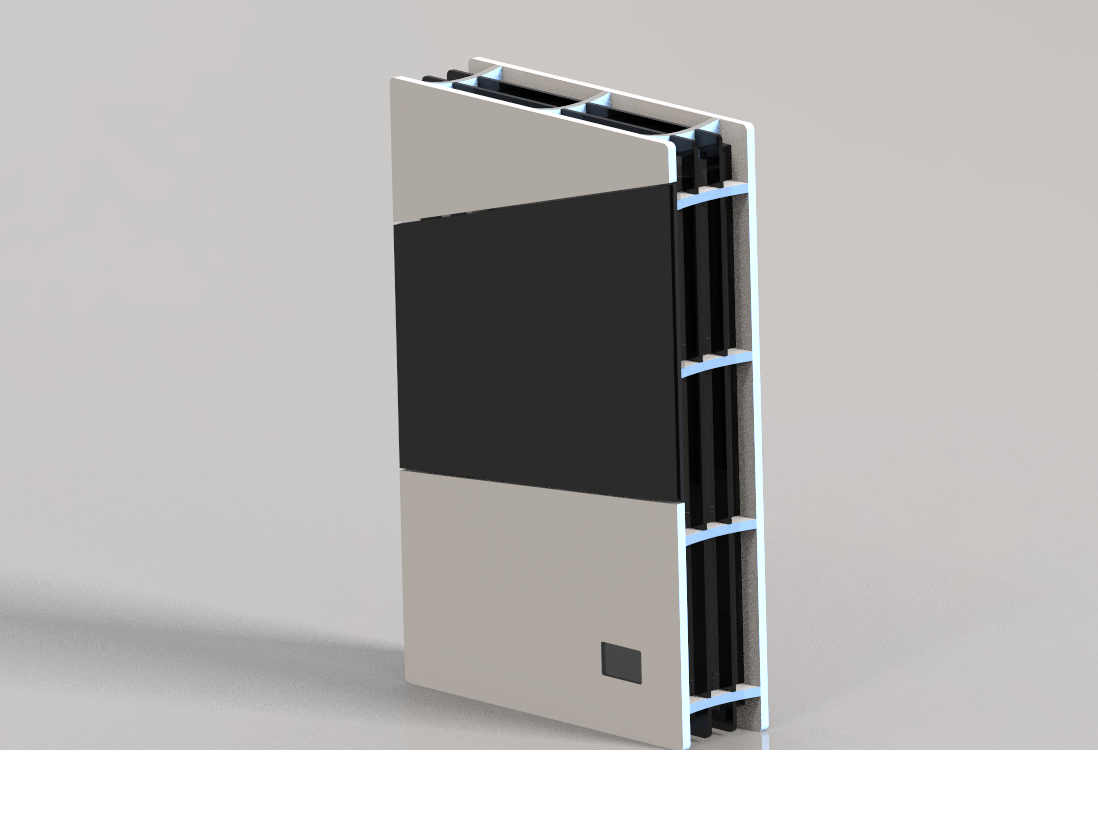
MeasureLab should either be picked up from the bottom or by holding with two hands from the sides. This is because the central black plate is a sensor called a Load Cell. Picking the MeasureLab from the sensor may damage the sensor.
-
The load cell is rated for 1 Kg of load, which should be applied uniformly and gradually at the center of the black plate. Sudden or excessive loads can cause the sensor to produce inaccurate results.
Setting up PhysLogger:
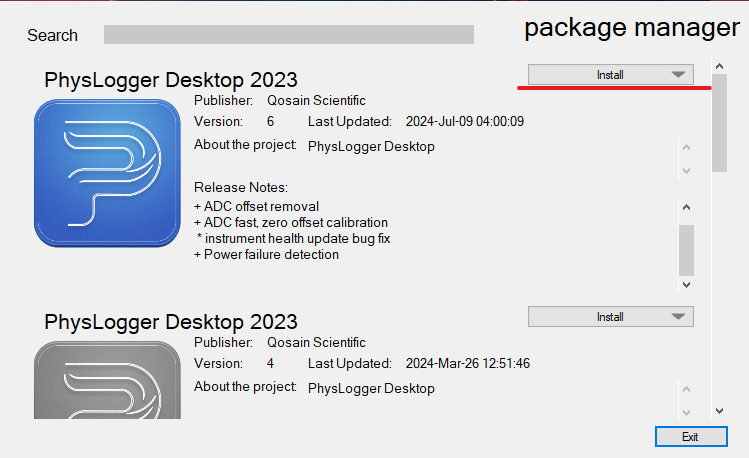
- To observe the changing sensor values, line plots and use the values you need to install and set up a software package called “PhysLogger.”
- You can download it using the embedded link. It will be named “Qosain Package Manager” on the website.
- This will be an online installer so you will need an active internet connection to install the software.
- Once installed, you can launch it using the shortcut on the desktop:

- After a few seconds, you will see a list of available devices:
Note:
- If you are also a 3D printing enthusiast and use Ultimaker Cura Slicer, make sure that it is closed before launching PhysLogger.
- Additionally, some elements in the software may not look the same as your MeasureLab console. This is because the software supports various form factors
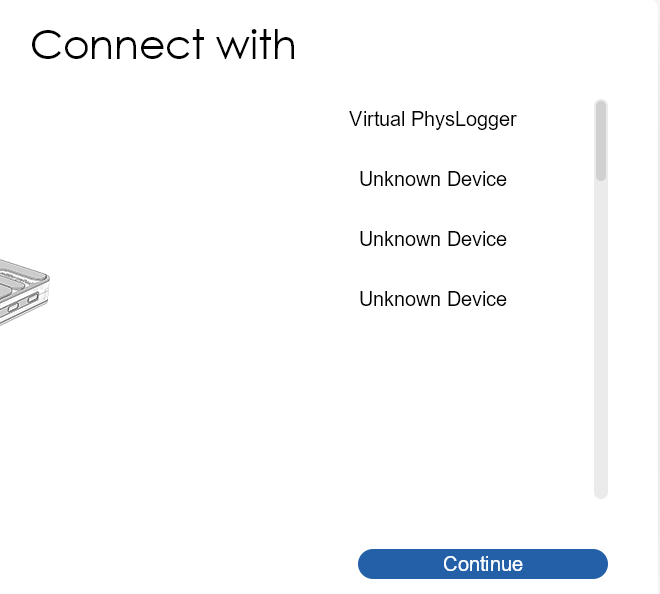
Select your PhysLogger device which will start with the word COM followed by a number of the port e.g. COM14.
Once selected, if you have used PhysLogger before, you will be greeted with the following menu:
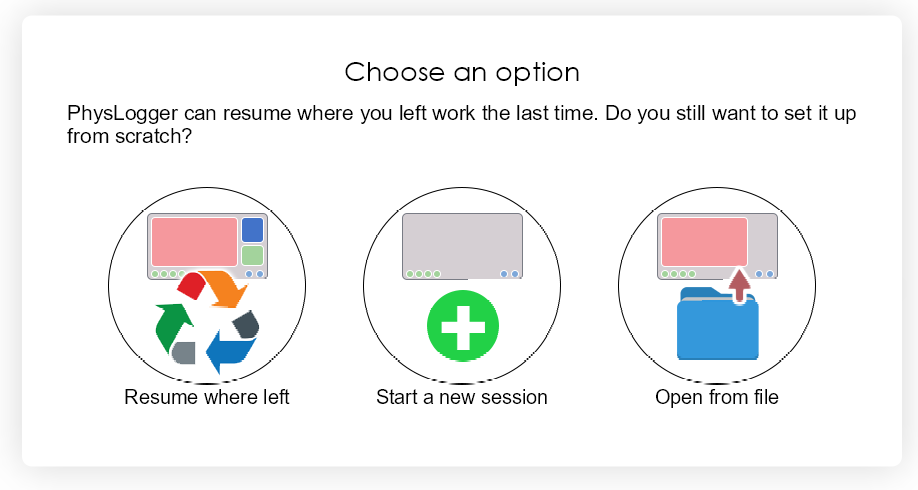
You can either continue your previous work, start a new session or load a previous workspace if you have saved one or you can use our provided session files.
If it is your first time, you will be greeted with the intro menu with two options:

Click on “Using a self guided tour” to see the available actions that you can use:
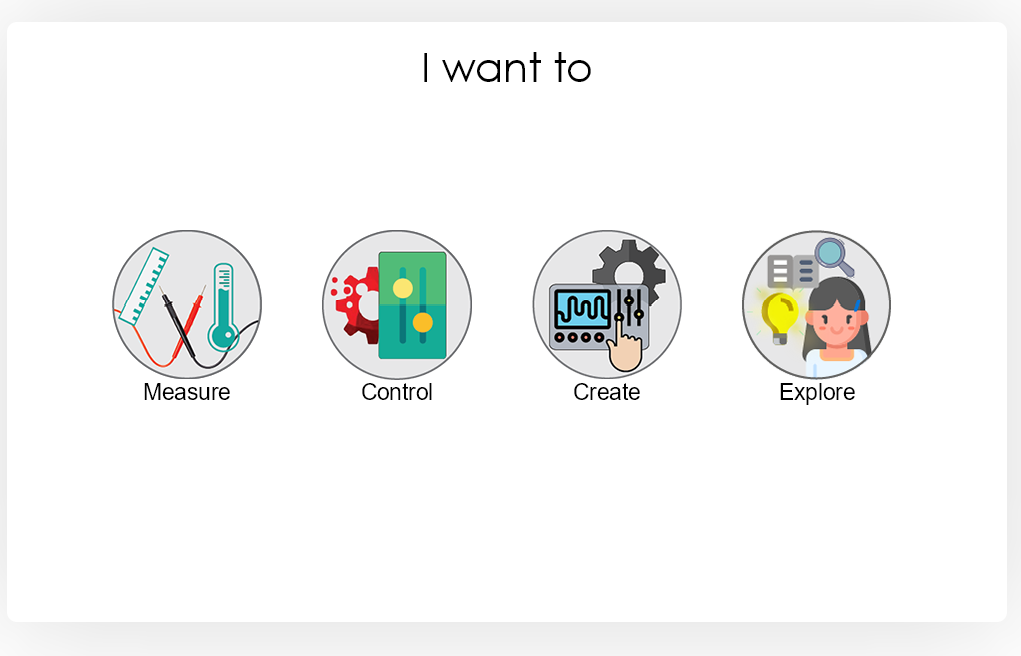
Click on “Measure” to see the list of available values you measure:
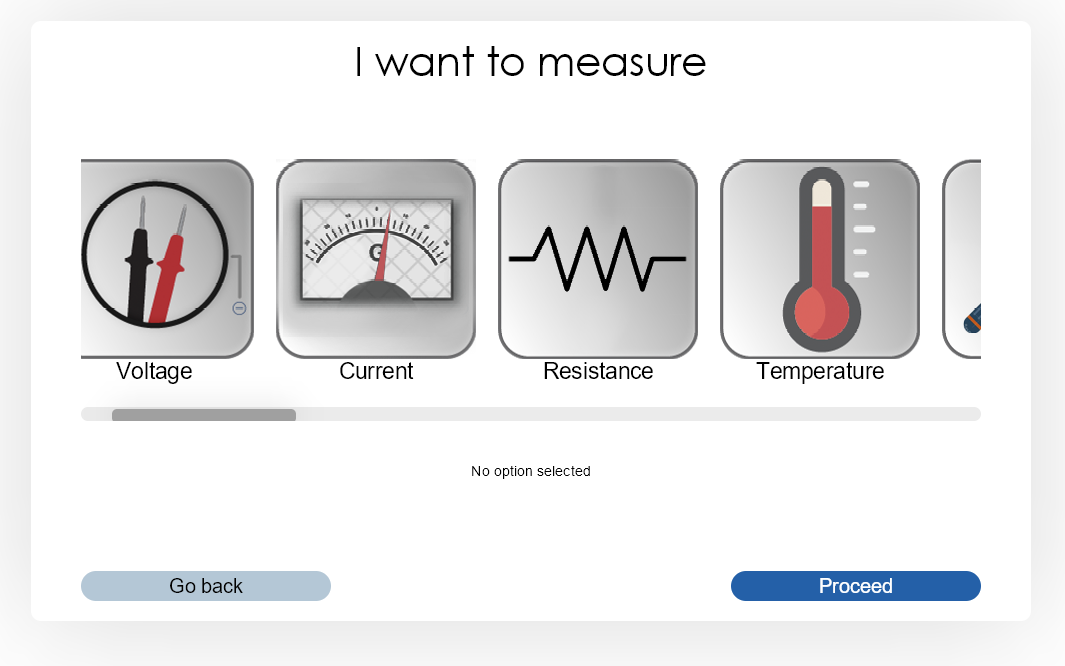
If you cannot see a value you want to measure and have connected the sensor to it, make sure that you have connected the sensor’s wire in the correct port. After that, try restarting the app.
- Once the value appears in the menu, click on it, and select the port in which you have connected the sensor.
- Select a value range that you want to measure:
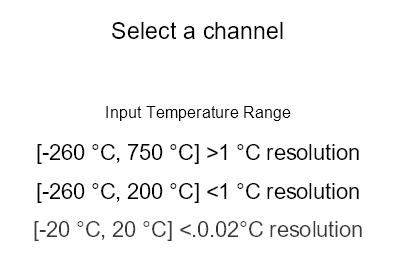
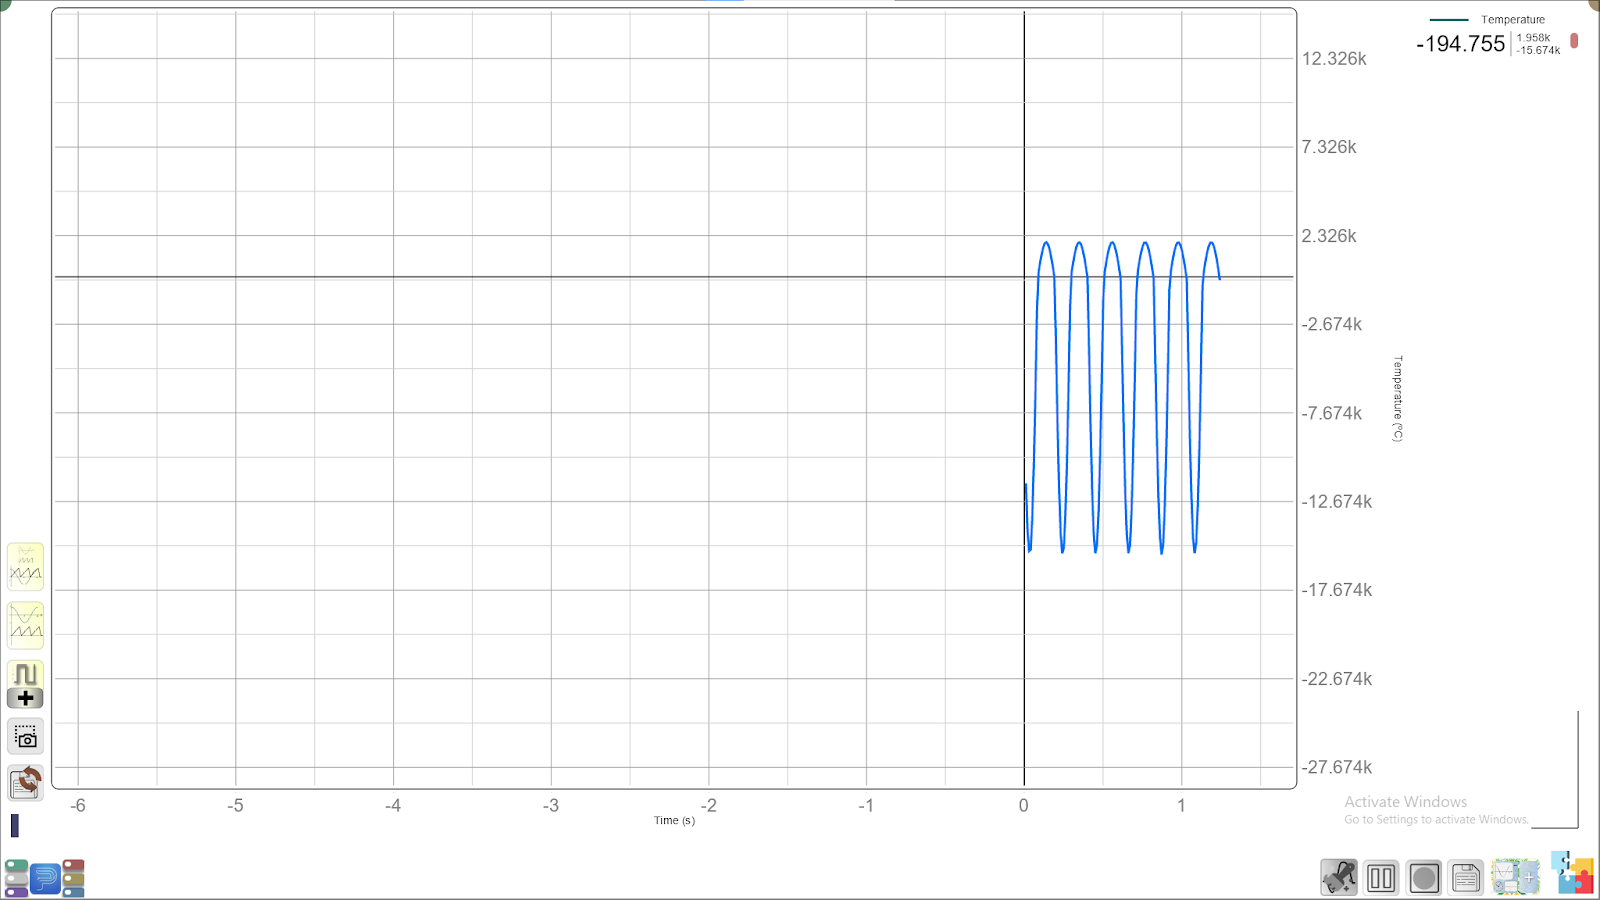
- Once you have selected the range, click on next and select “Make a Live Plot Now” to start observing the sensor’s reading:

After that, you should have the following screen layout:
Further Guidance:
To gain an in-depth understanding of the LivePlot and the supporting utilities, you can go through our LivePlot UI Guide