Session 1: “Journey into 3D Worlds”
Architect:
Syed Shayaan Haider - Markhor3D
Learning Objectives
In this session, the students will:
- Recognize and Identify Complex 3D Shapes: Understand and name 3D shapes such as pyramids, cylinders, and cones.
- Relate 3D Shapes to Everyday Objects: Connect geometric shapes to real-world items, enhancing spatial awareness.
- Identify Basic Shapes in Surrounding Objects: Analyze everyday items to determine the 3D shapes they consist of.
- Create and Label 3D Shape Compositions: Draw objects using combinations of 3D shapes and label them accordingly.
- Spark Interest in 3D Design: Build excitement for future sessions involving 3D modeling and printing.
Teaching Aids
Required Equipment:
- Visual Aids:
- 3D printed 3D geometric shapes. (STL LINK)
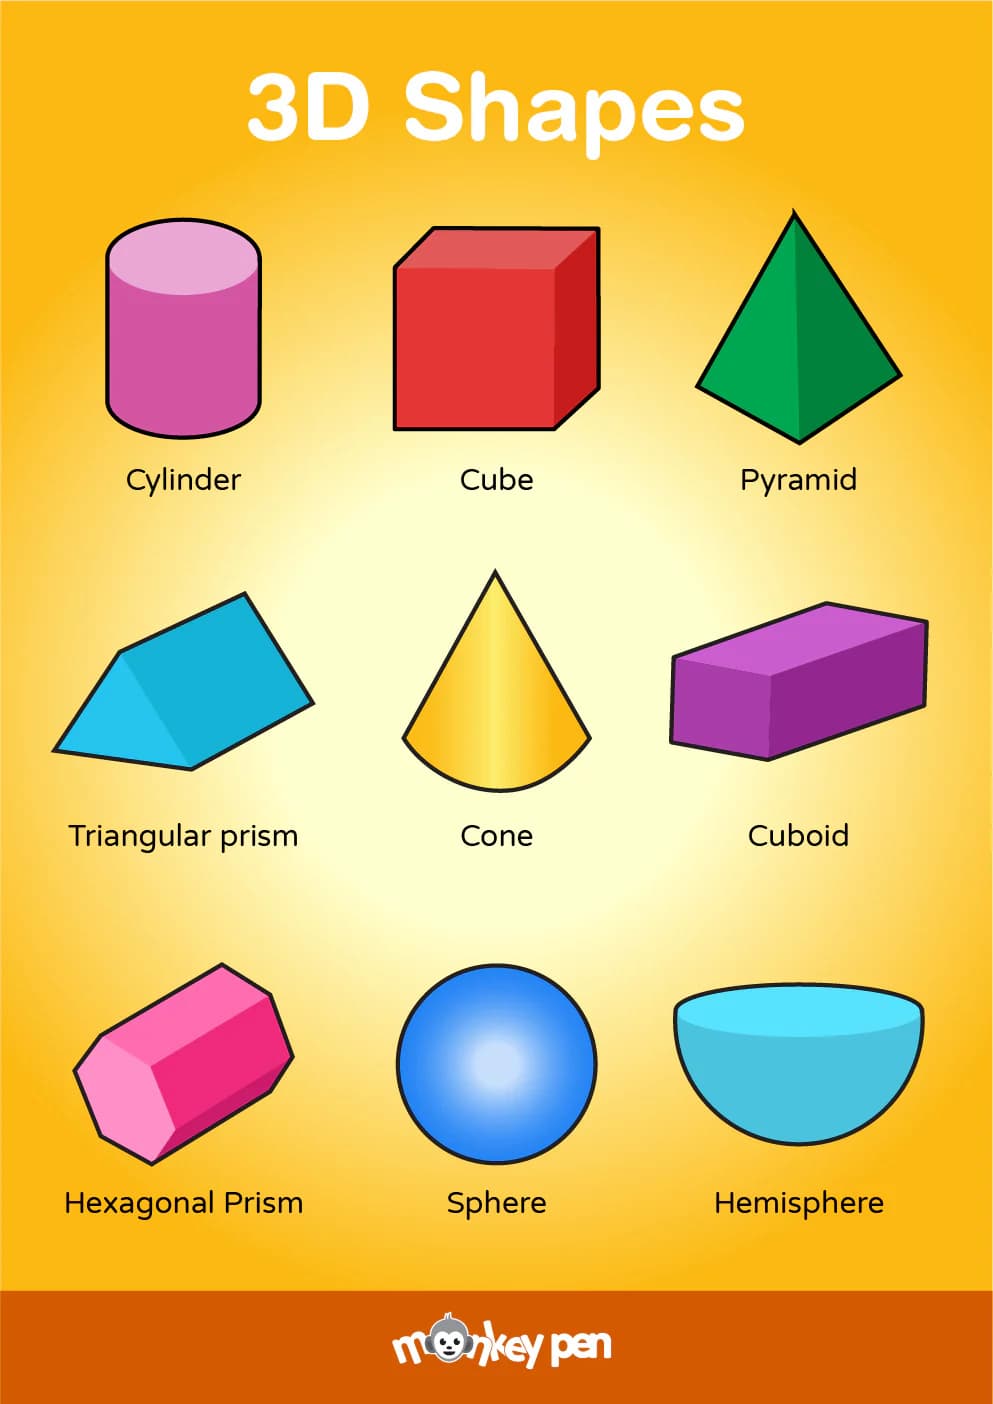
- Slides or posters showcasing 3D shapes (pyramids, cylinders, cones, cubes, spheres, rectangular prisms).
- Images of everyday objects resembling these shapes.
- Interactive Whiteboard or Projector:
- For displaying images and drawing shapes.
- Drawing Materials:
- Paper, pencils, erasers, and coloring materials.
- Worksheets:
- Shape identification sheets and drawing activities (optional).
- Whiteboard and Markers:
- For drawing and brainstorming sessions.
Structure and Lesson Plan (Total Time: 50 minutes)
1. Introduction to 3D Shapes (5 minutes)
Encouragement:
“Welcome, everyone! Today, we’re starting an exciting journey into the world of 3D shapes. Are you ready to explore?”
Action Steps:
-
Engage Students with a Question:
- Question: “Who can tell me what a 3D shape is?”
- Possible Student Response: “A shape that has length, width, and height.”
-
Introduce Basic 3D Shapes:
- Action: Display images of cubes, spheres, pyramids, cylinders, and cones.
- Question: “Can you name these shapes?”
Encouragement:
“Great start! Let’s see how these shapes are part of the world around us.”
2. Identifying Shapes in Surrounding Objects (10 minutes)
Action Steps:
-
Observation Activity:
- Prompt: “Look around the classroom and find objects that match these 3D shapes.”
Examples
-
Cone
- Ice Cream Cone: The classic treat we all love!
- Party Hat: Festive hats worn during celebrations.
- Traffic Cone: Used to direct traffic safely.
-
Cylinder
- Soup Can: The container that holds delicious soups.
- Pencil: A common writing tool.
- Candle: Provides light and a pleasant aroma.
- Drinking Glass: Holds beverages for us to enjoy.
-
Pyramid
- Tent: Often used for camping adventures.
- Pyramids in Egypt: Ancient and impressive structures.
- Sugar Cone: Similar to an ice cream cone but used for sugary treats.
-
Sphere
- Ball: Used in various sports and games.
- Globe: Represents our world with countries and oceans.
- Ornament: Decorative spherical items hung on trees.
-
Cube
- Dice: Used in many board games.
- Box: Holds and transports all sorts of items.
- Rubik’s Cube: A colorful puzzle toy.
-
Cuboid:
- Book: Holds stories and information.
- Cereal Box: Contains your favorite breakfast cereal.
- Shoebox: Keeps your shoes organized and tidy.
-
Group Discussion:
- Question: “What shape is the clock on the wall?”
- Possible Student Response: “It’s a circle or cylinder, depending on its depth.”
-
Interactive Participation:
- Action: Invite students to point out objects and identify their shapes.
- Encouragement: “Excellent observations! You’re finding shapes everywhere.”
3. Connecting Shapes to Everyday Objects (10 minutes)
Action Steps:
-
Present Real-Life Examples:
- Action: Show images of everyday objects and discuss the 3D shapes they resemble.
- Examples:
- Cone: Ice cream cone, party hat.
- Cylinder: Soup can, pencil.
- Pyramid: Tent, pyramids in Egypt.
-
Class Discussion:
- Question: “Can you think of other objects that look like a cone?”
- Possible Student Responses: “A traffic cone,” “A megaphone.”
-
Quick Matching Game:
- Action: Display an object image and ask students to identify its shape.
Encouragement:
“Fantastic! Now you’re seeing how shapes make up everything around us.”
4. Exploring the Properties of 3D Shapes (10 minutes)
Action Steps:
-
Discuss Shape Characteristics:
- Explanation: “Let’s talk about what makes each shape special.”
- Properties to Cover:
- Faces: Flat or curved surfaces.
- Edges: Where two faces meet.
- Vertices (Corners): Points where edges meet.
-
Interactive Whiteboard Activity:
- Action: Draw a 3D shape on the board and label its faces, edges, and vertices.
- Question: “How many faces does a cube have?”
-
Student Participation:
- Prompt: “Let’s count them together!”
Encouragement:
“You’re becoming shape experts!”
5. Creative Drawing and Combining Shapes (15 minutes)
Action Steps:
- Introduction to Combining Shapes:
- Visual Demonstration:
- Action: Show images or draw on the board how combining 3D shapes can create new objects.
- Example: Combining a cylinder and a cone to make a rocket.
- Example: Stacking cubes and prisms to build a skyscraper.
- Explanation: “By putting different shapes together, we can create all sorts of amazing things!”
- Action: Show images or draw on the board how combining 3D shapes can create new objects.
- Individual Creative Drawing Activity:
- Prompt: “Now, I want you to use your imagination to draw anything you like—a robot, a house, a car, or something entirely new! Think about how you can use different 3D shapes to create your drawing.”
- Action: Students individually draw their chosen object, combining at least two different 3D shapes.
- Labeling Shapes in Drawings:
- Action: After completing their drawings, students label the 3D shapes they’ve used.
- Guidance: “Circle or point to the shapes in your drawing and write the name of each shape next to it.”
- Pair Sharing and Discussion:
- Action: Students pair up with a classmate to share their drawings.
- Prompt: “Explain to your partner what you drew and which shapes you used to create it.”
- Class Sharing of Creations:
- Action: Invite several students to share their drawings with the class.
- Question: “Who would like to show us their drawing and tell us about the shapes they used?”
- Highlighting Creativity and Teamwork:
- Encouragement: “Look at how you’ve used shapes to create something unique! By combining different shapes, you’ve brought your ideas to life.”
Encouragement:
“Amazing work, everyone! See how combining shapes leads to endless possibilities. Your creativity shines through in your drawings!”
6. Sparking Ideas for Personal Designs (5 minutes)
Action Steps:
-
Brainstorming Session:
- Prompt: “Think about what you’d like to design in the future using these shapes. It could be anything—a dream house, a new toy, or a fantastical creature!”
-
Idea Sharing:
- Action: Allow students to share their ideas with the class.
- Possible Student Responses: “I want to design a spaceship,” “I would create a castle.”
Encouragement:
“Wonderful ideas! We’ll explore designing these in upcoming sessions using a special computer program.”
7. Conclusion and Preview of Next Session (5 minutes)
Action Steps:
-
Recap Key Learnings:
- Question: “What’s one new thing you learned today about 3D shapes?”
- Possible Student Responses: “A cone has one vertex,” “You can combine shapes to make new objects.”
-
Preview Next Session:
- Explain: “Next time, we’ll start using a computer program called TinkerCad to create our own 3D designs digitally!”
-
Optional Homework:
- Suggestion: “At home, look for objects that are made up of the 3D shapes we learned about. Draw or write about one and bring it to share with the class.”
Encouragement:
“Great job today! I can’t wait to see what you’ll create next.”
Glossary
I. 3D Shape: A solid figure with length, width, and height.
II. Pyramid: A shape with a polygon base and triangular sides that meet at a point.
III. Cylinder: A shape with two parallel circular bases connected by a curved surface.
IV. Cone: A shape with a circular base that tapers smoothly to a point.
V. Face: A flat or curved surface on a 3D shape.
VI. Edge: The line where two faces meet.
VII. Vertex (Vertices): The corner point where edges meet.
For suggestions, improvements, and corrections, feel free to reach out at shayaanhaider@gmail.com