Grade 6 - Session 4: Exploring Centripetal Force
Session Architect: Aleeza Ayaz - Markhor3D
Session Length: 50-60 minutes
Learning Objectives:
In this session, students will:
- Recall different types of forces and be introduced to centripetal force.
- Observe the relationship between speed and centripetal force through a hands-on experiment.
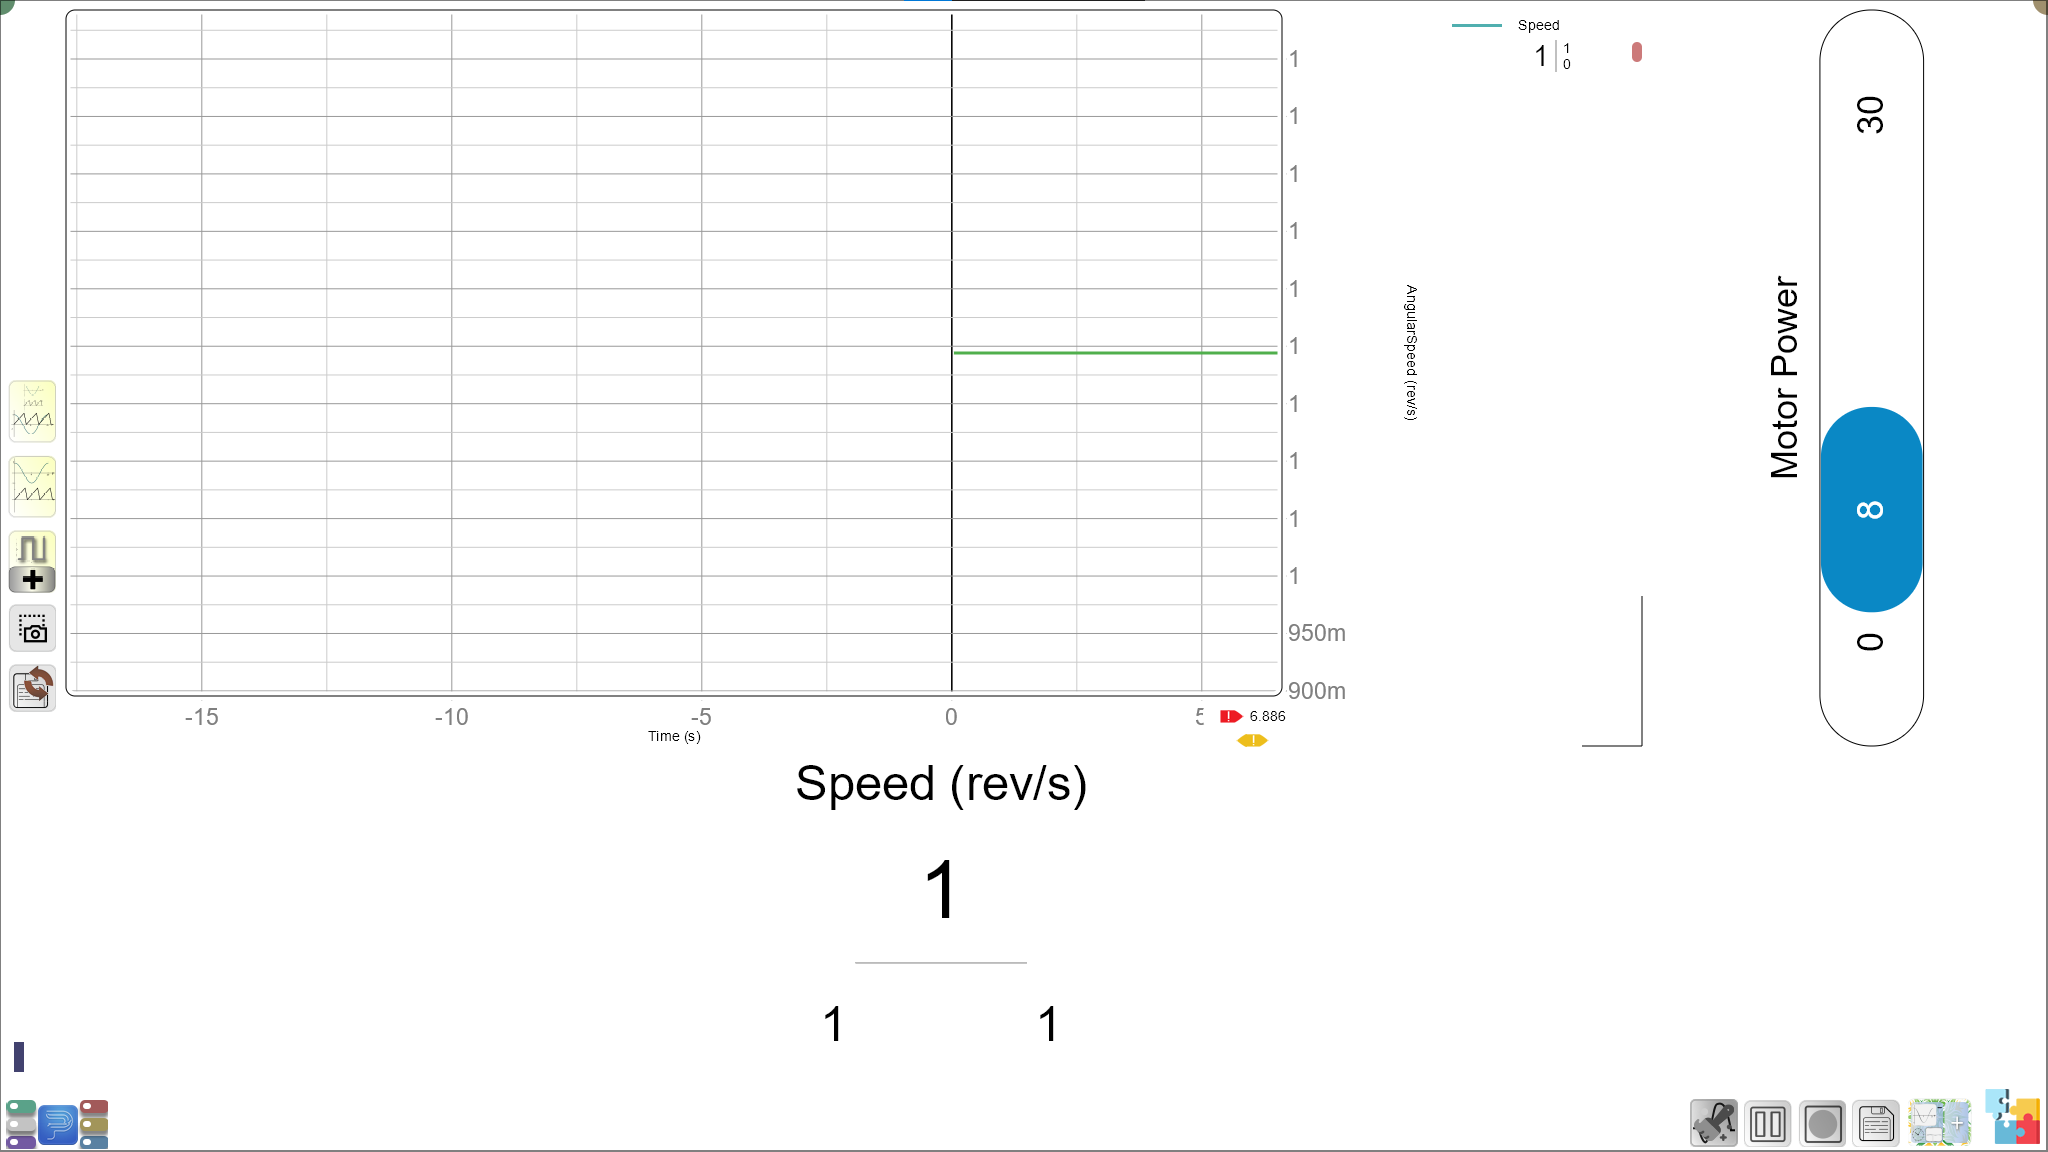
- Use MeasureLab to monitor the speed of a motor and control the spinning speed of an object on a circular plate.
- Vary the object’s radius from the center of rotation and find the maximum speed before it leaves the circular path.
- Learn about the role of centripetal force in keeping objects in circular motion.
- Identify independent, dependent, and controlled variables in the experiment.
- Plot a graph of maximum speed vs. radius and interpret their findings.
Teacher Resource:
Session File: ML64.plf (57.1 KB)
Equipment Required:
- PC/Laptop to display measurement and live plot
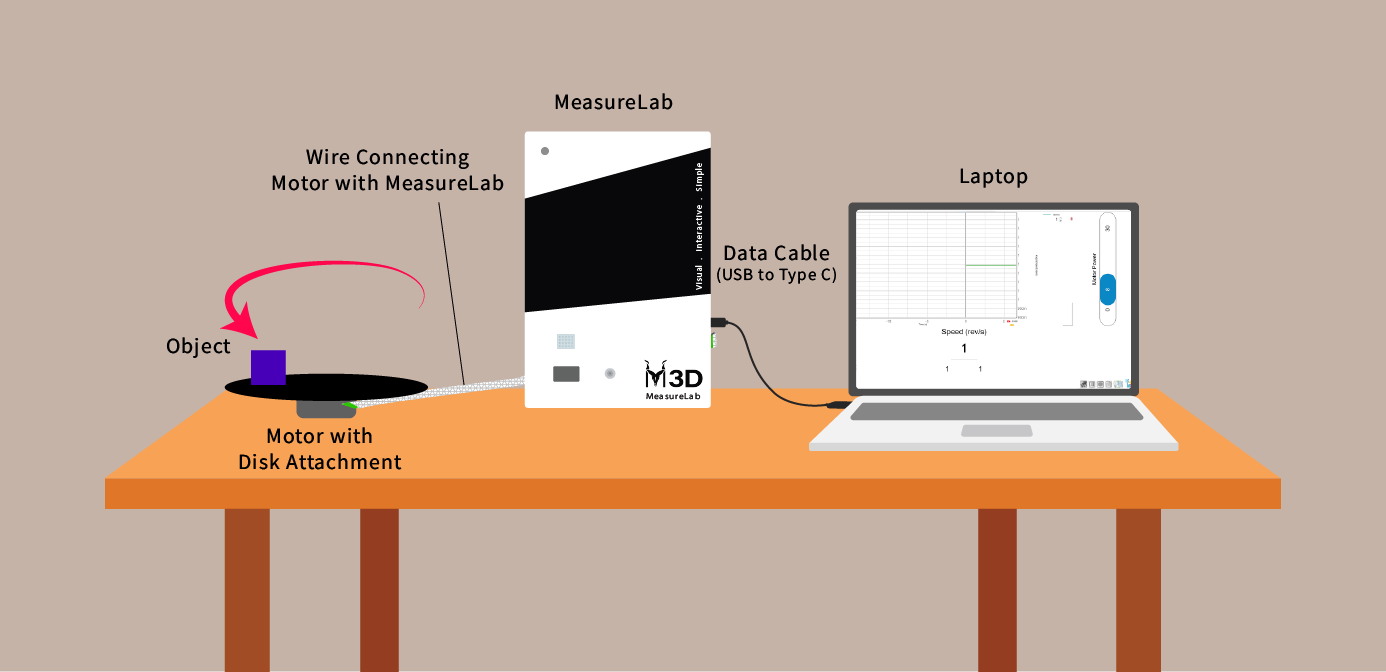
- MeasureLab with a motor to control and monitor the spinning speed
- Circular plate that attaches to the motor
- Small object(s) to place on the plate
- Photogate sensor (optional, if additional time measurements are needed)
- String or ruler to measure different radii for object placement
- Stopwatch for additional time measurements (optional)
- Worksheet for recording observations and plotting graphs
- Pens, pencils, and graph paper
Teaching Aids:
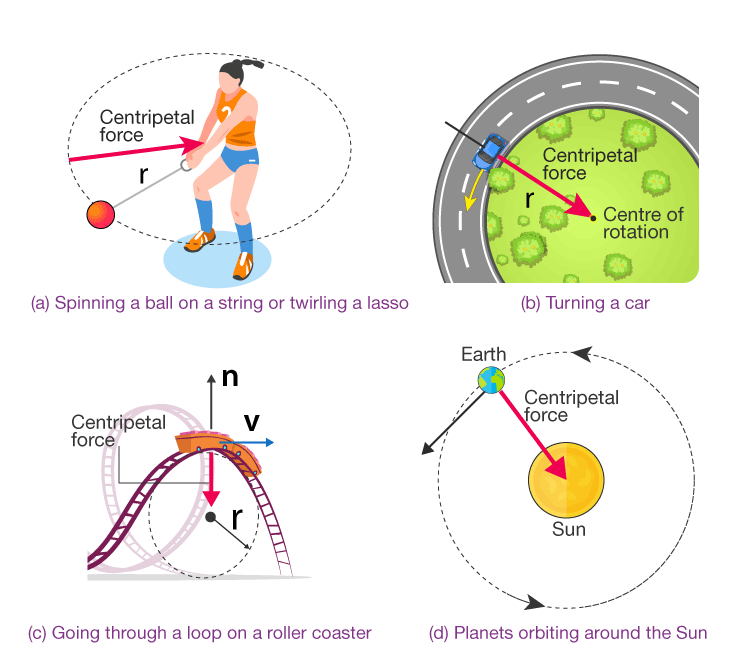
- Visual aids showing examples of centripetal force (e.g., cars turning, Earth orbiting the sun).
- Projector for live display of data and graphs (optional).
Preparation:
This step has to be done before the session on each workstation/apparatus by the teacher/session instructor:
- Make sure that each computer has Physlogger installed and can detect the Measrelab when connected to it using the provided cable.
- Each Measurelab should have access to a power outlet for sensors that require external power. For this session, Motor Attachment will be used which require an external power source. The motor has to be connected in the following dedicated port:
- Launch the Physlogger application and load the session file provided in the resources section.

Your setup will look something like this:
Introduction and Hands-On Exploration: (35 minutes)
Recalling Different Types of Forces:
- You may start by asking:
“Can anyone name some types of forces we’ve already learned about? What does force do?”
- Allow students to recall examples such as push, pull, gravity, or friction.
Guiding the Conversation:
“Great! Today, we’re going to talk about a special kind of force called centripetal force. Have you ever felt like you’re being pushed to the side when you’re sitting in a car that’s turning quickly?”
Connecting to Everyday Experiences:
- You may ask:
“When you’re in a car and it turns, what do you feel? Do you move in the same direction as the car or do you get pushed to the side?”
- Show visual aids, like images of cars turning or people on amusement park rides, to relate their responses to feeling “pushed” when moving in a circular path.
Explaining Centripetal Force:
“That ‘push’ is due to centripetal force—it keeps you moving in a circle. Without it, you’d fly off in a straight line, like an object leaving a roundabout. We’re going to experiment with this today.”
Demonstrating Centripetal Force:
- Start a demonstration: Place a small object on a circular plate attached to a motor and slowly increase the motor’s speed. Ask students:
“What do you think will happen if I keep increasing the speed?”
- As the speed increases, the object will fly off in a straight line, tangent to the circular path.
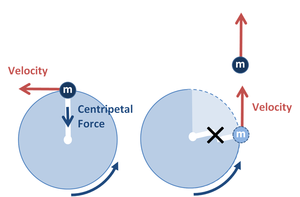
- Follow-up question: “Why do you think the object flew off in a straight line? What changed?”
Guiding the Explanation:
“The object moved in a straight line because it no longer had a force keeping it in a circle. While it was on the plate, centripetal force acted on it, keeping it in circular motion. When that force stopped, the object followed a straight path because of inertia.”
Setting Up the Experiment with MeasureLab:
Explanation:
“Now, we’ll use MeasureLab to spin the plate at different speeds and measure how fast we can go before the object flies off. We’ll adjust the radius by placing the object at different distances from the center of the plate.”
Steps:
-
Attach the circular plate to the motor, place the object on the plate, and set MeasureLab to control and monitor the speed.
-
Place the object at a specific radius from the center. Slowly increase the motor speed and note the speed at which the object leaves the plate.
-
Record the maximum speed at which the object could remain on the plate. Repeat this for different radii.
Observing and Recording Data:
- Varying the Radius:
- You may ask:
“What do you think will happen if we place the object closer or farther from the center? Will it stay on the plate longer or fly off sooner?”
-
Record the maximum speed for each radius in the table below.
Radius from Center (cm) Maximum Speed (rpm)
Guided Activity and Follow-Up Questions:
- Plotting a Graph of Maximum Speed vs. Radius:
You may explain:
“Let’s plot a graph to see the relationship between the radius and the maximum speed. What does the graph look like? Do you see any patterns?”
- Interpreting the Graph:
You may ask:
“If the graph is a straight line, what does that mean? If it curves, what does that tell us about speed and radius?”
- Introduce concepts of proportionality.
- Additional Reflection Questions:
- “Why did the object fly off at a tangent when it could no longer stay on the plate?”
- “What force was keeping the object moving in a circle? How did changing the radius affect this force?”
- “What real-life situations can you think of where we feel centripetal force, like in a roundabout or a car turn?”
Sharing Observations:
Encourage students to share findings with the class, discussing patterns and insights from the graph.
Summary and Wrap-Up: (5-10 minutes)
Summarizing Centripetal Force:
“Today, we observed how centripetal force helps objects move in circles. When that force is no longer applied, objects follow a straight path, as we saw when the object flew off the plate.”
Real-Life Connection:
“Next time you’re in a turning car or on a roundabout, remember that centripetal force is what keeps you moving in a circle!”
Reflection Questions:
- “What would happen if we could increase the radius to a much larger distance? How would that impact the speed?”
- “If you were designing a ride or roundabout, how would you think about centripetal force and speed?”
- “How does understanding this force help us in real-world situations?”
Glossary:
- Centripetal Force: The force that keeps an object moving in a circular path.
- Radius: The distance from the center of a circle to the edge.
- Photogate Sensor: A device that measures the time an object takes to pass through a gate.
- Speed: How fast something is moving, calculated as distance traveled over time.
- Revolution: One complete turn around a circular path.