Session 4: Shape Tracing with Robots
Session Architect: Muhammad Bilal
Session Length: 40-50 minutes
Equipment Required:
- M3D Robotics kit with pen attachment.
- Laptops with interactive gamepad pre-loaded.
- Paper and pencils for students to trace shapes.
- Everyday objects of basic shapes: ball (circle), duster (triangle), rubik’s cube (square), sandwich (triangle), etc.
- Markers or other items for tracing shapes.
Learning Objectives:
- Develop an understanding of basic 2D shapes and how to draw them.
- Use the robot to trace shapes and observe how movement affects accuracy.
- Compare hand-drawn shapes to robot-drawn shapes, discussing challenges in precision and control.
Resources:
Scratch Code File:
Grade 1 Session 4.sb3 (3.5 MB)
1. Introduction to Shapes (10 minutes)
Activity:
Introduce shapes by relating them to objects the students are familiar with in their everyday life.
Instructions:
You might say:
“Today, we’re going to look at some shapes we see every day! Have you ever noticed that the ball you play with is round like a circle, or that the sandwich you eat is shaped like a triangle?”
- Hold up different objects, like a ball, sandwich, and Rubik’s cube, and ask:
“What shape do you think this is? Is the ball round? How many sides do you think a sandwich has?”
- Pass the objects around for students to explore and guess:
“Here, take a look at these. Do you think this Rubik’s cube is a square? Let’s count how many sides it has.”
- Encourage them to think about other shapes they’ve seen around the classroom or at home:
“What about the clock on the wall? Is it shaped like a circle too?”
- Start a discussion with them about the basic shapes they see everyday. Encourage each student to participate.
Teacher’s Role:
- Encourage the students to interact with the objects and think about the shapes they see daily. Ask questions like:
“Do you think you can find more circles or squares in the room? What about things at home—are there shapes in your toys or in your food?”
- Help them recognize the shapes in a fun, conversational way while reinforcing the concept of sides, corners, and round edges.
2. Hand-Drawn Shapes Practice (10 minutes)
Activity:
Students will trace the shapes of the objects by hand on a piece of paper. This helps them understand how shapes are formed and how their hand movements create each shape.
Instructions:
-
After exploring the objects, give students paper and pencils and ask them to trace the shapes by hand.
-
You may guide them by saying:
“Now that we know what the shapes look like, let’s try drawing them ourselves! Trace the shape of the ball, or draw a triangle like the sandwich.”
- Encourage them to notice how their hands move when drawing different shapes.
Teacher’s Role:
- Walk around the room, observing and guiding students as they trace shapes. Reinforce key features of the shapes (e.g., “A triangle has 3 sides and 3 corners”).
3. Moving the Robot to Draw Shapes (15 minutes)
Activity:
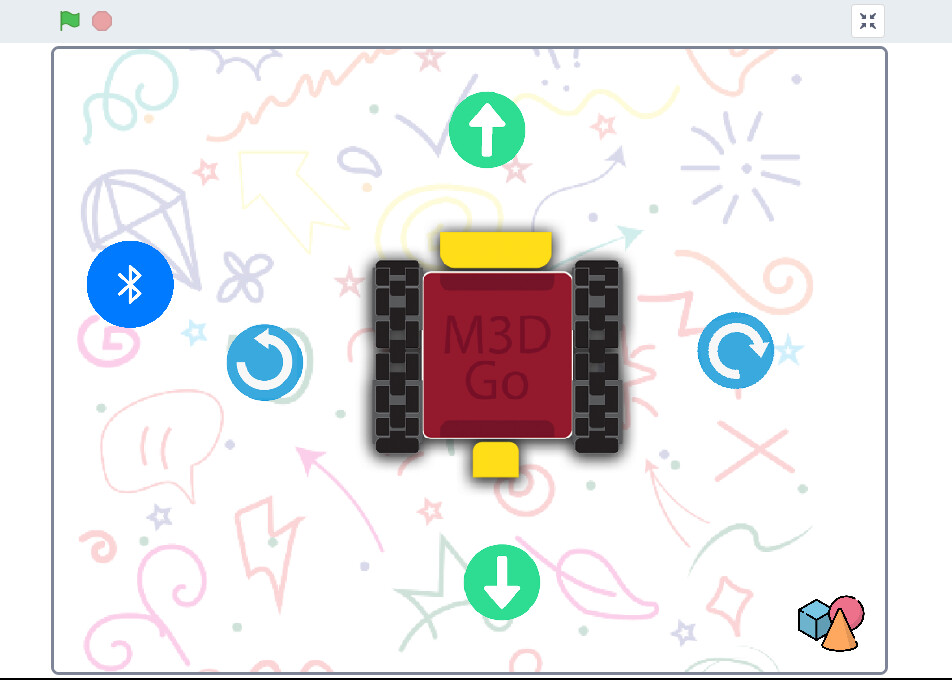
Now, students will attach the pen to their robot and use the gamepad or arrow keys to move the robot over the shapes they drew by hand. They will compare how accurately the robot follows the shape.
Instructions:
You can say:
“Next, we’ll use the robot to trace the same shapes! Attach the pen to your robot and use the arrow keys or gamepad to move it along the lines.”
-
Open the scratch file on their laptops and use the full screen button on the gamepad
-
Guide the students in attaching the pen to their robot using the pen holder attachment. Then, let them move the robot over their hand-drawn shapes, tracing them as accurately as possible.
-
Encourage students to notice how the robot moves and how slight inaccuracies affect the shape.
Teacher’s Role:
- Help students attach the pen and guide them in controlling the robot with either the gamepad or arrow keys.
- Encourage them to compare the robot’s movement with how they drew the shapes by hand.
4. Analyzing Differences in Shape Accuracy (10 minutes)
Activity:
Students will compare the shapes they drew by hand with the shapes the robot traced. They will analyze where the mistakes occurred and why the robot’s movement was different from their hand-drawn shapes.
Instructions:
- Ask students to place their robot-traced shapes next to the hand-drawn ones and compare:
“Look closely at both your hand-drawn and robot-drawn shapes. Did the robot trace the shapes exactly? Where are the differences?”
- Encourage them to reflect on how precise or imprecise the robot’s movements were and how they can improve it:
“Did the robot make sharper turns, or did it miss some corners? How do you think you could control the robot to make the shape more accurate?”
Teacher’s Role:
- Facilitate the comparison and analysis, helping students identify why some shapes may have turned out differently.
- Ask questions to help them understand the importance of precision in controlling the robot.
5. Conclusion and Wrap-Up (5 minutes)
Activity:
Summarize the session by discussing what students learned about shapes and controlling the robot to trace them.
Wrap-Up Summary:
You can say:
“Great job today! You all learned how to draw shapes by hand and with the robot. We saw how important it is to move carefully and control the robot to make accurate shapes. Next time, we’ll continue exploring how to control the robot even better!”
- Encourage students to reflect on the activity:
“What was the most fun shape to trace? Was it harder to control the robot than to draw by hand?”
Teacher’s Role:
- Celebrate the students’ effort and progress, reinforcing what they learned about shapes and robot movement.
Learning Outcome:
By the end of the session, students will have developed a better understanding of basic shapes and how to trace them both by hand and using the robot. They will also gain insight into how precise movements affect drawing accuracy.