Advanced Controls: Making fine adjustments in Bed Levelling
This is an Advanced Guide designed only for users to want to manually calibrate their bed levelling. For most users, it is recommended to use built-in Automatic Bed Levelling of the D8500.
If you have already used the build-in Automatic Bed Levelling and you still feel the need to fine tune it, you can do so using the D8500’s Web Utility.
To do so, simply connect your computer/laptop to the printer and go the web utility by typing http://m3d-enabler.local/ in the URL bar.
Once there, you should see the following screen:
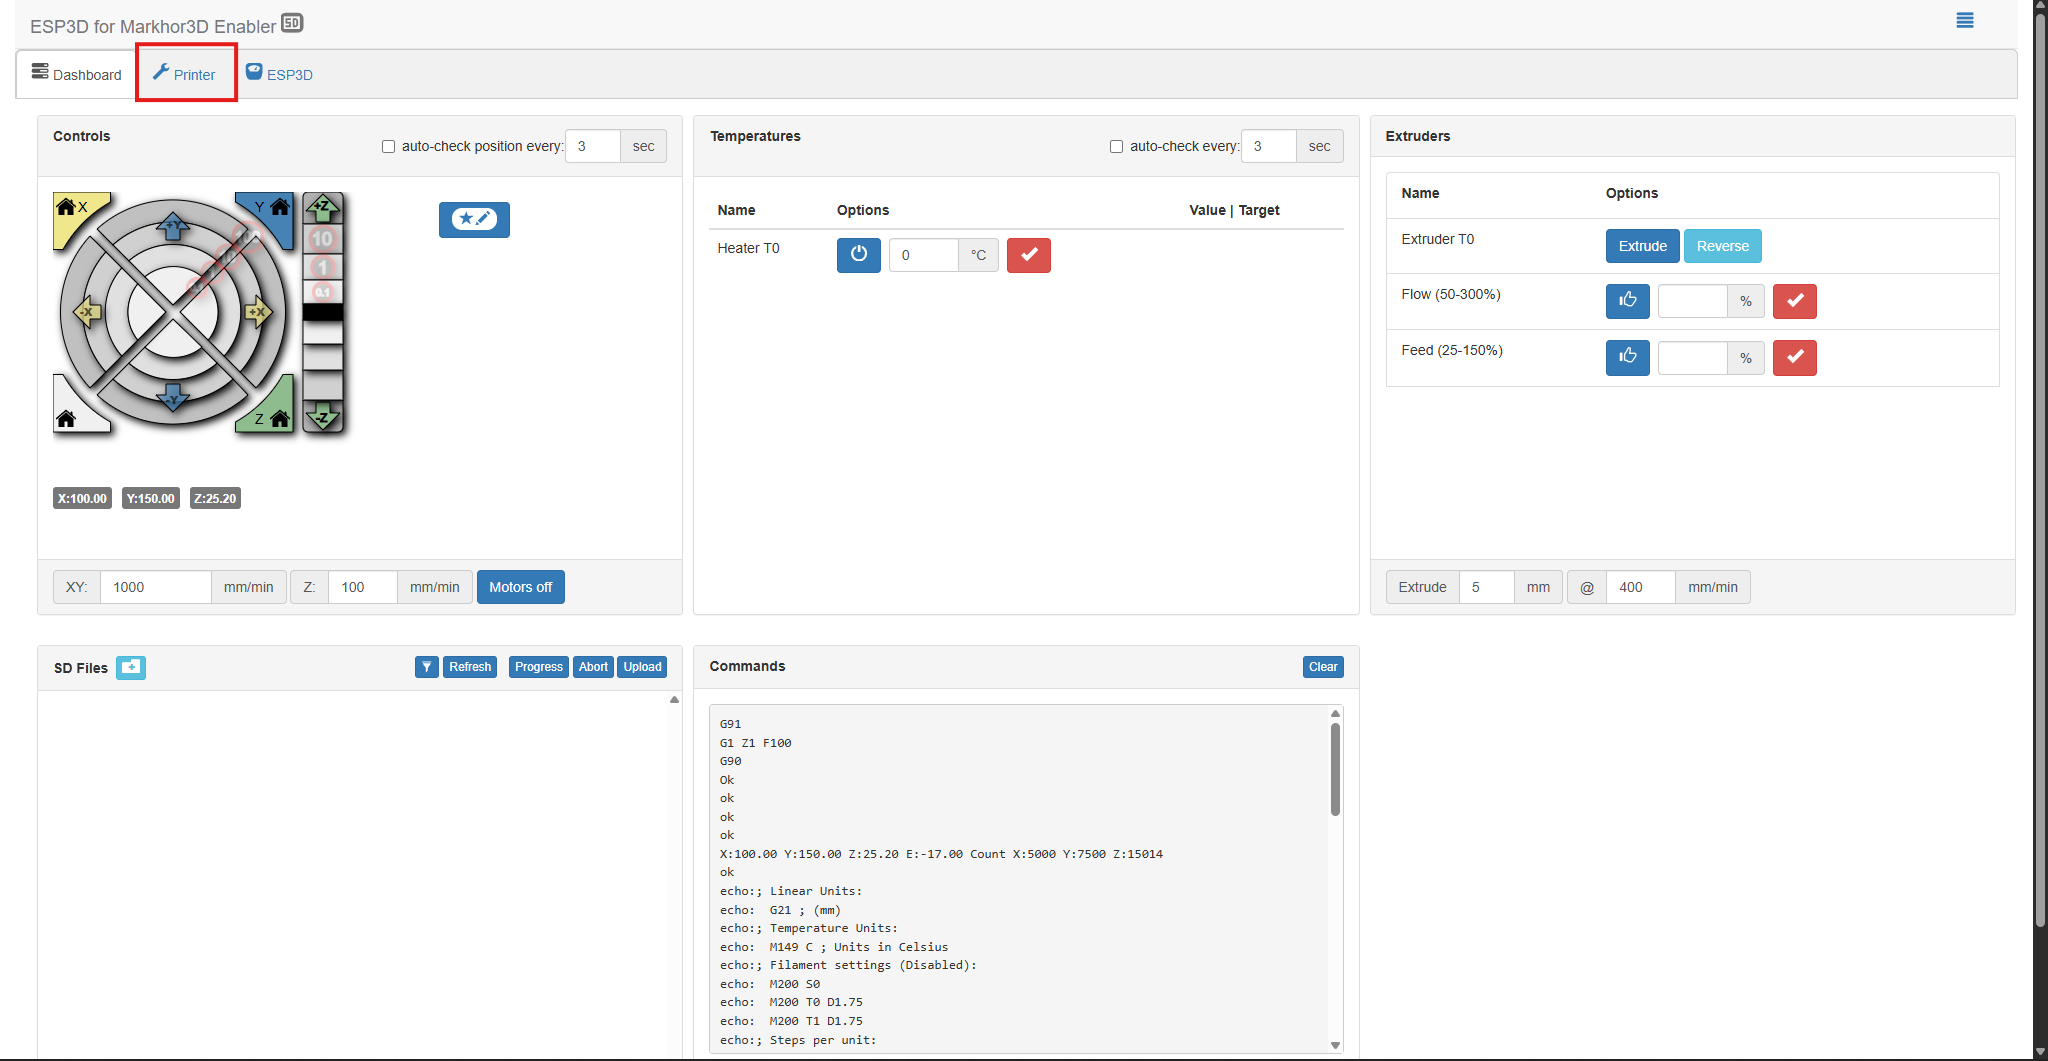
Navigate to printer’s calibration section by clicking on the tab named “Printer”
Once there, scroll down and click on the refresh button right below the “Printer Configuration” section:

Once clicked, your printer should refresh and start displaying a long list of values labelled with different section name.
Scroll down till you reach the section named “#; Auto Bed Leveling:”.
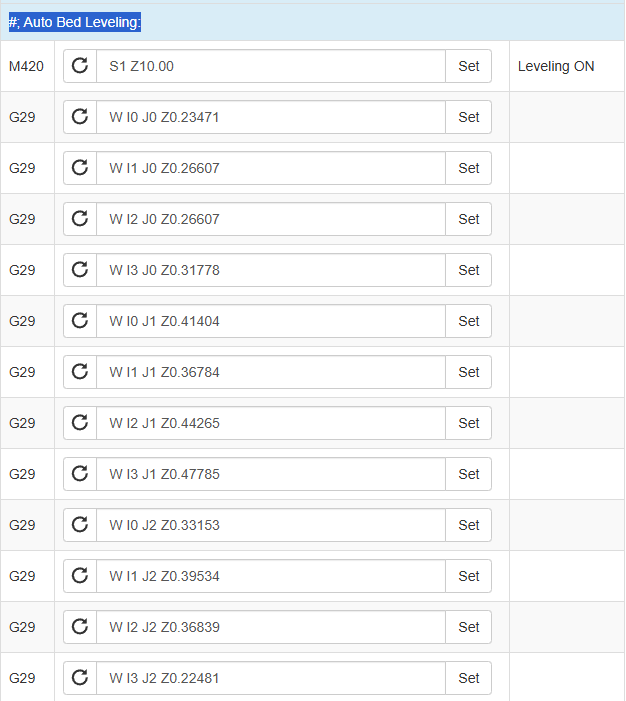
This table displays the values of the bed levelling sensor the printer is currently operating on. To understand this table, follow the figure below:
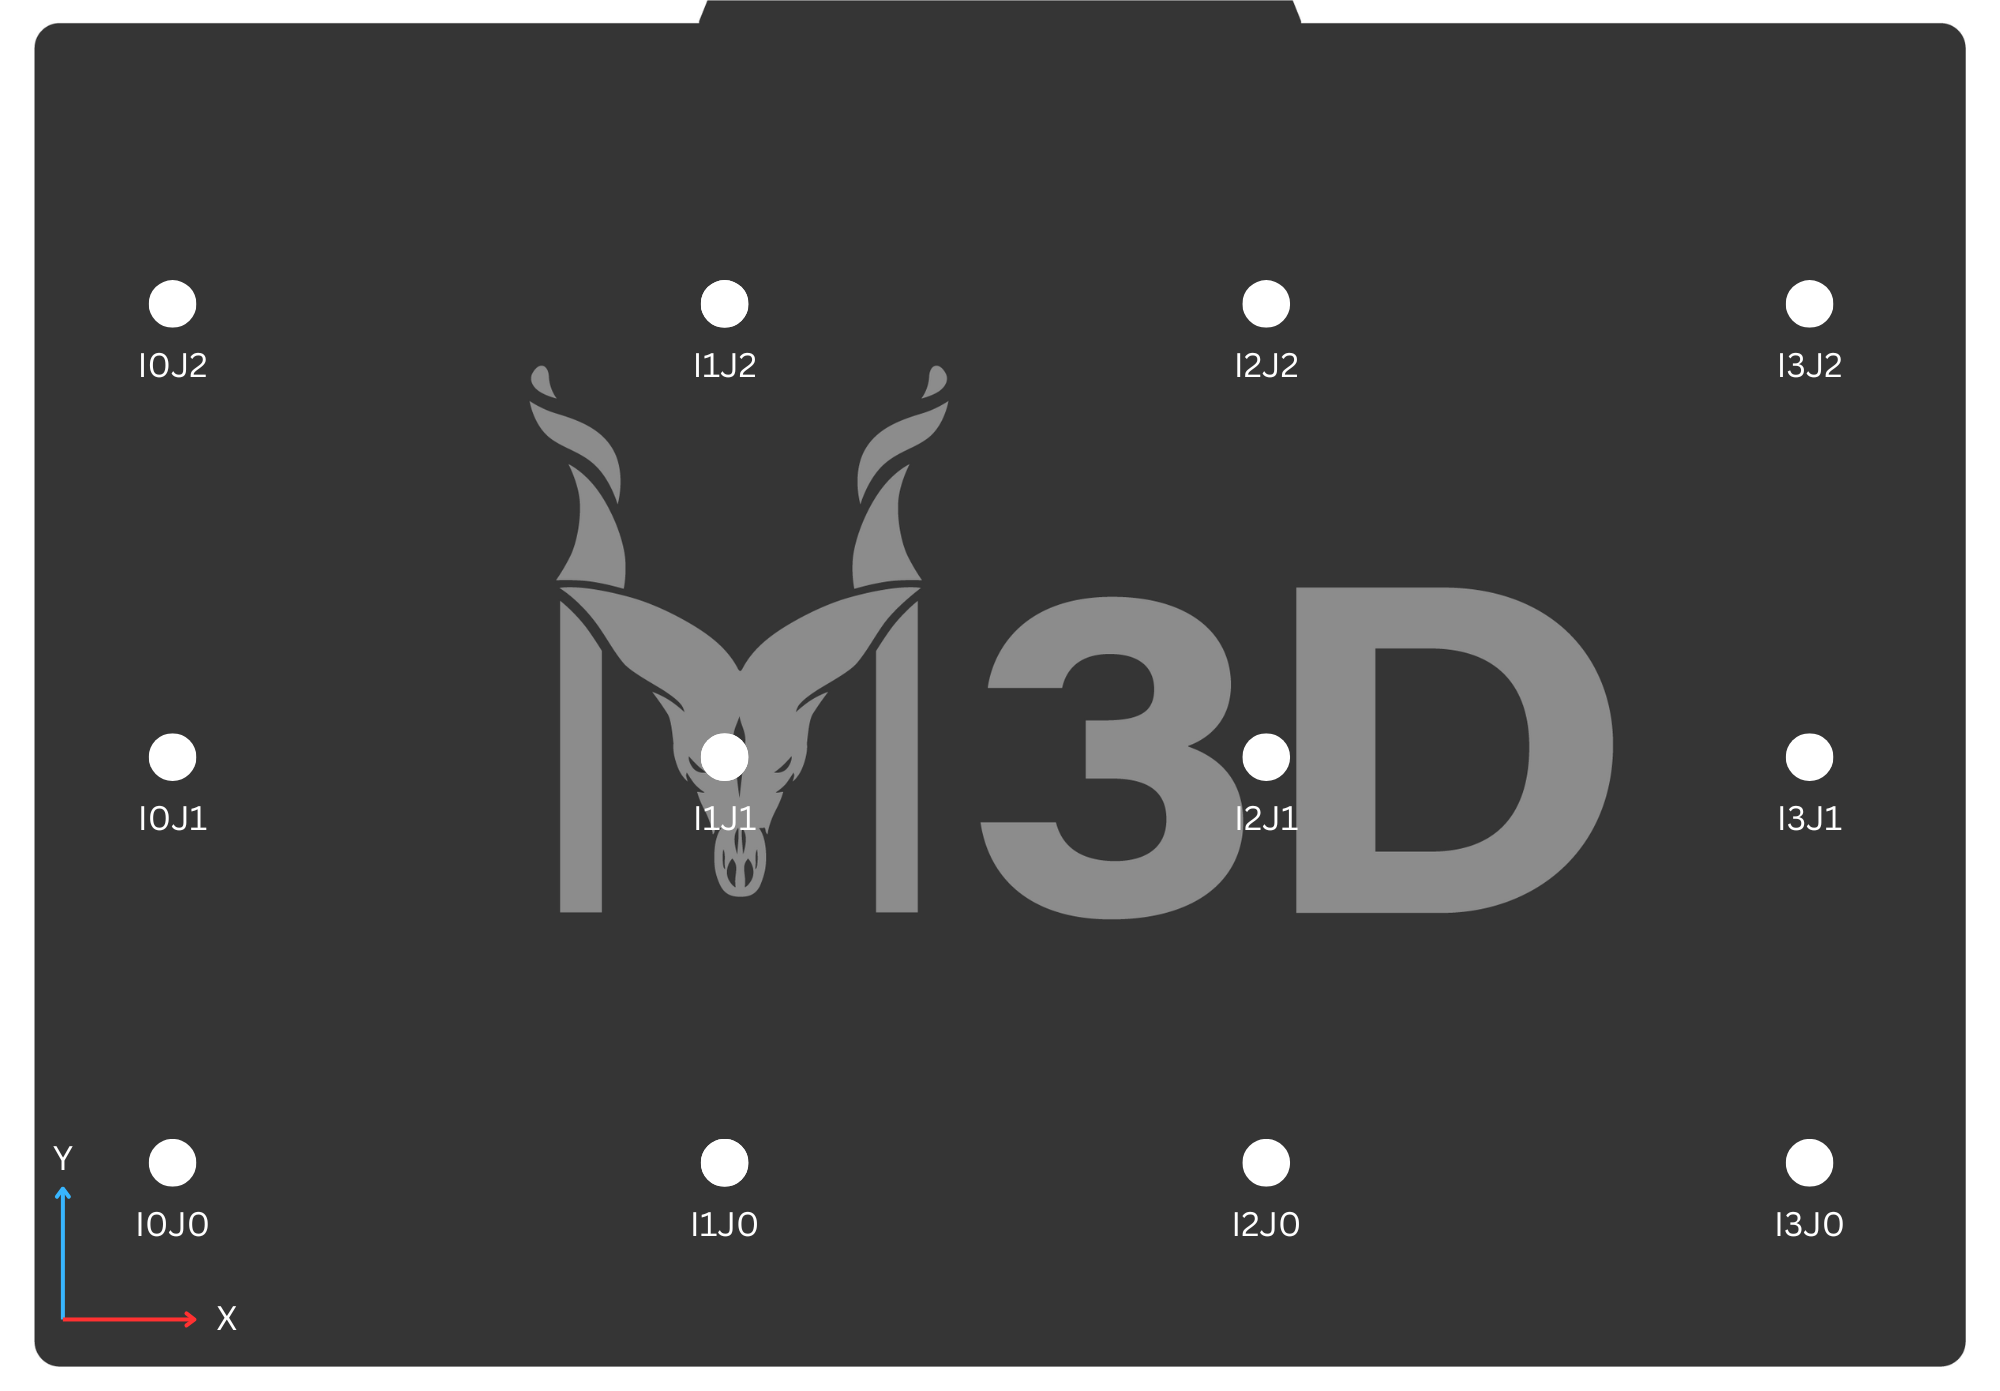
In this figure:
-
Each point in the figure represents the positions of the nozzle where the printer performs the automatic bed levelling. You must have seen a similar layout on your printer’s screen as well while it completes the bed levelling process.
-
As the printer levels the bed at 12 different points, the sensor stores the value of each point along with it’s coordinates.

For example: The bed levelling value for, say I2J0, will be in the tabled with the label W I2 J0 Z0.26607. This number after Z is the value from the bed levelling sensor.
If you feel the need to adjust this bed levelling value for any point on the bed, you can do so by incrementing it by 0.1 if you feel the nozzle is too close to the bed. Or you can decrease it by 0.1 if you feel the nozzle is too high from the bed.
For Exmaple: For our previous value Z0.26607, if you want to lower the nozzle at that point, you can change it to Z0.16607 or if you want to slightly lift it, you can change the value to Z0.36607.
Once you have adjusted the desired value, simply click the set button next to it and the printer will update it’s settings automatically.

.
.
.
![]()