This guide is designed for users of the M3D Enabler D8500 Lite/Pro. In this tutorial, we will learn how to manually adjust (increase or decrease) the power delivered to your printer’s X and Y axis motors.
1. Why adjust motor power?
Before you continue, please note that all the printers are factory tuned carefully. These settings work for most printers under most use cases. You don’t actually need to follow this tutorial unless you are solving a problem or are trying to experiment with your printer.
There are three primary reasons you might want to perform this tweak:
1.1: Increasing Print and Travel Speed: Increasing the power level directlly affects how fast your printer can go is very helpful for longer prints or less complex models e.g. vase mode printing.
1.2 Motor Hum Reduction:
You want to reduce the operating sound of your printer’s motors at the expense of reduced speed.
1.3 Performance Experimentation:
You want to experiment with higher torque/power from the motors.
1.4: Fixing Layer Shifts:
You are experiencing layer shifts during printing in either the X or Y axis.
Understandinging Layer Shifts
If you are facing the first problem—your prints are showing a “staircase” effect or shifting mid-print—it is important to understand why this happens.
Layer shifting is a normal occurrence when the physical print gets in the way of the nozzle. Because the printe doesn’t actually “see” the model), if the nozzle bumps into a curled edge or an overhang, the motor may skip a few millimeters. This physical resistance causes the coordinates to de-sync, resulting in a shifted layer.
Preliminary Fixes
Before opening up your printer to adjust motor power, try these non-invasive fixes:
- Reduce Print Speed: You can lower the speed within Orca Slicer or directly on the printer’s Control pad during a live print. Slower speeds allow the hot nozzle to melt through minor obstructions rather than abruptly bumping into them.
- Check Model Geometry: Ensure your model doesn’t have extreme, unsupported overhangs that might curl upwards and catch the nozzle.
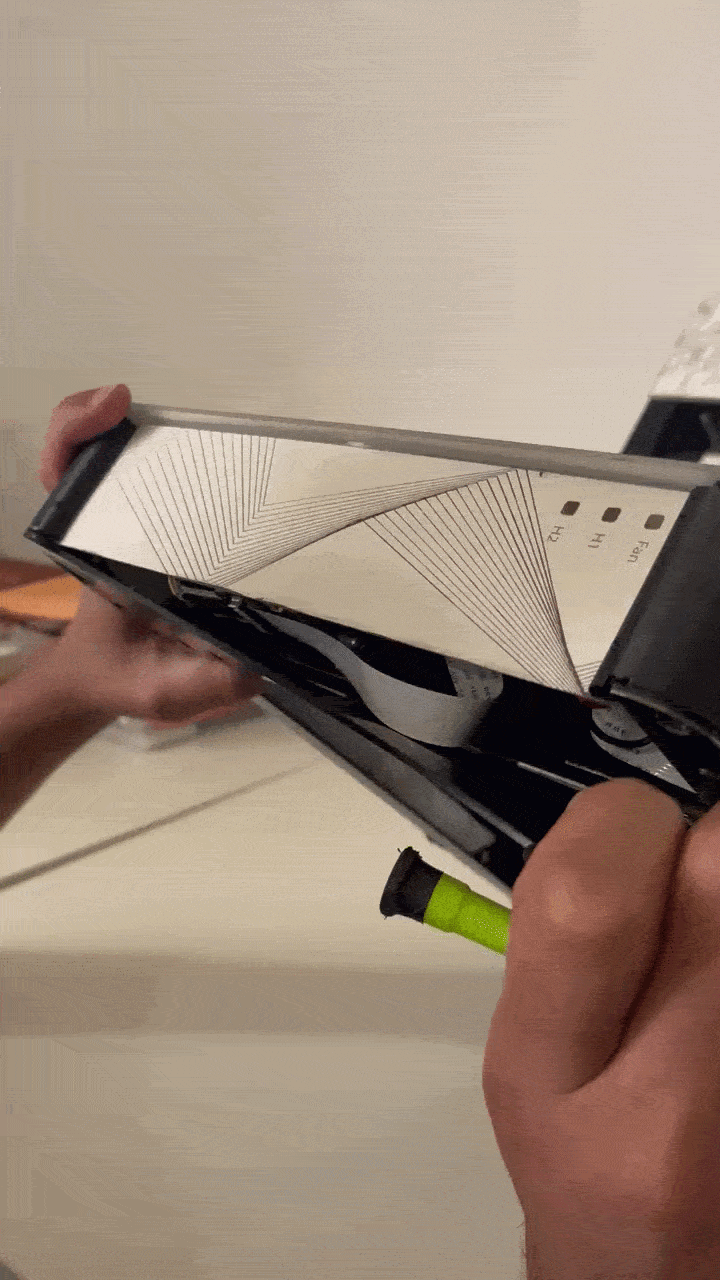
2. Opening your printer:
If the fixes above do not resolve the issue, or if you simply wish to change with the power limits, follow these steps to adjust the motor drivers.
Before you continue, make sure the printer has been turned off and plugged out. Do not perform the following steps while the printer is on.
Step 1: Accessing the Internal Circuitry
To begin, you will need to open the lower panel of your printer.
Safety First: Lift the printer and place it securely on your workbench. Ensure it is stable and cannot slide or slip while you are working.
- Insert a screwdriver in the left or right lower corner in the front panel.
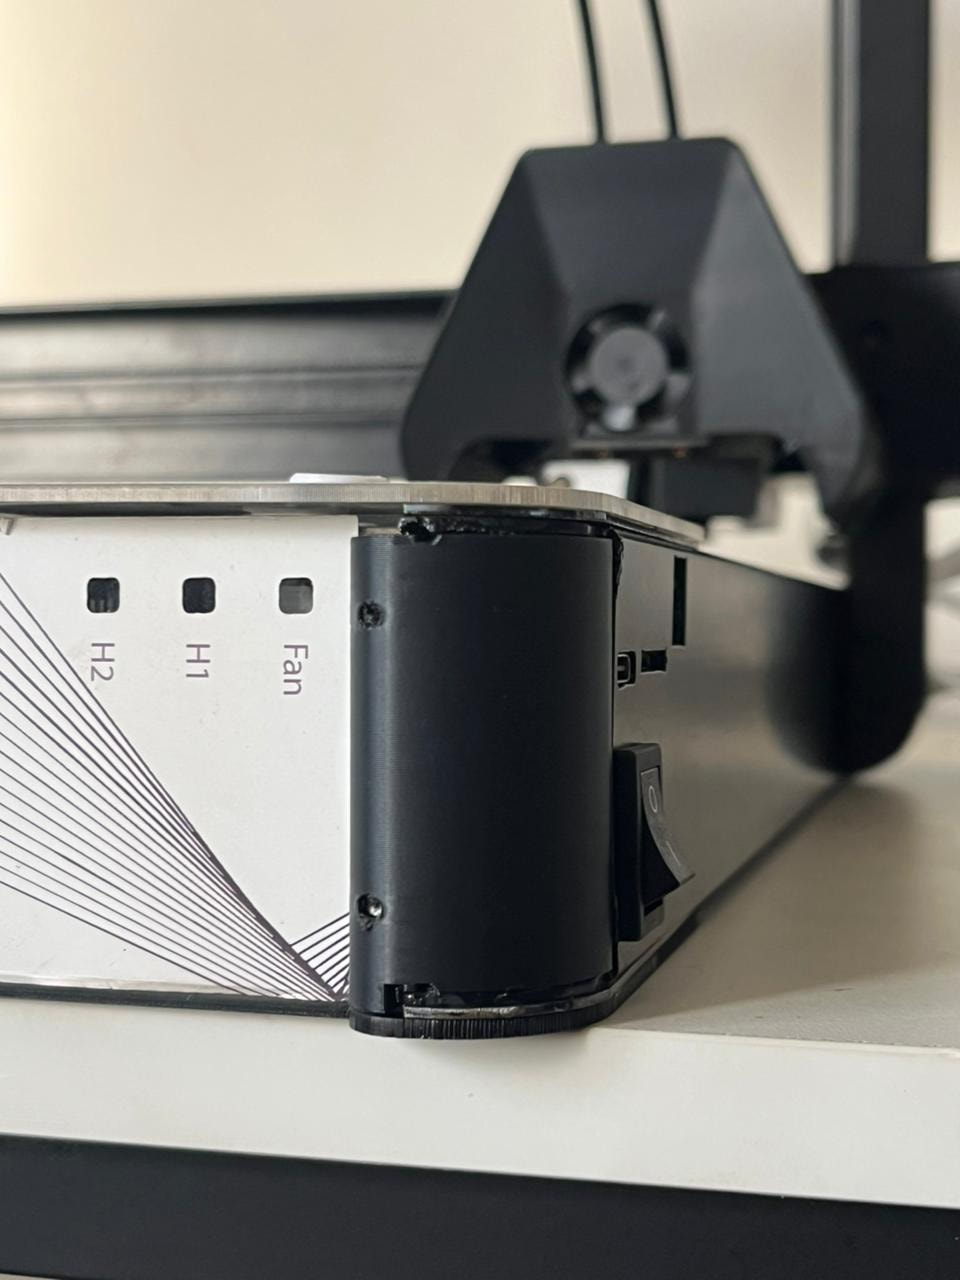
- Slowly and gently separate the panel from the main body as shown in the video below.
Note on Adhesives: The panel is attached only via adhesives. Any abrupt force or sudden jerk may break the panel. Apply even, slow pressure until it begins to separate from the body.
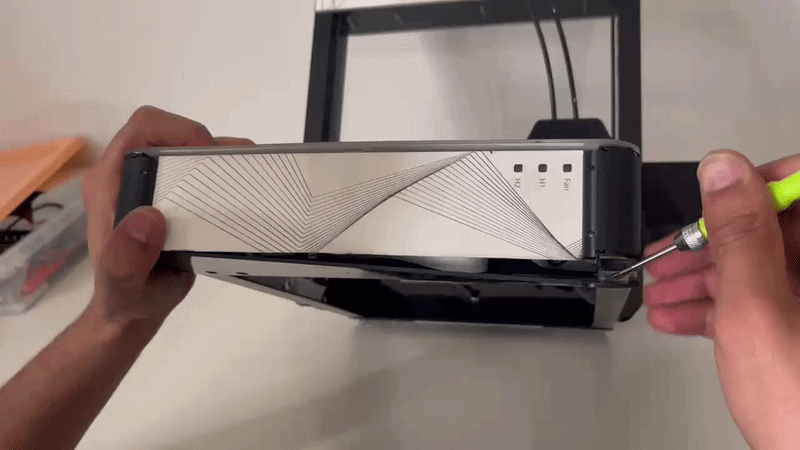
Once it is slightly separaeted, you can use your hands to evenly apply force and separate it from the body.
Step 2: Locating the Motor Drivers
Once the panel is removed, you will see the main control board.
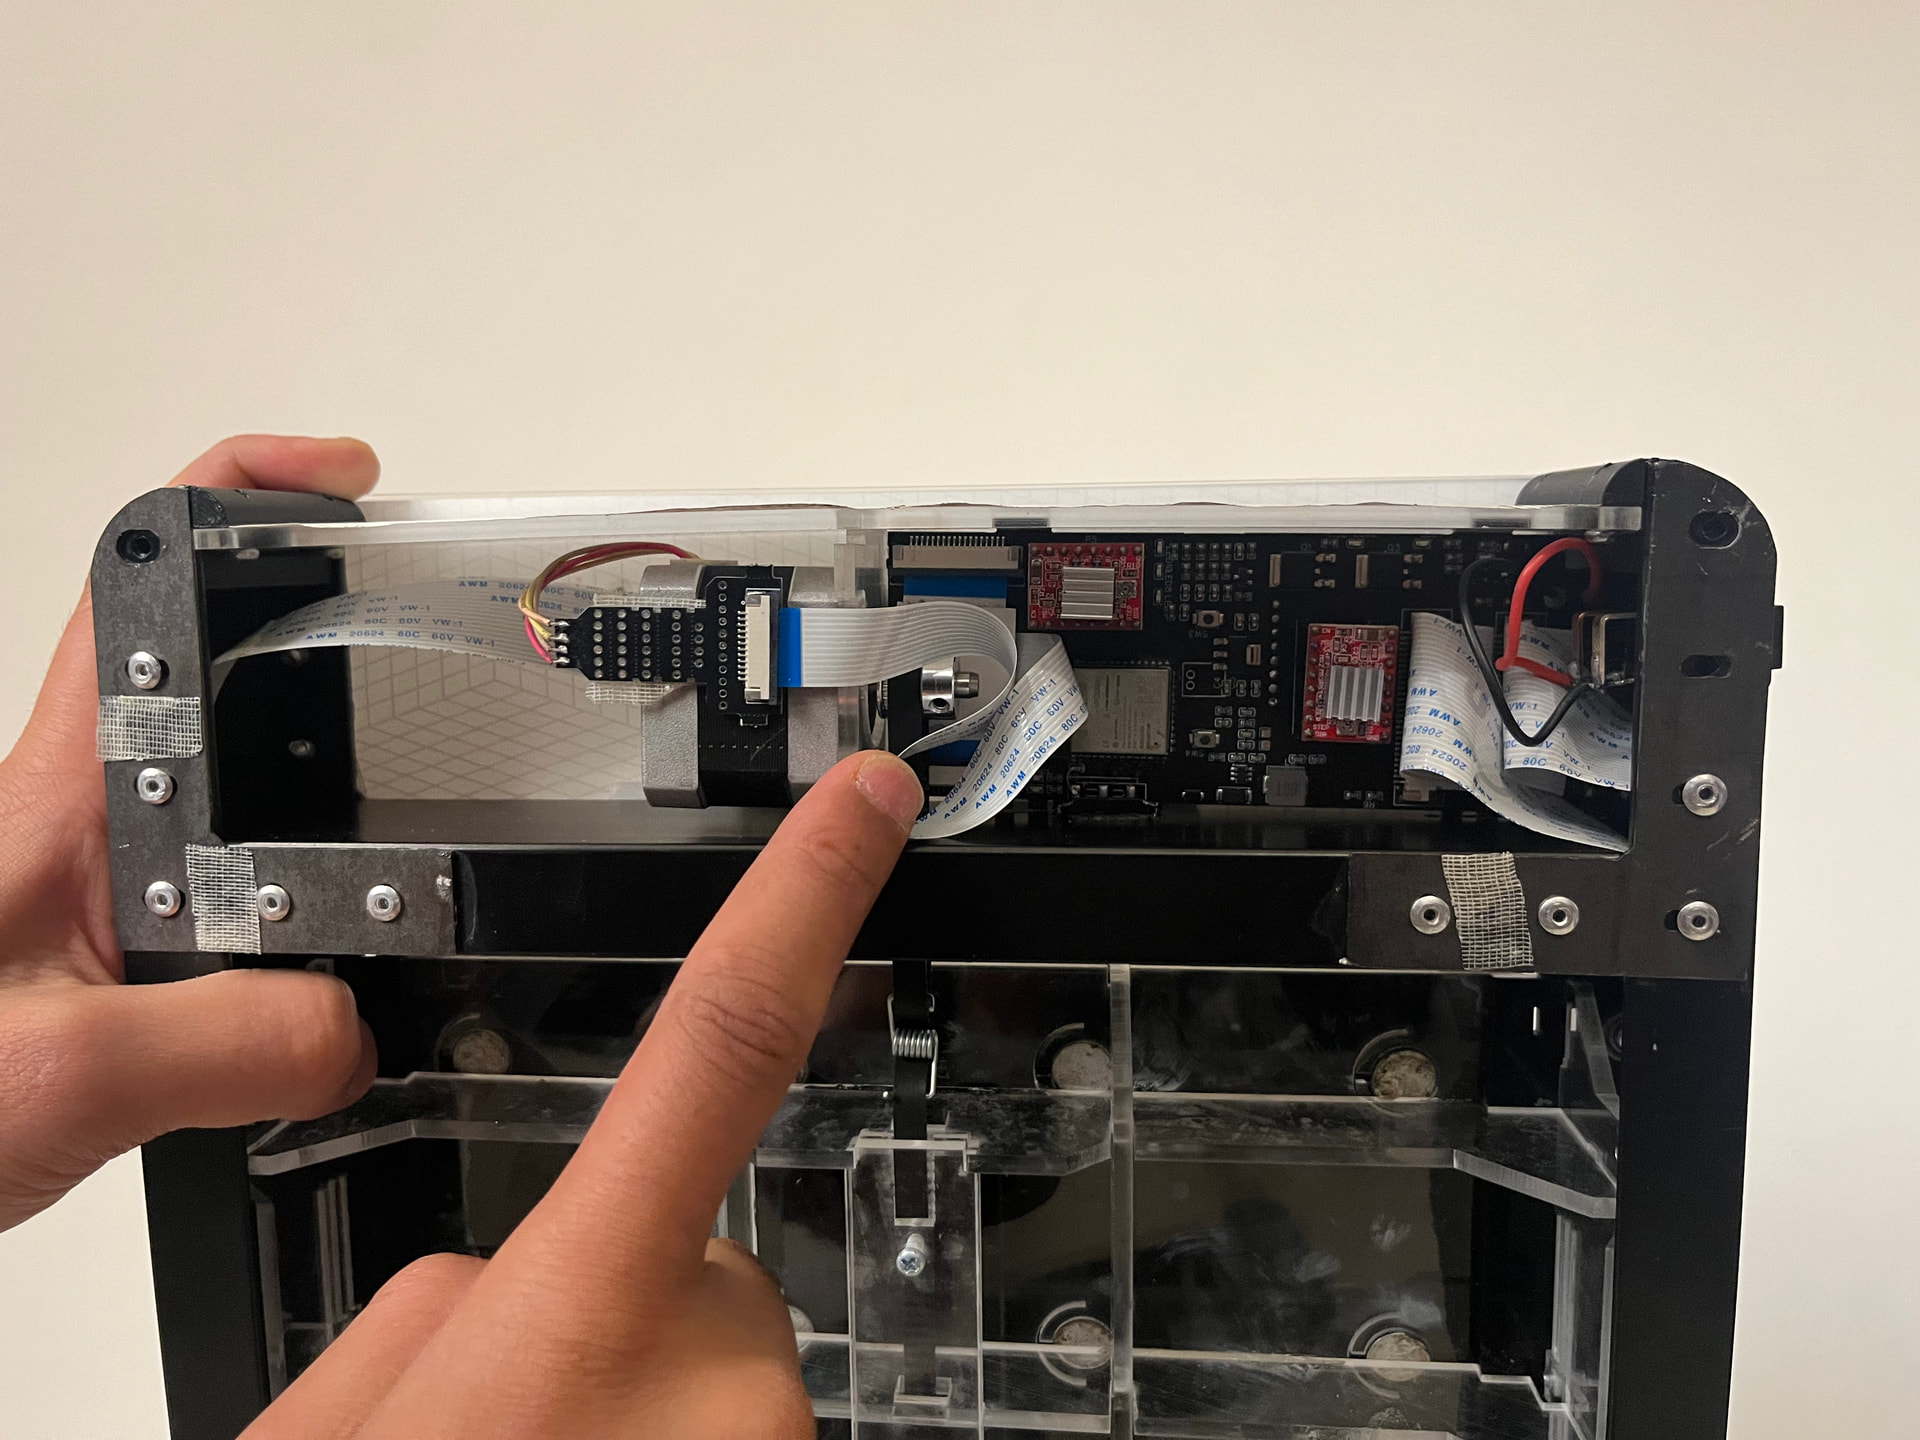
You will see two specific motor drivers marked in the image below. These control the X and Y axes respectively.
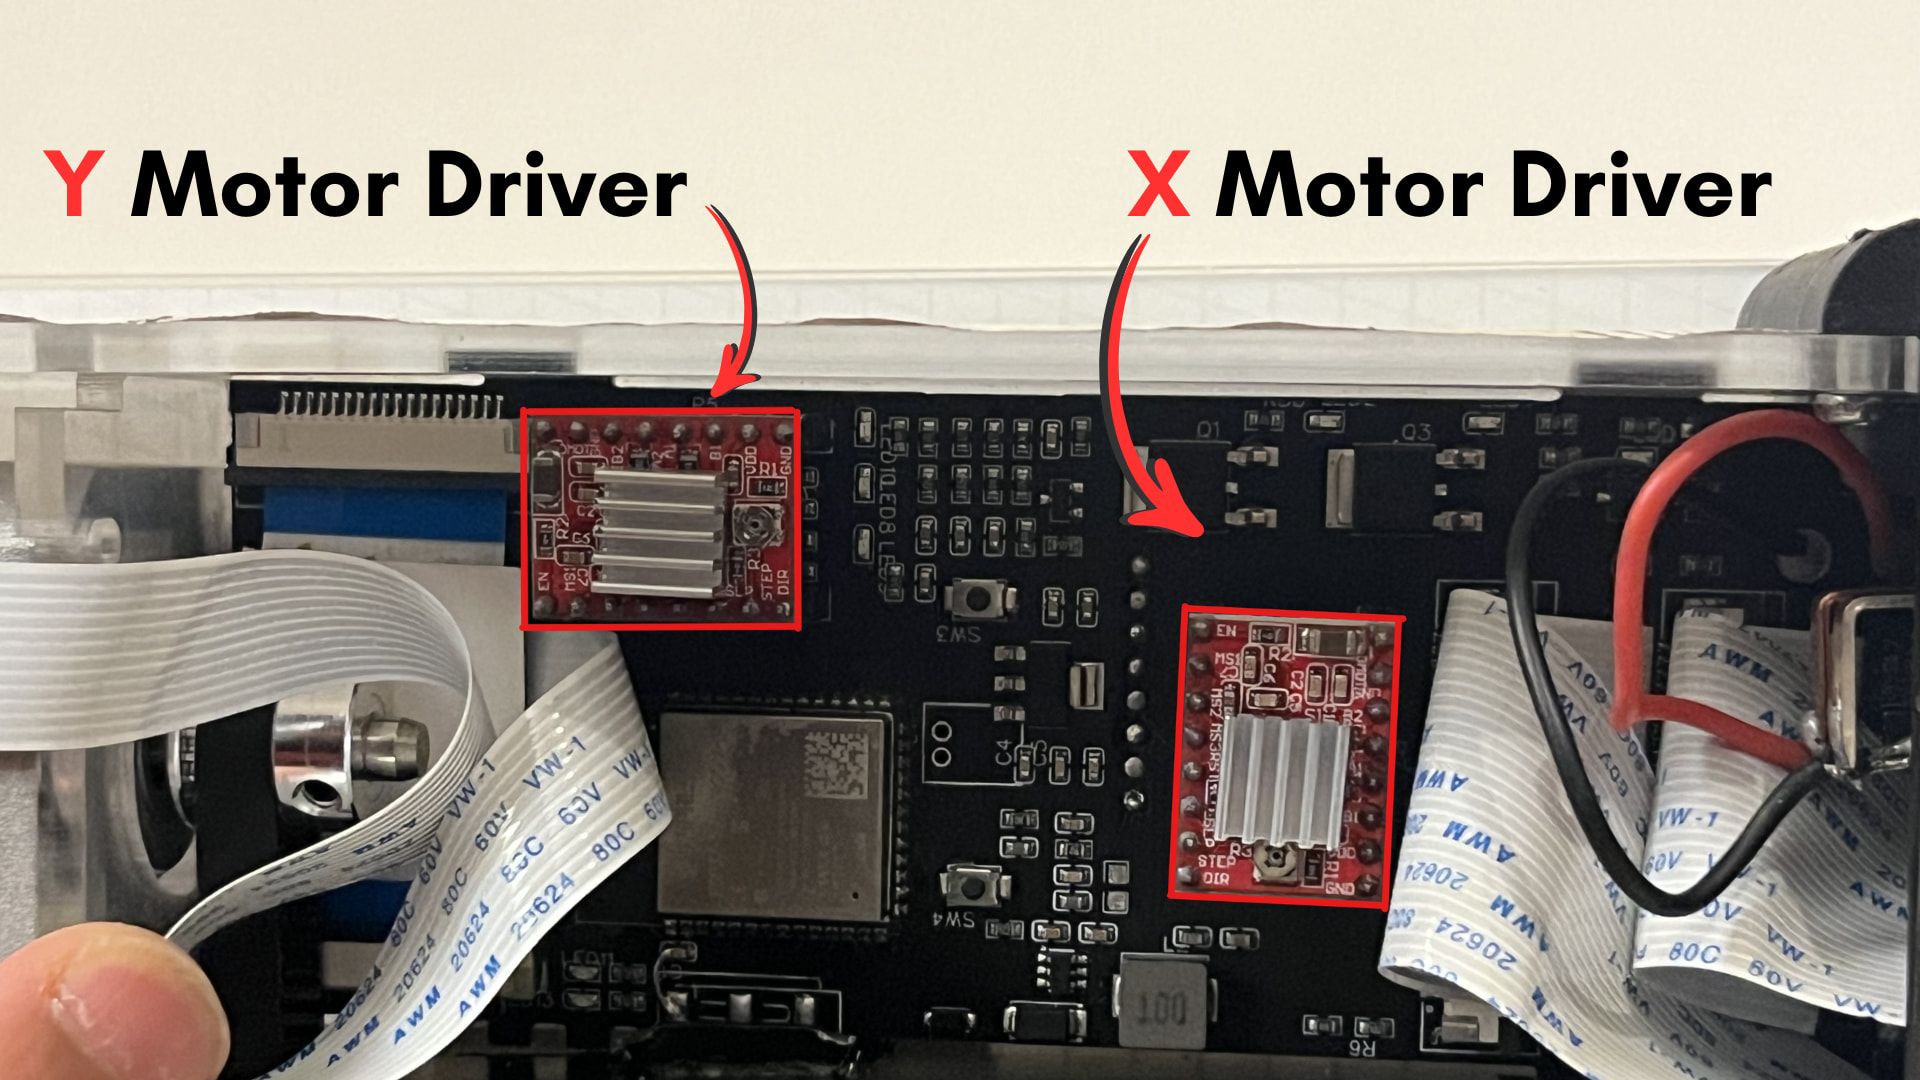
Depending on which axis is experiencing issues (or which one you want to tweak), you will perform the adjustment on the corresponding driver.
Step 3: Identifying the Driver Components
Before making adjustments, let’s look at the driver itself. Your motor driver looks similar to this.
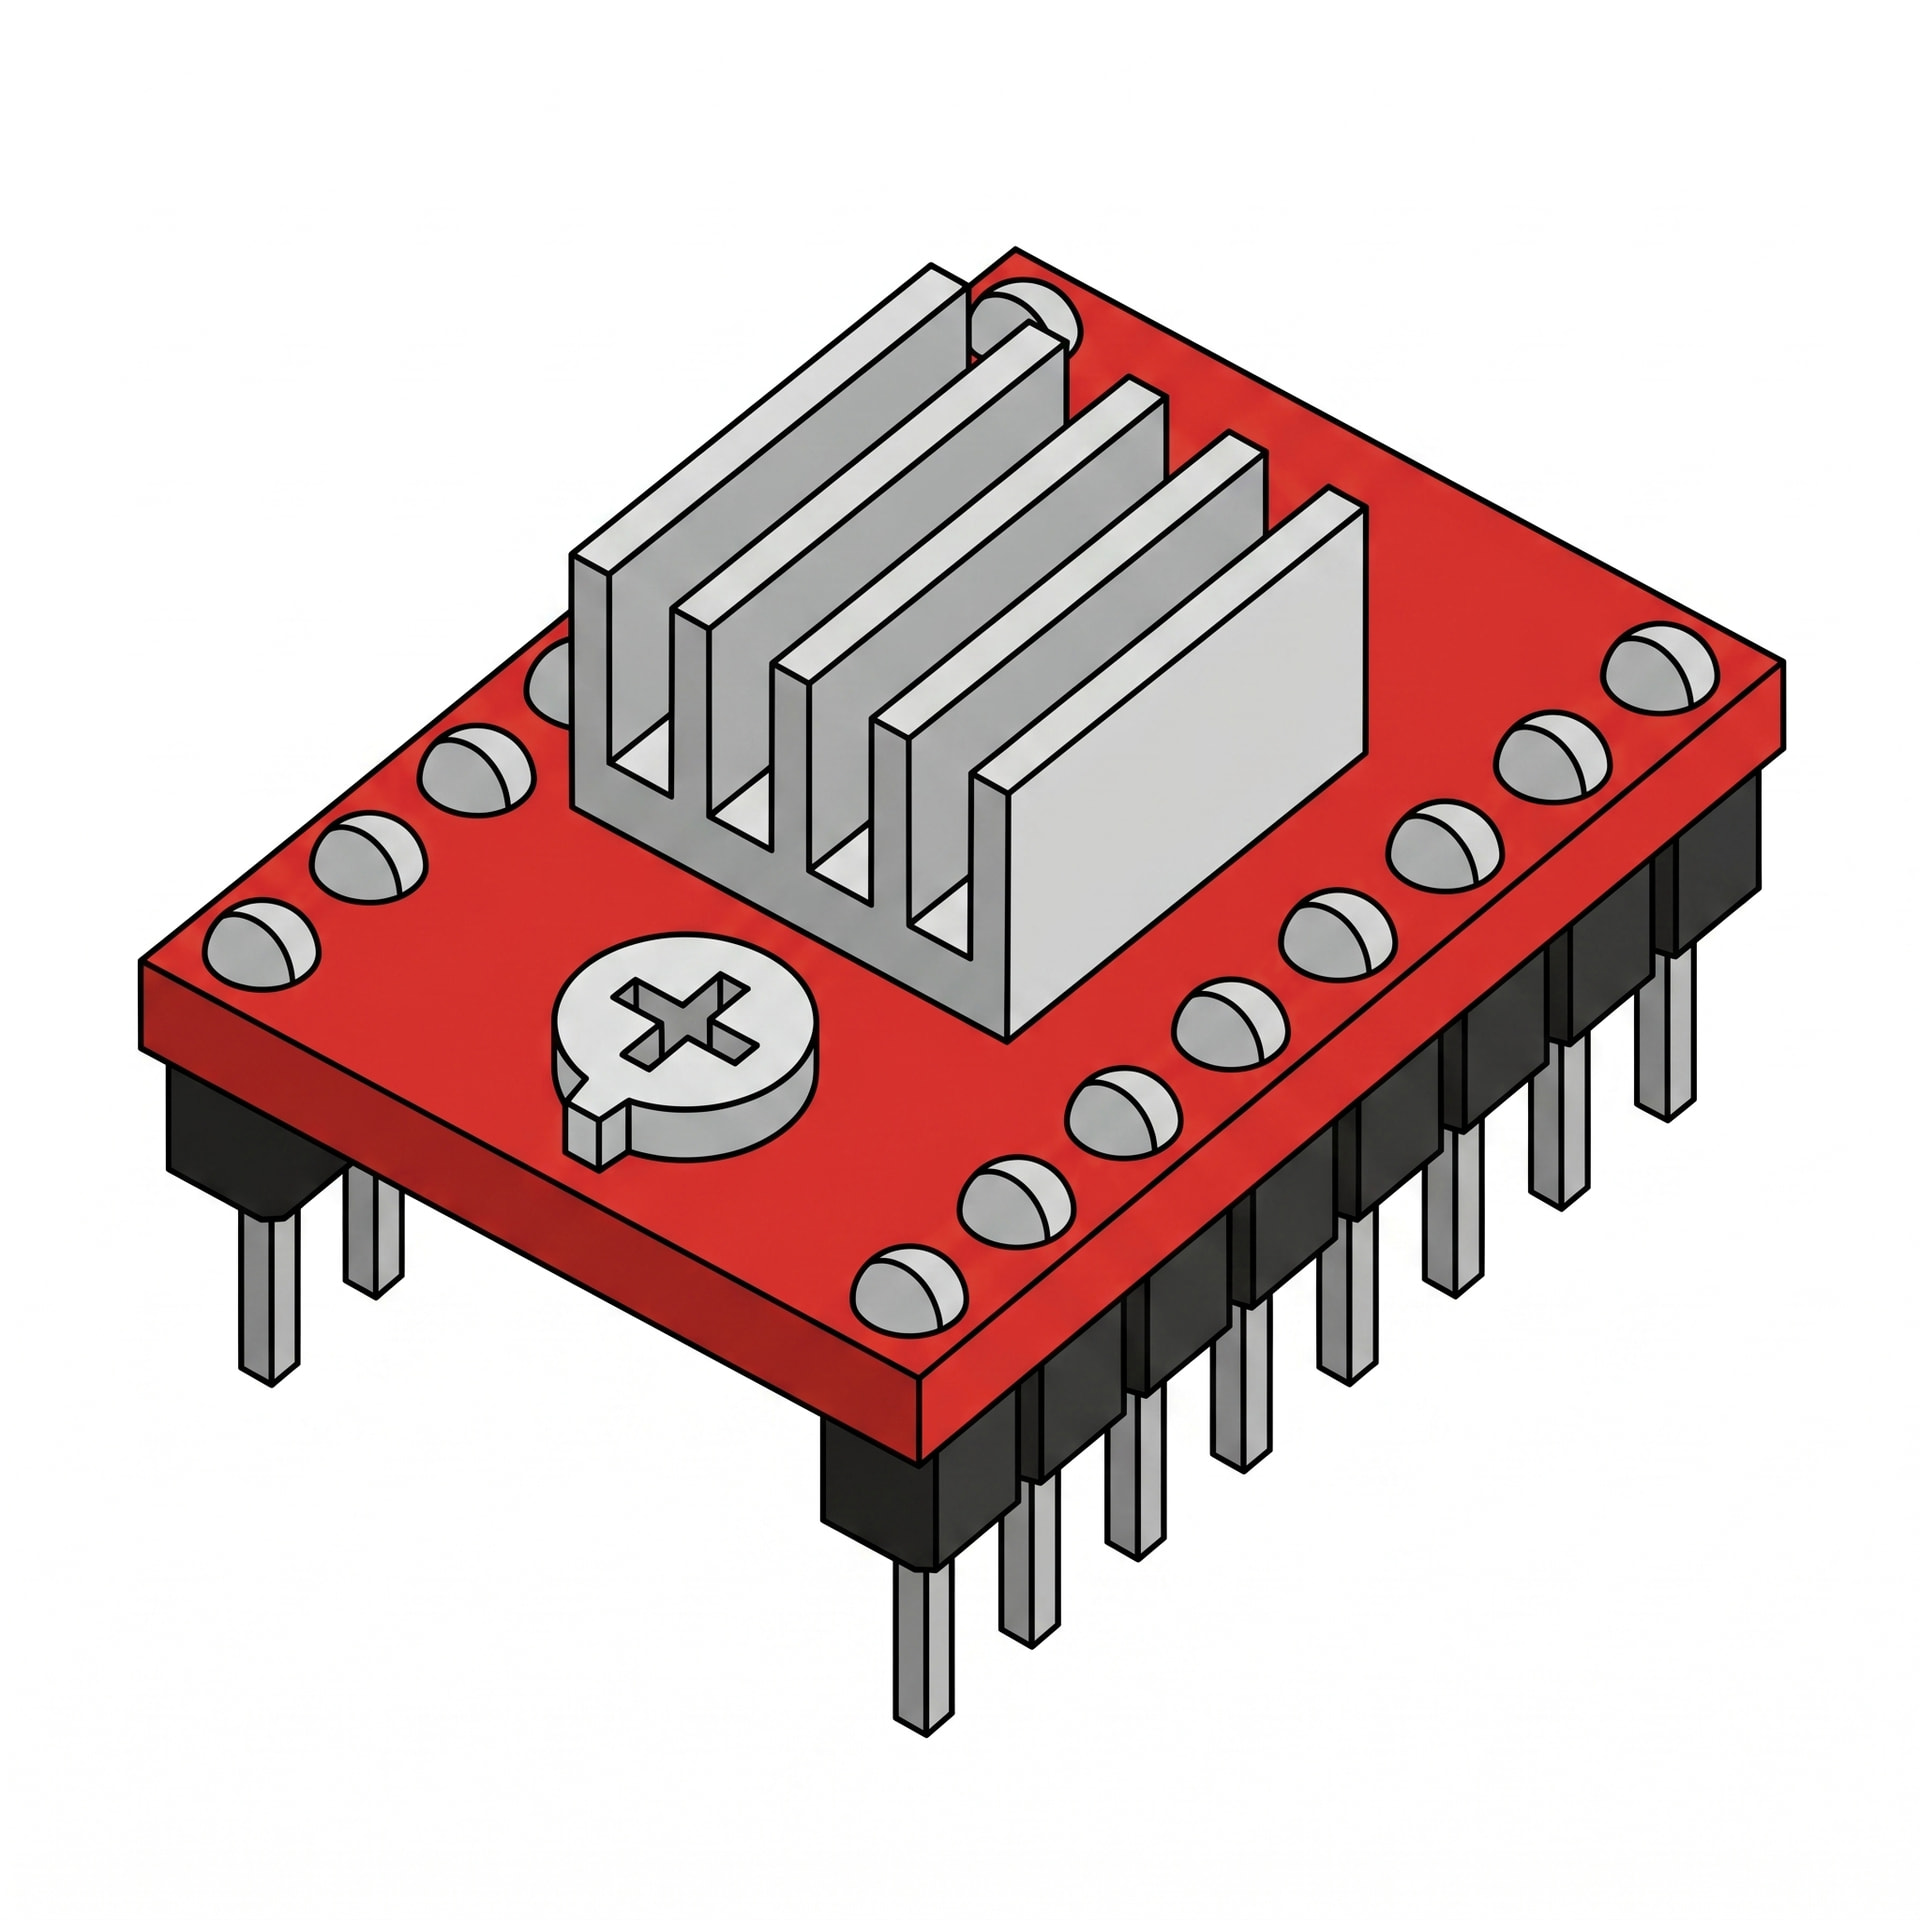
This is the standard motor driver used in your M3D Enabler. You will be seeing it from the top, so this top down look will be more familiar for you:
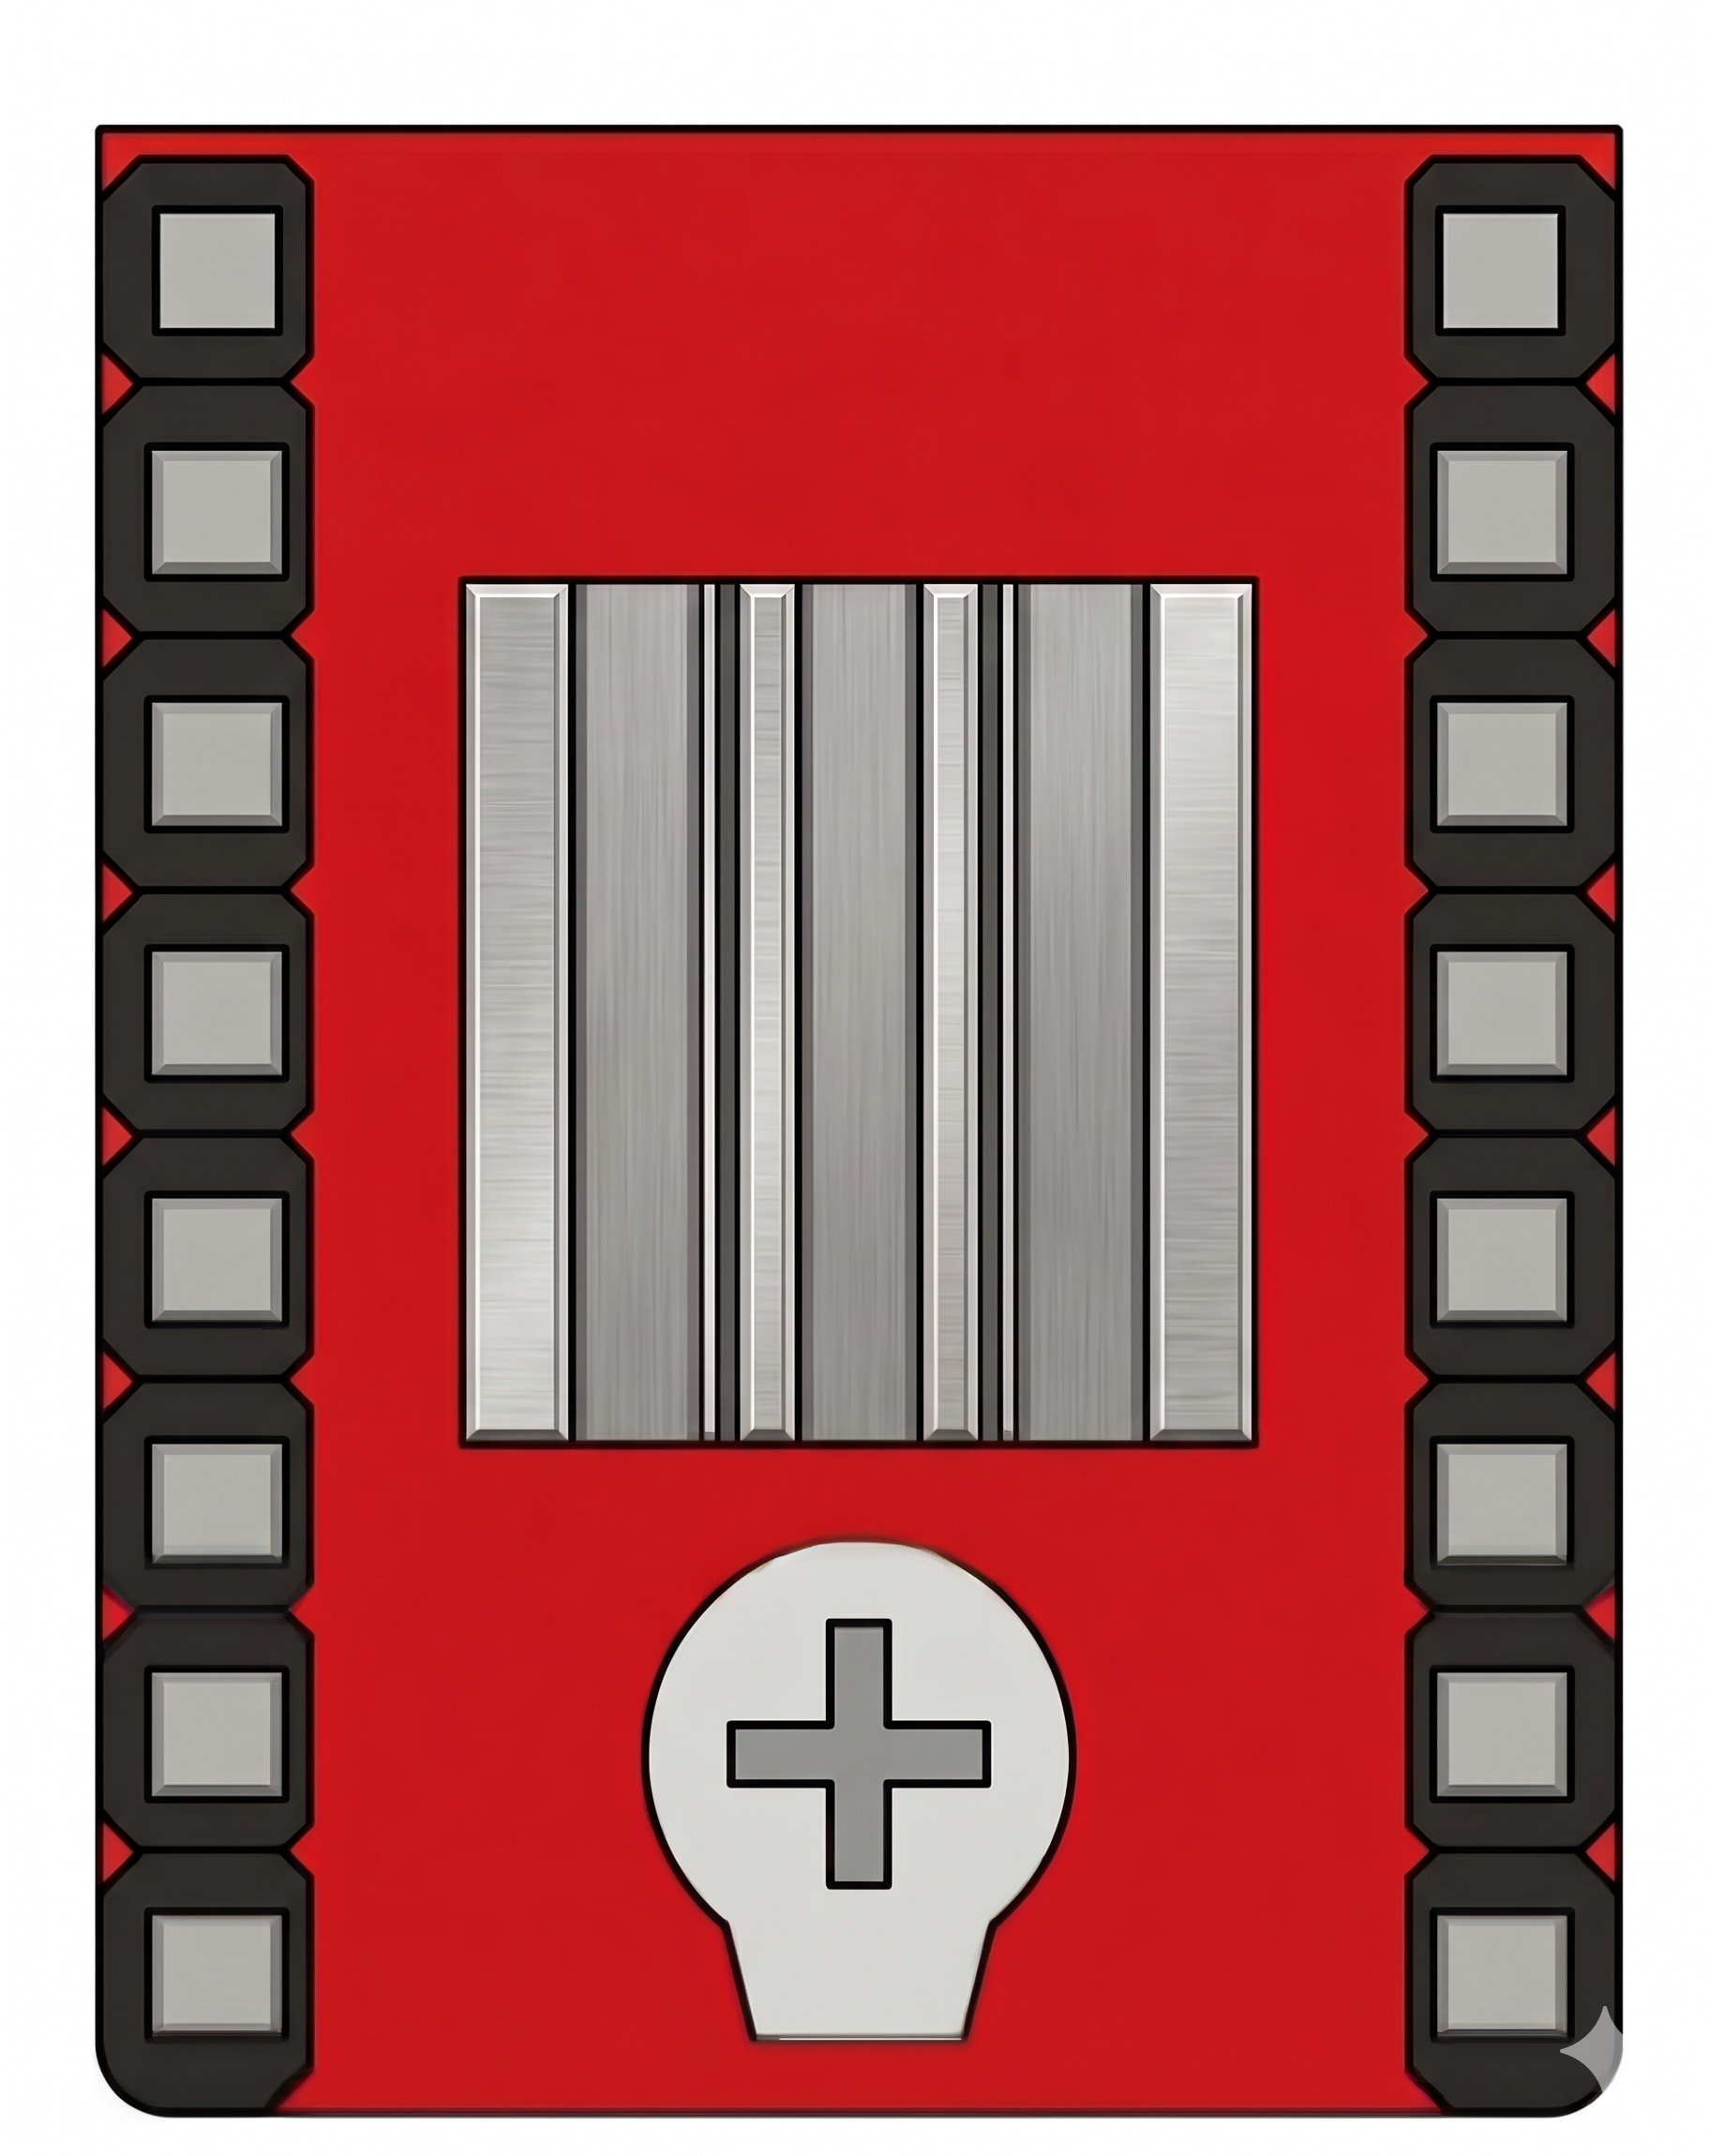
This screw at the bottom is what you will be adjusting which in turn will increase/decrease the power for the motor.
3. Adjusting Power Level:
If you want to increase the power level, you will turn the screw clockwise. If you want to decrease it, turn the screw counter-clockwise.
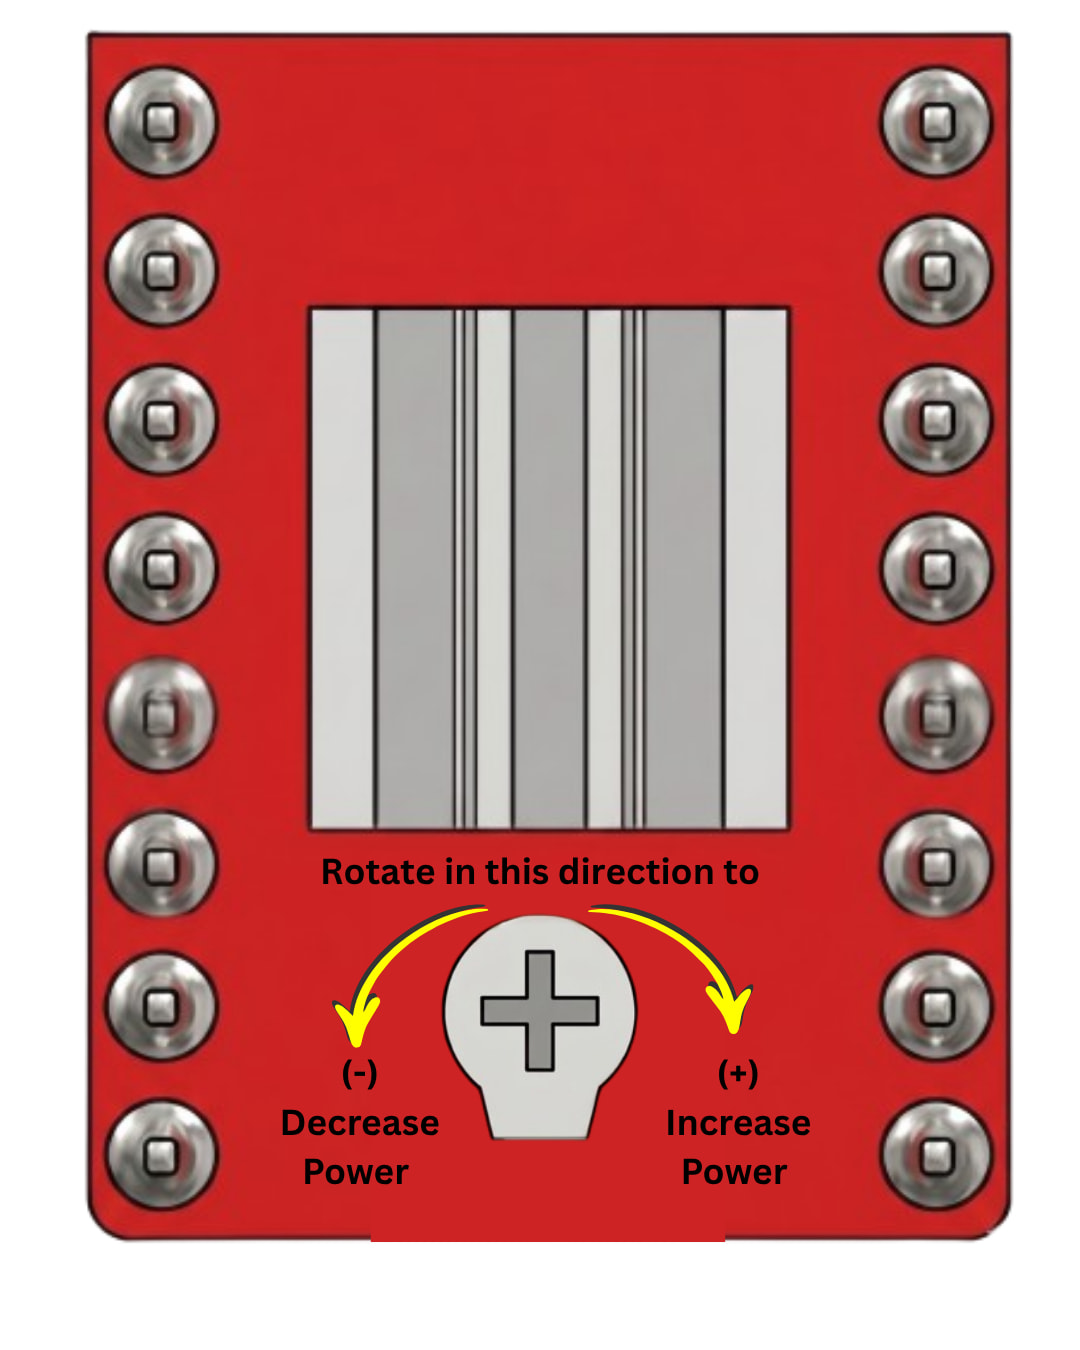
There are 4 different levels to which you can adjust your power to. Each power level can be set by turning the screw 45 degrees in the desired direction. The different power levels are as follows:
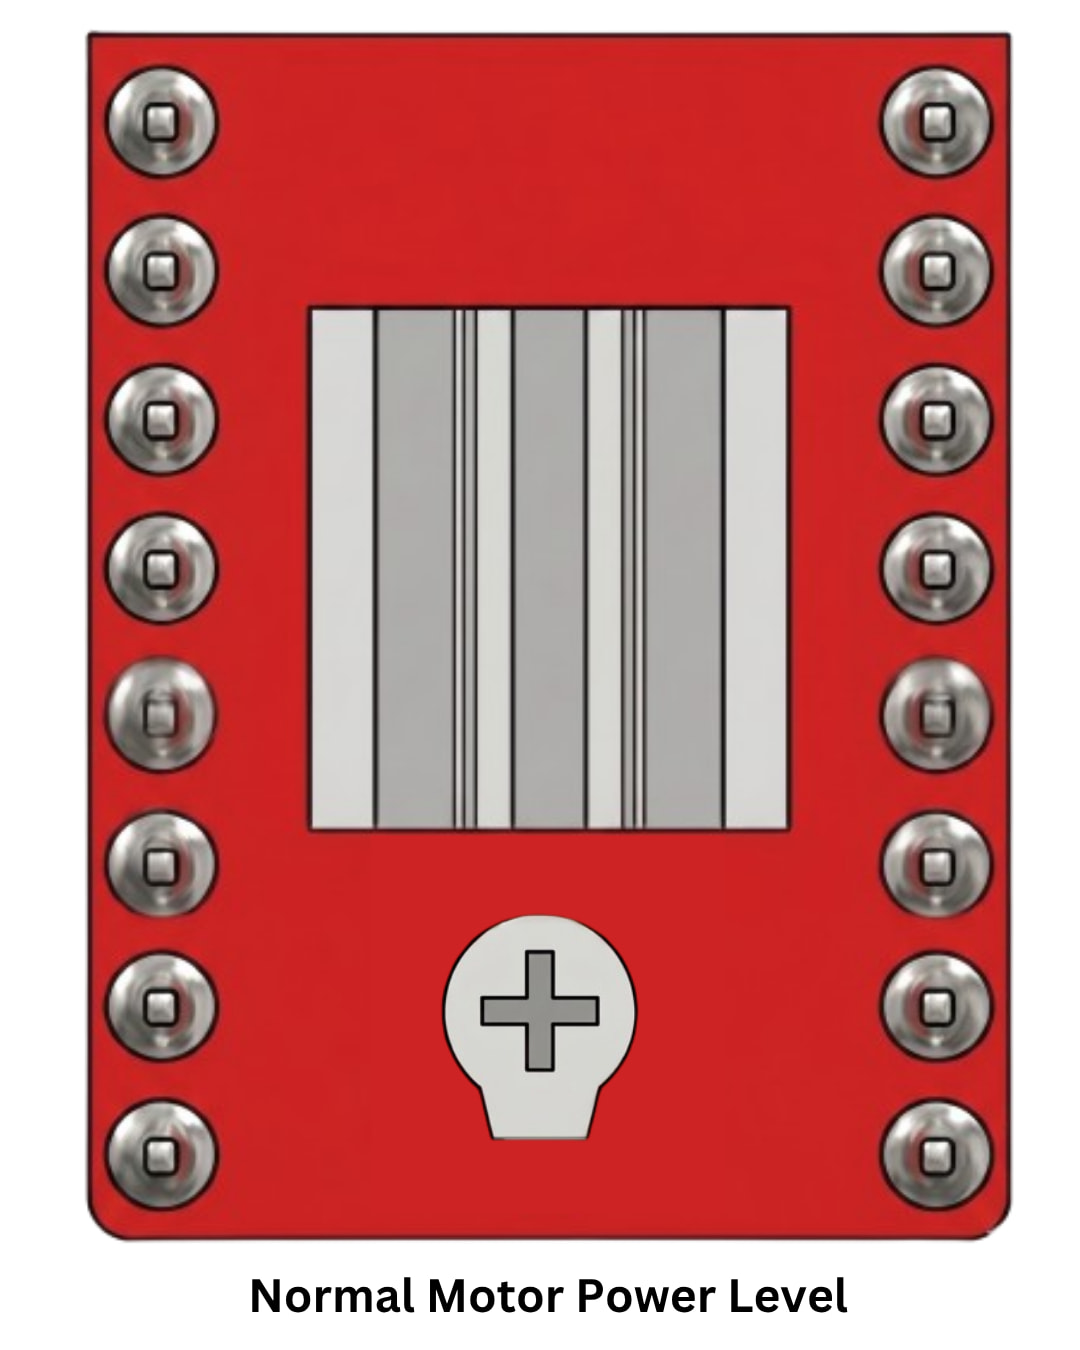
The normal level:
When you open the driver, the screw should be facing down. This is the default/normal level.
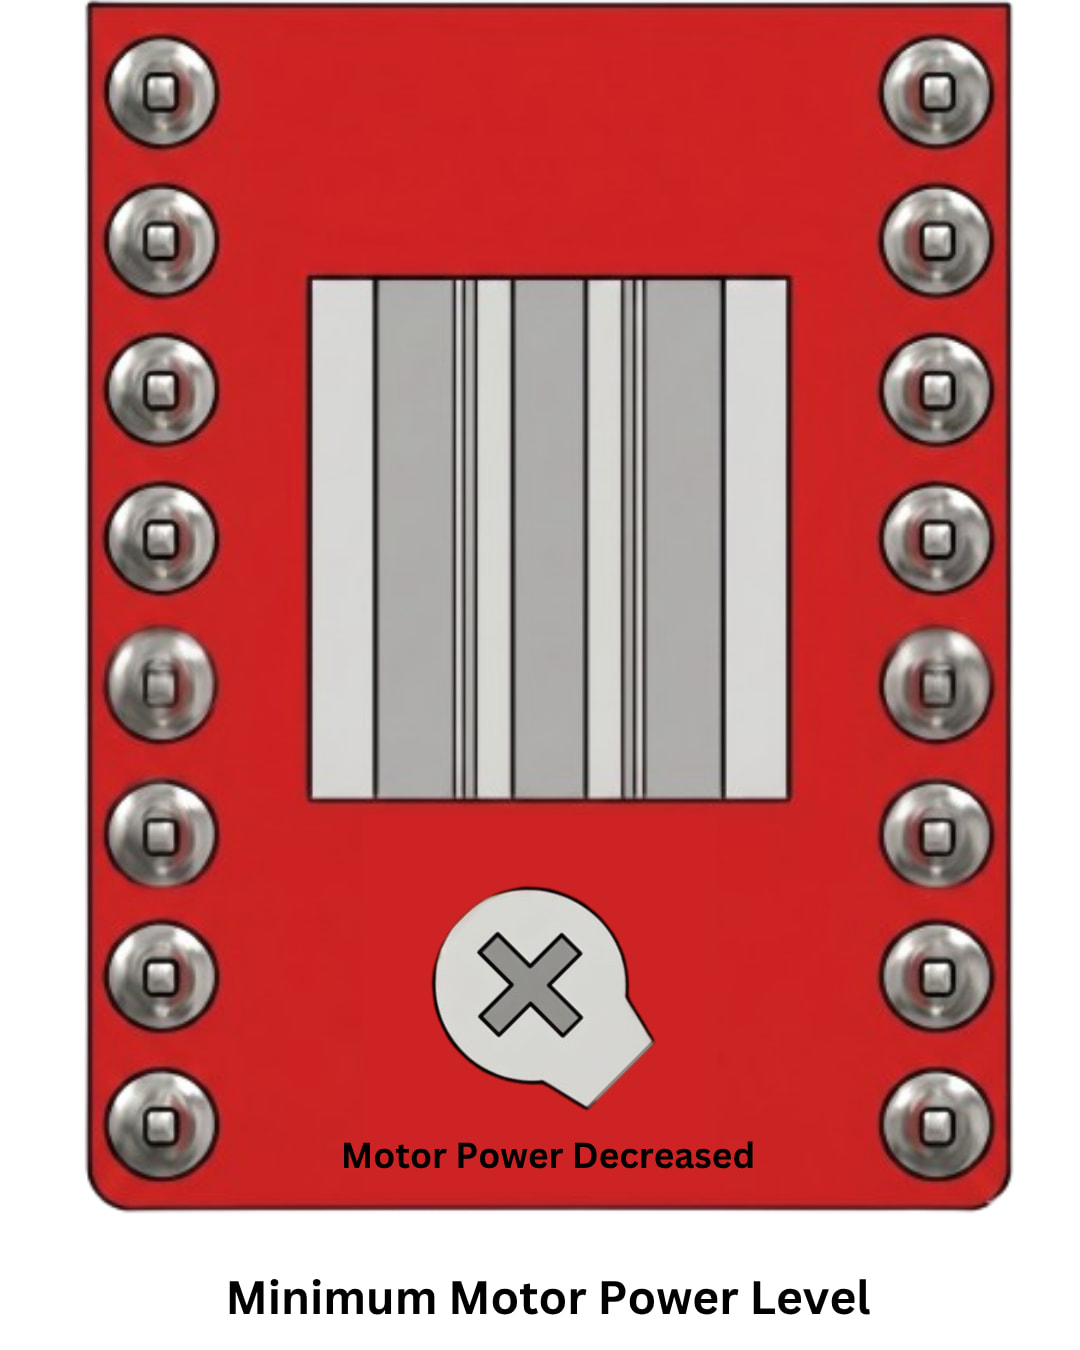
Minimum Power Level:
Turning the screw 45 degrees counter-clockwise will decrease the power level to minimum. This will decrease the sound of the motors of the printer.
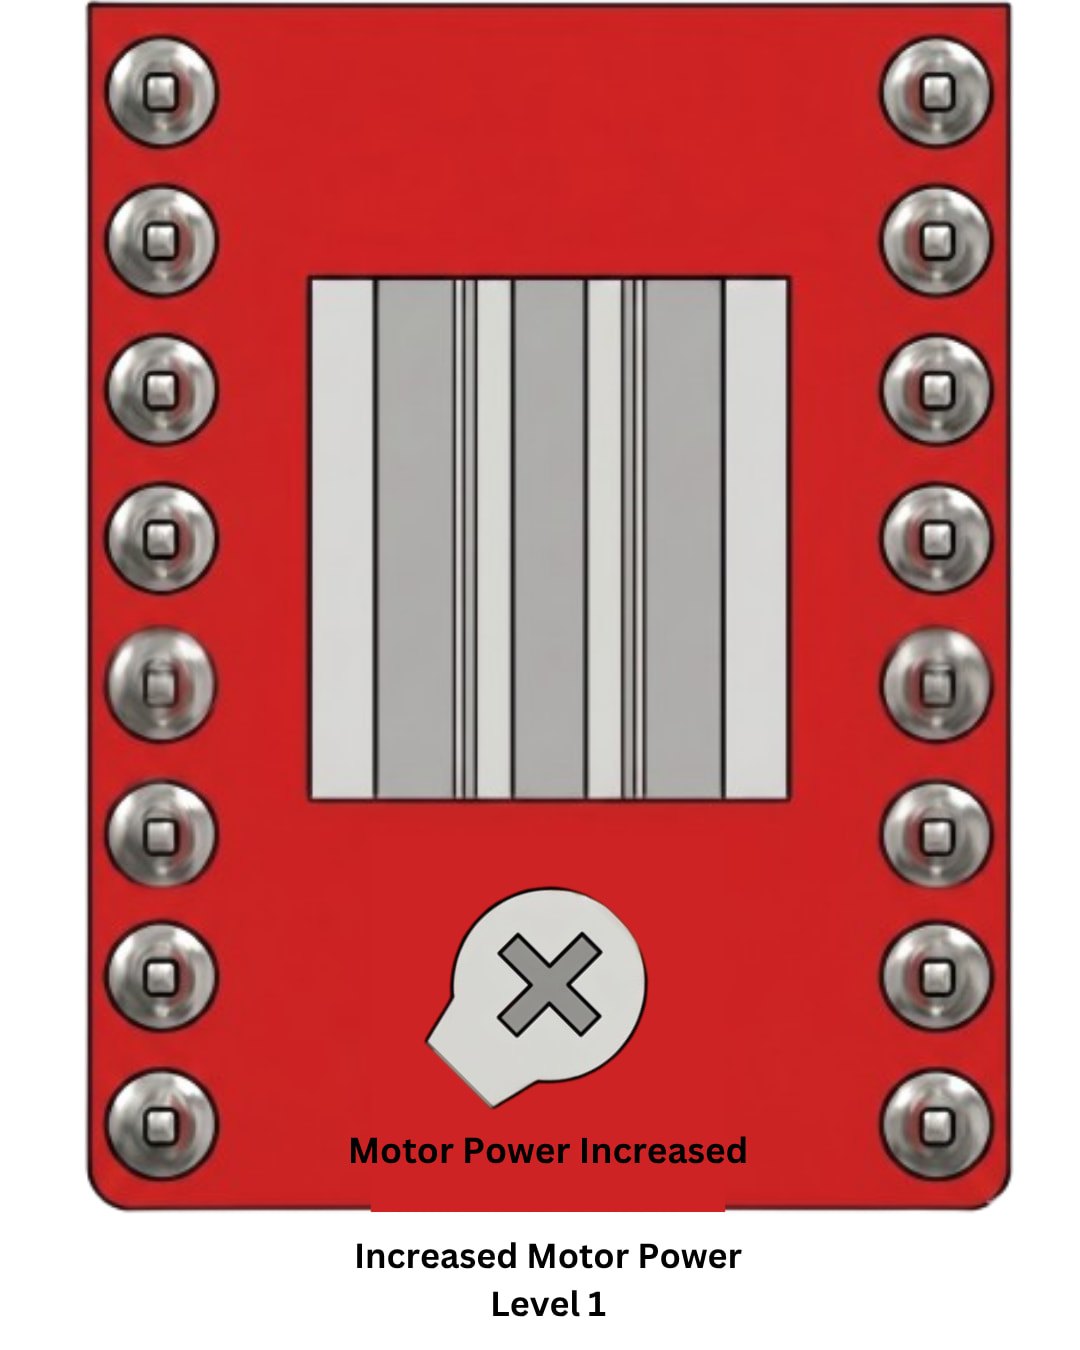
Increased Power Level 1:
Turning the screw 45 degrees clockwise will incerase the power level by 1 stage. This will help in resolving the slippage issue during printing.
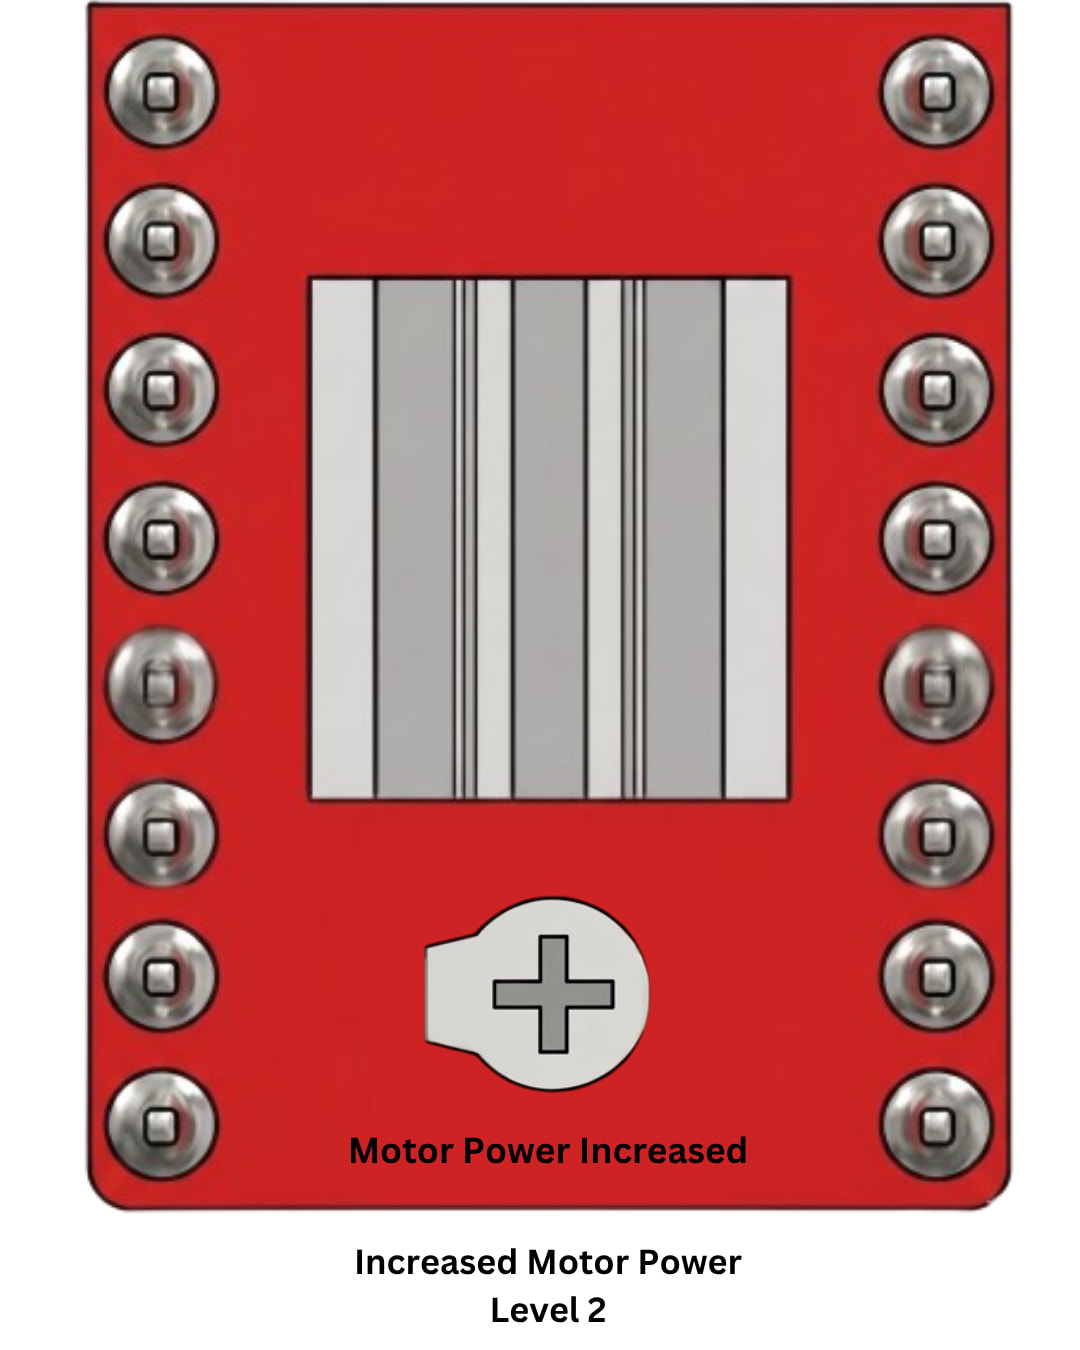
Increased Power Level 2:
Turning the screw 45 degrees more so in clockwise direction will incerase the power level to stage 2.
Maximum Power Level:
This is the max power the motor drivers can deliver, resulting in improved performance.
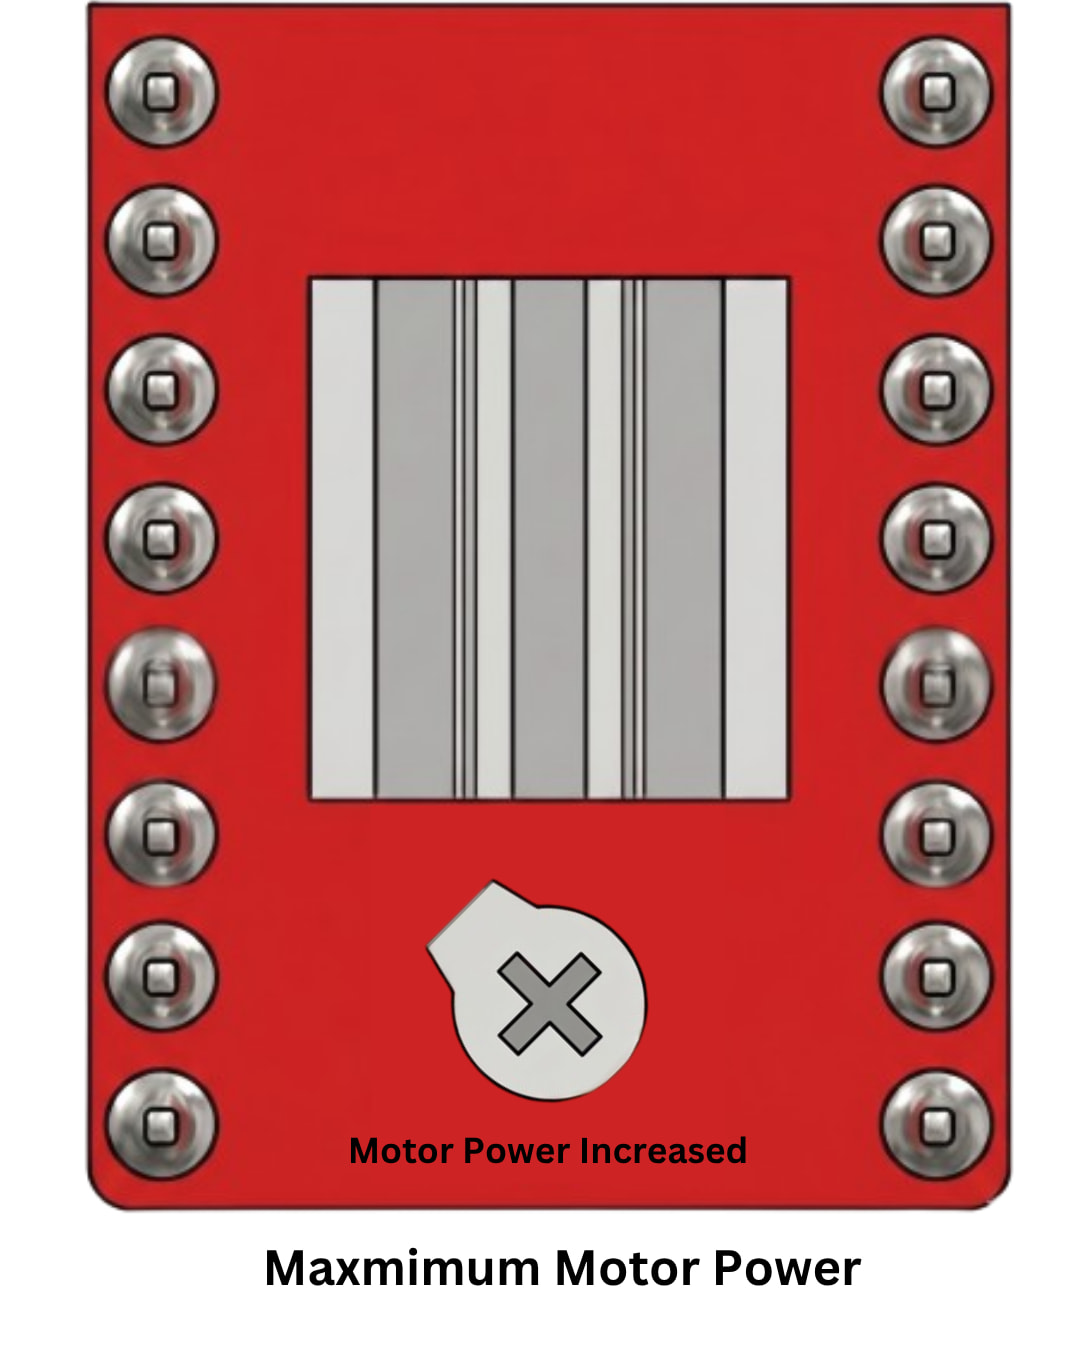
Note: At max power, the motors will start to heat up as the passive cooling will not be enough. If you want to operate the printer at this power level, we highly recommedn swapping the heatsink with a bigger one and removing the lower cover when you are printing.
Final Thoughts & Safety Check
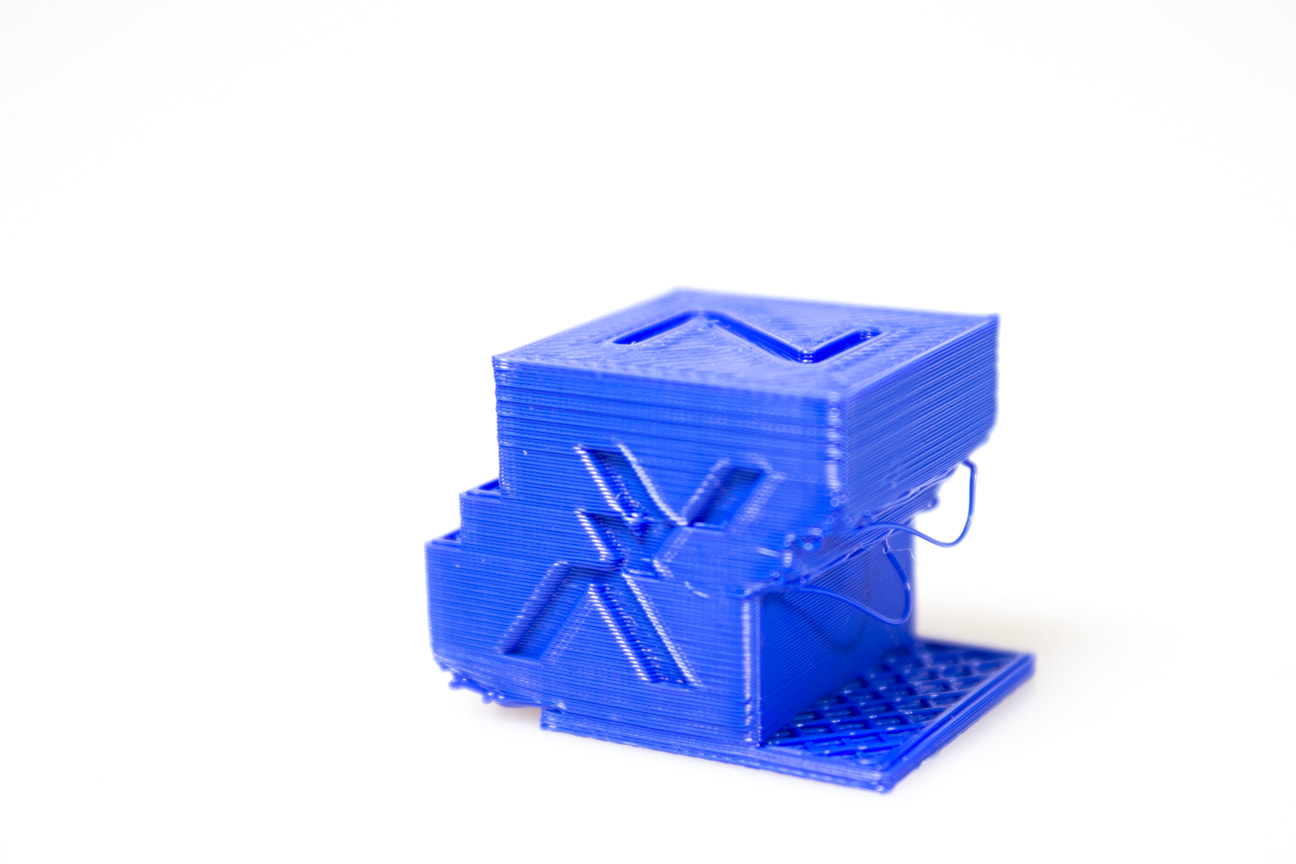
After making these adjustments, always run a small test print (like a 20mm calibration cube) to monitor the motor temperature. The motors should be warm to the touch, but never so hot that you cannot hold your finger on them for 5 seconds.
If you have any questions about the specific voltage levels or if you’re unsure which way to turn the screw for your specific driver version, drop a comment below! We’d love to hear how this modification improved your print quality or noise levels.
Additionally, overclocking is a great way to squeeze extra performance out of your Enabler D8500 , but every machine environment is slightly different. If you find a “sweet spot” for your X/Y motor power that works perfectly for high-speed printing, please share your results in the thread below!
By fine-tuning your motor drivers, you take full control over the balance between torque and silent operation. Remember to apply the adhesive panel back carefully or use fresh double-sided tape to ensure the underside remains sealed.
For more Enabler D8500 tutorials, check out our Guides category.