Session 8: “Designing Our Dream Playground in TinkerCad - Part 1”
Architect:
Syed Shayaan Haider - Markhor3D
Learning Objectives
In this session, the students will:
- Collaborate in Pairs: Work together to brainstorm and design simple playground equipment.
- Express Creativity and Imagination: Generate ideas and sketch designs for their dream playground equipment.
- Develop Basic Digital Skills: Begin modeling their designs in TinkerCad using basic shapes.
- Understand Basic Concepts of 3D Modeling: Recognize how shapes combine to create more complex structures.
- Build Confidence with Technology: Strengthen familiarity with TinkerCad and digital creation.
Teaching Aids
Required Materials:
-
Computers or Tablets:
- One per pair of students, with TinkerCad already logged in and ready to use.
- Preferably touch-screen devices for easier interaction.
-
TinkerCad Accounts:
- Use pre-logged-in accounts from previous sessions.
- Ensure each pair can access TinkerCad.
-
Paper and Pencils:
- For sketching ideas during brainstorming.
-
Visual Aids:
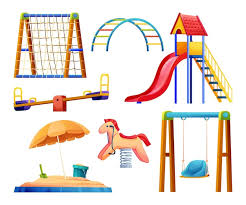
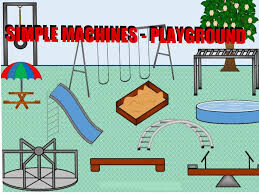
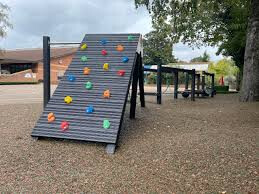
- Pictures of playground equipment: slides, swings, seesaws, monkey bars, etc.
- Pictures of playground equipment: slides, swings, seesaws, monkey bars, etc.
-
Teacher’s Guide:
- Basic steps on how to create playground equipment in TinkerCad (provided in the Additional Notes section).
-
Assistants or Volunteers (optional):
- Additional adults to help guide students during the session.
Structure and Lesson Plan (Total Time: 50 minutes)
1. Introduction and Inspiration (5 minutes)
-
Greet the Students:
- “Hello, everyone! Are you excited to design our dream playground today?”
-
Introduce the Theme:
- “Today, we’ll be working together to create our own playground equipment like slides, swings, seesaws, and monkey bars!”
-
Show Visual Aids:
- Display pictures of playground equipment.
- “Look at these fun playgrounds! What do you like to play on?”
-
Explain the Activity:
- “You’ll work with a partner to imagine and sketch your own playground equipment, and then we’ll start making them in TinkerCad!”
2. Pair Formation and Idea Brainstorming (15 minutes)
-
Form Pairs:
- Pair up students, considering friendships and balancing skills.
-
Distribute Paper and Pencils:
- Give each pair a sheet of paper and pencils.
-
Brainstorming Session:
- “Take some time to talk with your partner about what playground equipment you’d like to design.”
- Prompts:
- “What is your favorite playground equipment?”
- “Can you think of a new, imaginative piece of equipment?”
- “How can you make it unique or special?”
-
Sketching Ideas:
- “Draw a simple picture of your playground equipment idea.”
- Encourage students to label parts or write down any special features.
-
Teacher and Assistant Support:
- Move around the room to assist pairs.
- Ask Open-Ended Questions:
- “What makes your design special?”
- “How will children play on your equipment?”
- Offer suggestions if pairs are struggling with ideas.
3. Hands-On Modeling in TinkerCad (25 minutes)
-
Guidelines and Expectations:
- “Use the shapes in TinkerCad to start building your playground equipment.”
-
Encourage Use of Basic Shapes:
- Remind students of the basic shapes available: boxes, cylinders, spheres, wedges, etc.
- “Think about how you can use these shapes to make your design.”
-
Teacher and Assistant Support:
-
Note: Since there is no live demonstration, refer to the Teacher’s Guide (provided below) for basic steps to assist students.
-
Move around the room to help pairs individually.
-
Areas of Assistance:
- Navigating TinkerCad interface.
- Adding and manipulating shapes.
- Resizing and positioning shapes.
- Grouping shapes.
-
-
Encourage Creativity:
- “Feel free to experiment with different shapes and see what works best for your design!”
- “Remember, it’s okay if it doesn’t look exactly like your drawing—have fun with it!”
-
Reminders:
- “Save your work frequently.”
- “If you need help, raise your hand.”
4. Saving Designs and Preparing for Next Session (3 minutes)
-
Saving Designs:
- “Let’s make sure to save our designs so we can continue working on them next time.”
-
Explain the Plan:
- “In our next class, we’ll finish our designs and prepare them for printing!”
5. Conclusion and Preview of Next Session (2 minutes)
-
Summarize the Session:
- “Great work today! You came up with wonderful ideas and started building them in TinkerCad.”
-
Express Excitement:
- “I’m excited to see how your designs develop in our next class!”
-
Closing Encouragement:
- “You all did an amazing job collaborating and being creative!”
Additional Notes for the Teacher
Preparation:
- Guide to TinkerCad (link to separate document)
-
TinkerCad Setup:
- Ensure all devices are logged into TinkerCad and ready to use.
-
Visual Aids:
- Prepare images of playground equipment for inspiration.
-
Materials Ready:
- Have paper and pencils available for brainstorming.
-
Teacher’s Guide:
- Familiarize yourself with the basic steps for creating playground equipment in TinkerCad (see below).
Teacher’s Guide: Basic Steps for Creating Playground Equipment in TinkerCad
Note: Use these steps to assist students as needed. Adjust explanations based on individual student needs.
1. Slides:
-
Base Ramp:
- Drag a Box shape onto the workplane.
- Resize it to be long and flat, creating the slide’s ramp.
-
Steps:
- Use smaller Box shapes to create steps.
- Stack them at one end of the ramp.
-
Safety Rails (Optional):
- Use thin Cylinder shapes for rails.
- Position them along the sides of the ramp.
-
Grouping:
- Select all shapes and Group them to make one object.
2. Swings:
-
Frame:
- Use Box shapes to create the sides and top beam of the swing set.
- Arrange them in an upside-down ‘U’ shape.
-
Seats:
- Use a small Box or Cylinder for the seat.
-
Chains/Ropes:
- Use thin Cylinder shapes to connect the seat to the top beam.
- You can also use thread to join the seats to the frame everything does not need to be 3D printed!
-
Grouping:
- Select all shapes and Group them.
3. Seesaws:
-
Plank:
- Use a long Box shape for the seesaw’s plank.
-
Fulcrum (Base):
- Use a Triangle Wedge or Cylinder shape for the base.
-
Handles (Optional):
- Add small Cylinder shapes at each end for handles.
-
Grouping:
- Align the plank on top of the base and Group all shapes.
4. Monkey Bars:
-
Frame:
- Use Box shapes to create the vertical posts.
-
Bars:
- Use Cylinder shapes for the horizontal bars.
-
Arrangement:
- Position the bars evenly across the top between the posts.
-
Grouping:
- Select all shapes and Group them.
Tips for Assisting Students:
-
Encourage Experimentation:
- Let students try different shapes and arrangements.
-
Simplify Shapes:
- If students are struggling, suggest using basic shapes to represent parts.
-
Alignment Tools:
- For advanced students, introduce the Align tool to position shapes precisely.
Key Vocabulary
- Brainstorming: Thinking of many ideas about a topic.
- Sketch: A simple, quick drawing.
- Modeling: Creating a representation of an object in a digital environment.
- 3D Shapes: Objects that have length, width, and height.
- Collaborate: Work together with others.
- Creativity: Using imagination to create something new.
For suggestions, improvements, and corrections, feel free to reach out at shayaanhaider@gmail.com