Grade 3 – Session 7: “Exploring Light: Reflection, Absorption, and Transmission”
Architect: Aleeza Ayaz - Markhor3D
Session Length: 50-60 minutes
Session Overview:
In this session, students will explore how different materials interact with light by reflecting, absorbing, or transmitting it. Using MeasureLab’s light sensor, they will investigate how materials like mirrors, black paper, and clear plastic respond to light and observe these effects in real time on a live plot. Through hands-on experimentation and group discussions, students will learn to classify materials as opaque, transparent, or translucent, connecting these properties to everyday examples. They will make predictions, test various materials, and interpret their findings, deepening their understanding of how light behaves with different surfaces.
Learning Objectives:
In this session, students will:
- Use the light sensor to investigate how different materials reflect, absorb, or transmit light.
- Understand how materials can be classified as opaque, transparent, and translucent and relate them to reflection, absorption, and transmission.
- Interpret live plots to observe how different materials interact with light in real time.
Equipment Required:
- MeasureLab with built-in light sensor.
- A laptop or PC for displaying live plots and measurements.
- A variety of materials (e.g., mirror, black paper, white paper, transparent plastic, glass, aluminum foil).
- Flashlight or adjustable light source.
- Worksheet for students to record their predictions, observations, and results.
- Pens, pencils, markets etc.
Teaching Aids:
- Projector (optional, for displaying live plots).
- Whiteboard to explain the concepts of reflection, absorption, and transmission.
Teacher Resource:
Session File: ML37.plf (55.7 KB)
Preparation:
This step has to be done before the session on each workstation/apparatus by the teacher/session instructor:
- Make sure that each computer has Physlogger installed and can detect the Measrelab when connected to it using the provided cable.
- Each Measurelab should have access to a power outlet for sensors that require external power. For this session, the light sensor will be used which does not require an external power source.
- Launch the Physlogger application and load the session file provided in the resources section.
Your setup will look something like this:
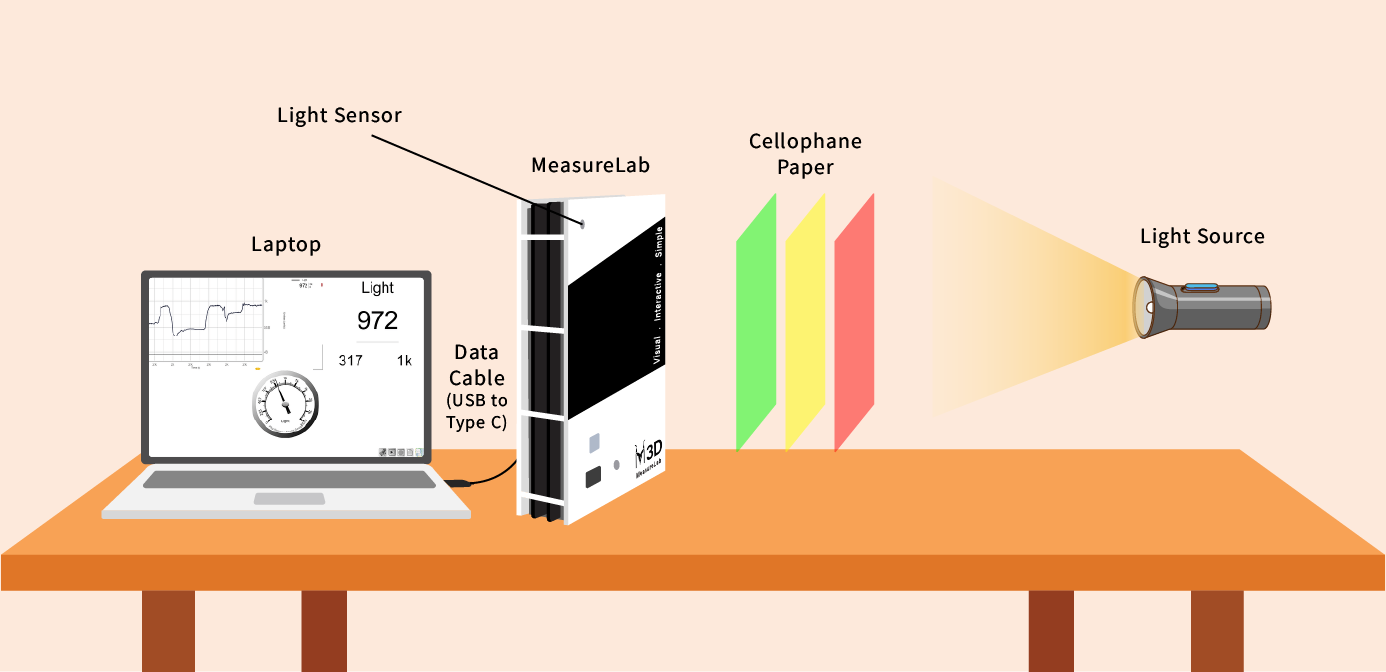
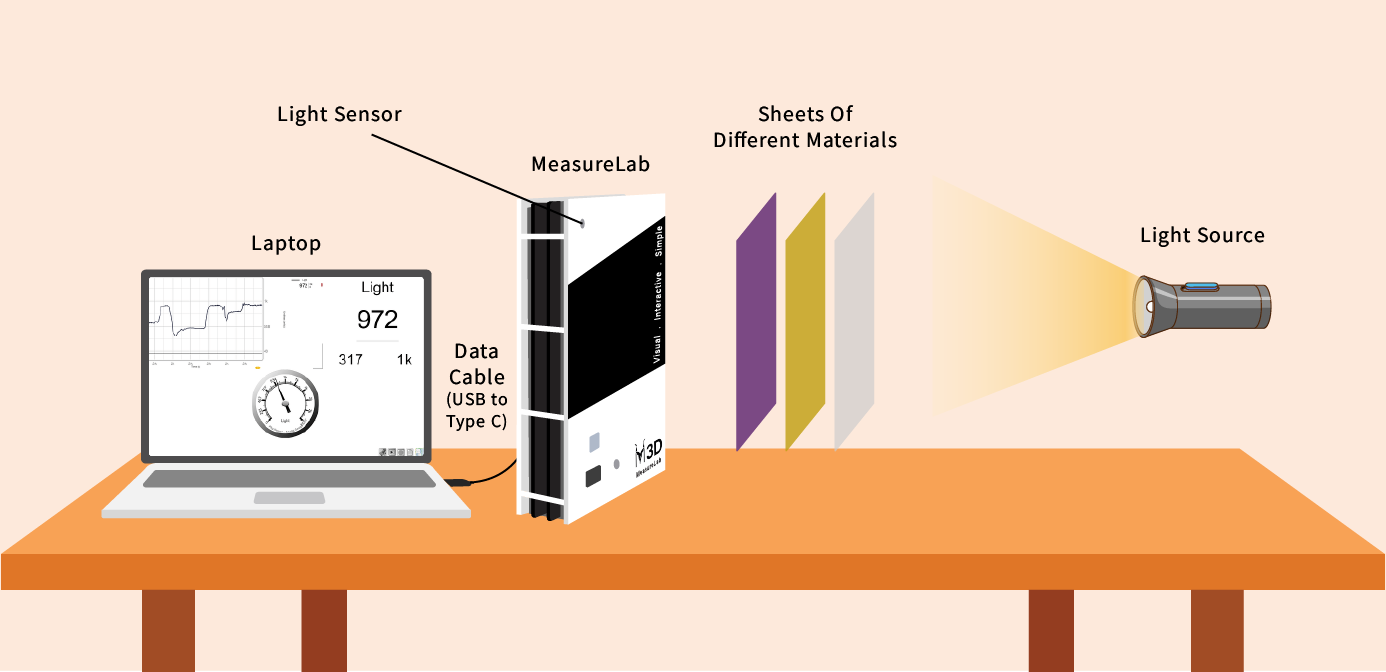
Introduction: (10 minutes)
- Interactive Show & Tell – Building Knowledge:
The teacher may begin by asking:
“How many of you remember our light experiment? Can you tell me what three types of materials we can have?”
-
Students will respond with opaque, transparent, and translucent.
-
Build on their response:
“Great! Why do you think some materials allow different amounts of light to pass through?”
Encourage students to think and offer their ideas.
- Connecting to Today’s Lesson:
“Today, we’ll see how different materials interact with light. Some materials reflect the light, some absorb it, and some let it pass through. We’re going to explore how these materials behave with light using MeasureLab.”
Hands-On Exploration (25 minutes)
Part 1: Exploring Reflection, Absorption, and Transmission
-
Step 1: Set up the light sensor connected to MeasureLab and show the live plot.
-
Step 2: The teacher explains the concepts clearly while demonstrating:
- Reflection (Mirror):
The teacher holds up a mirror:
- Reflection (Mirror):
“When light hits a mirror, it bounces back, just like when you see yourself in a mirror.”
Then, place the mirror in front of the sensor.
“What do you notice on the live plot when light reflects? Why do you think the light bounces back?”
- Absorption (Black Paper):
The teacher may show a black paper and explain:
“Some materials, like black paper, absorb light. This means the light doesn’t bounce back, it gets ‘trapped’ in the material.”
Place the black paper in front of the sensor.
“What happens on the live plot when light gets absorbed? Can you see any light coming through?”
- Transmission (Glass or Plastic):
The teacher may show a piece of clear plastic or glass:
“Transparent materials, like glass or clear plastic, let light pass through. This is called transmission. The light doesn’t bounce back or get trapped, it goes through the material.”
Place the material in front of the sensor.
“What do you notice on the live plot when light passes through?”
Part 2: Predicting and Testing Different Materials
-
Prediction Phase:
Before testing, students make predictions about whether each material will reflect, absorb, or transmit light. They record their predictions in their worksheet. -
Testing Phase:
In groups, students test the different materials with the light sensor and observe the live plot.
The teacher guides them:
“Which materials reflect light? Which materials absorb it? Which ones let light pass through?”
“What do you see on the live plot for each material? Does the line go up or down?”
Guided Activity (15 minutes)
Worksheet Activity:
-
Reflection, Absorption, and Transmission Table:
Students will record their predictions and observations for each material tested.
Readings with different materials:
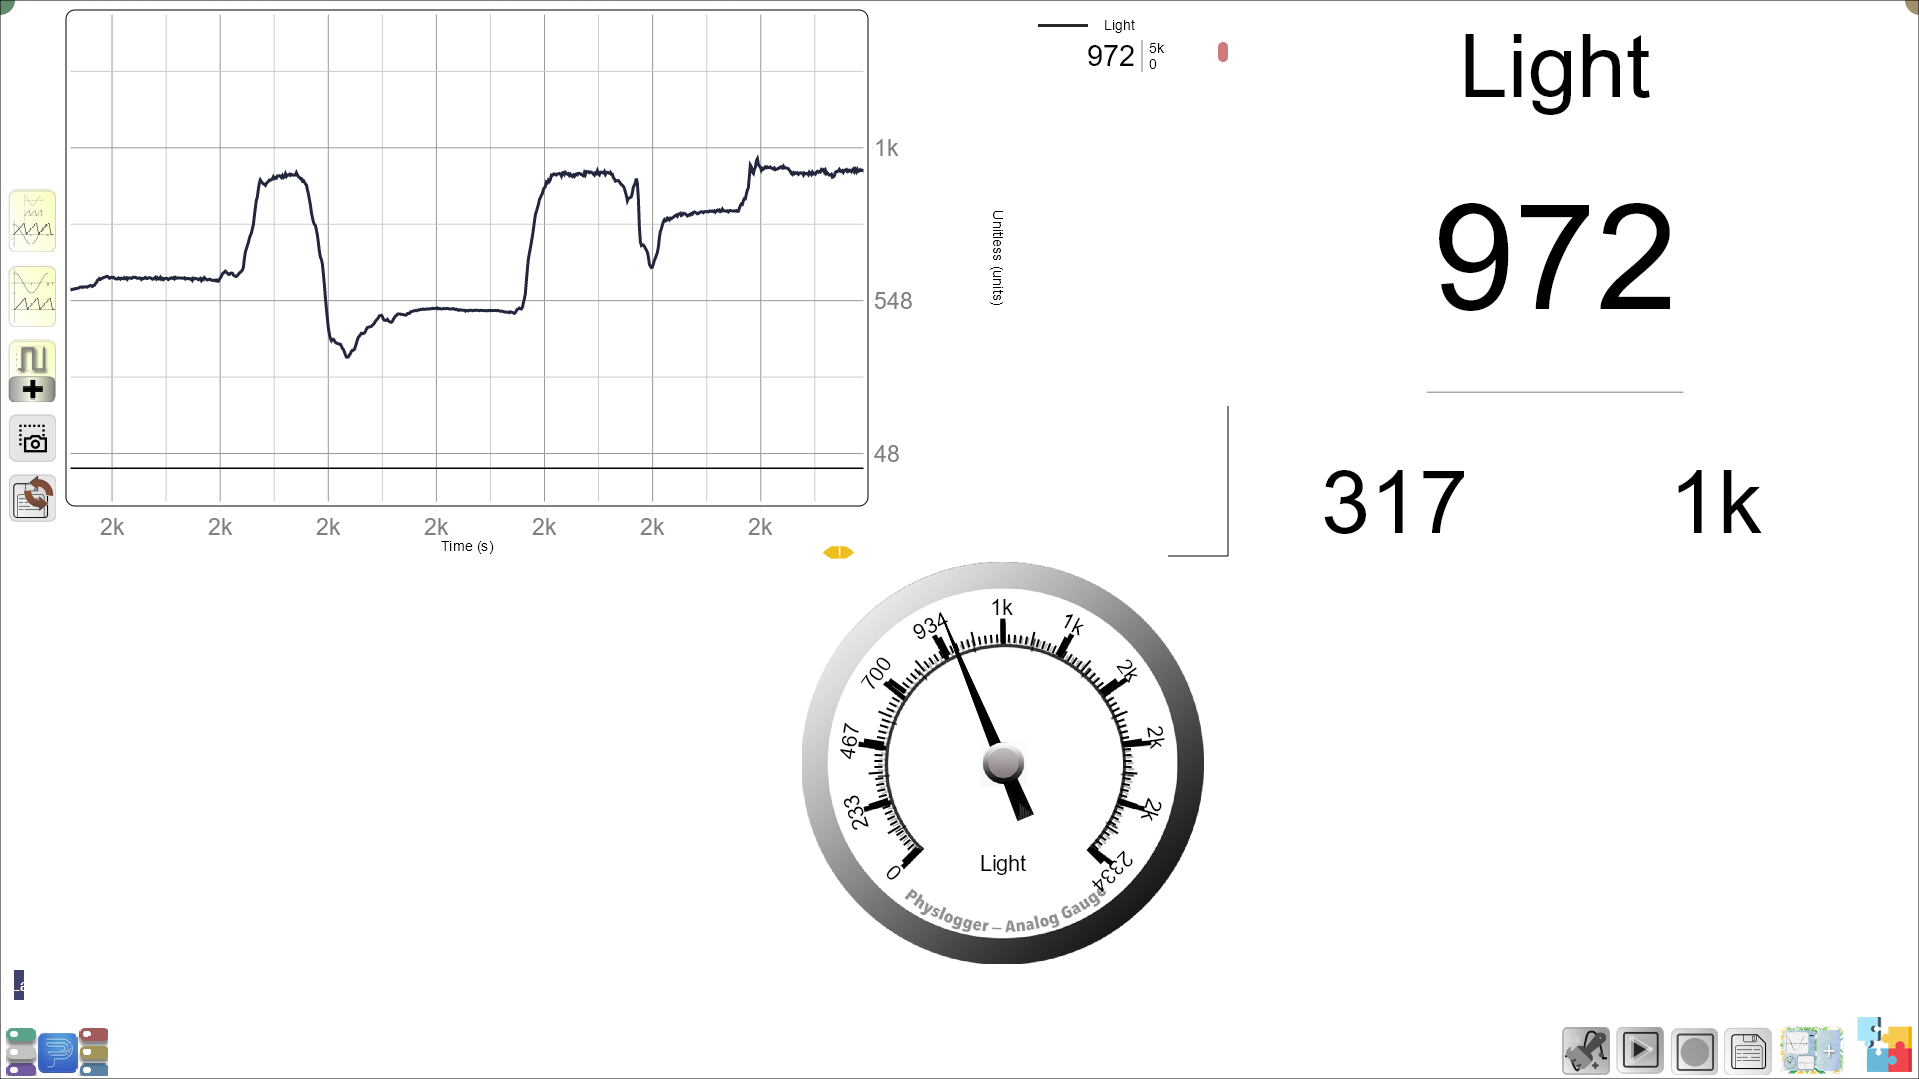
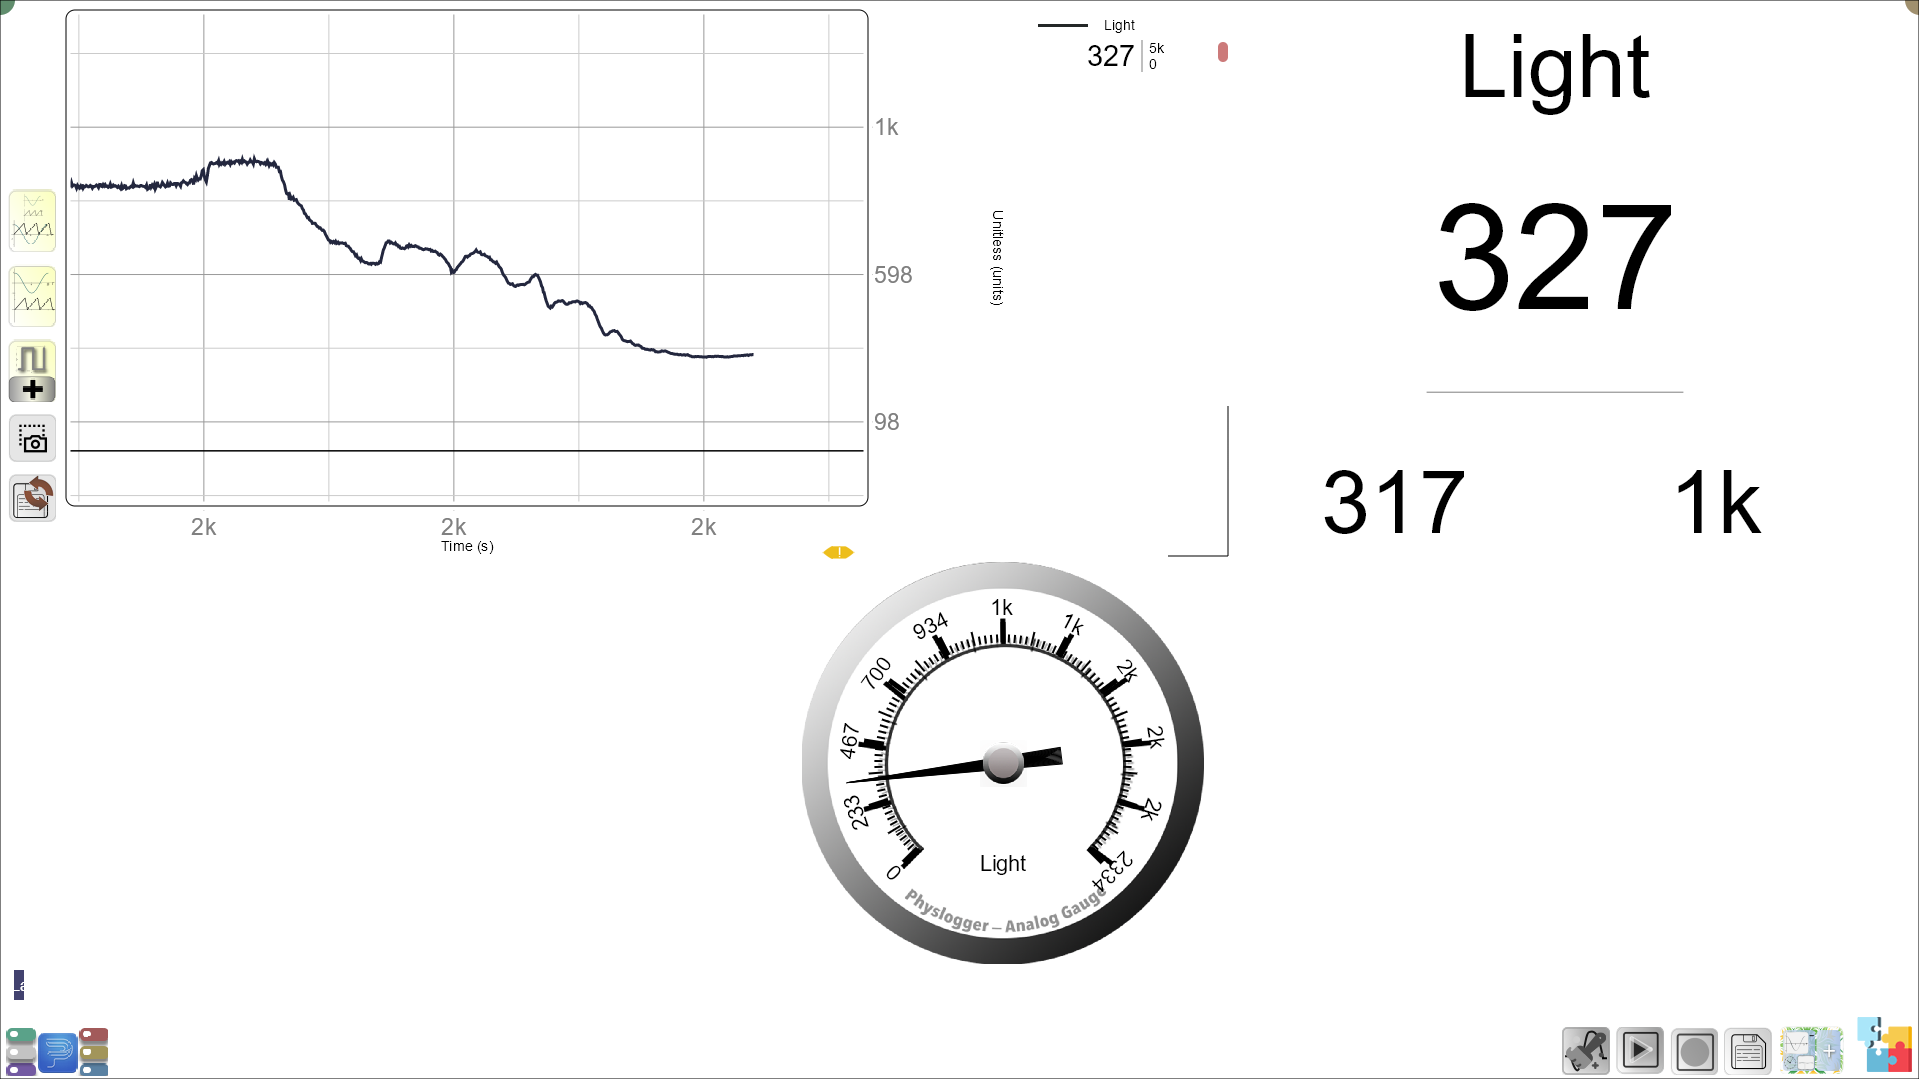
| Material | Prediction (Opaque/Transparent/Translucent) | Observation (Reflection/Absorption/Transmission) |
|---|---|---|
| Mirror | Opaque | Reflection |
| Black Paper | Opaque | Absorption |
| Transparent Plastic | Transparent | Transmission |
| Translucent Glass | Translucent | Transmission |
| Aluminum Foil | Opaque | Reflection |
-
Follow-up questions:
- “Which material reflected the most light? Why?”
- Encourage students to think about surfaces that shine and bounce light, like mirrors and foil.
- “Which material absorbed the most light? Why do you think that happened?”
- Reinforce that dark-colored objects, like black paper, tend to absorb more light.
- “Can you think of a place where these materials would be used in real life?”
- Ask where they’ve seen mirrors, dark-colored curtains, frosted glass, or other light-blocking materials.
- “Which material reflected the most light? Why?”
-
Live Plot Interpretation:
Students observe the live plot changes as they test different materials.
Ask them to note:- “How does the live plot change when we use reflective surfaces like mirrors? What happens when we use absorbing or transmitting surfaces?”
Summary and Reflection (10 minutes)
- Conclusion:
- Summarize the key takeaways:
“Today, we learned that light can reflect off surfaces, get absorbed by materials, or pass through them. We saw how mirrors reflect light, black paper absorbs it, and glass lets it pass through.”
“These different properties are important in designing things like windows, mirrors, and even sunglasses.”
- Reflection Questions:
“Where else do you see light being reflected, absorbed, or transmitted in your surroundings?”
“Can you think of other objects that transmit light, like windows, or absorb light like dark curtains? Why do we use mirrors to see our reflection?”
Glossary:
- Reflection: The bouncing back of light from a surface (like a mirror).
- Absorption: The process of taking in light, where light does not bounce back (like black paper).
- Transmission: When light passes through a material (like glass or clear plastic).
- Opaque: A material that does not let light pass through.
- Transparent: A material that allows light to pass through completely.
- Translucent: A material that lets some light through, but not all.
- Light Intensity: How much light is being reflected, absorbed, or transmitted.
- Live Plot: A plot that shows real-time changes as we measure how surfaces reflect, absorb, or transmit light.