Grade 2 – Session 4: “Light Blockers: Exploring Materials”
Architect: Aleeza Ayaz - Markhor3D
Session Length: 50-60 minutes
Session Overview: “Light Blockers: Exploring Materials”
In this interactive session, students will explore how different materials interact with light. Using MeasureLab’s light sensor, they’ll observe how light behaves when it encounters materials like paper, plastic, and foil, discovering concepts of transparency and opacity. Students will make predictions, test various materials, and observe how stacking transparent sheets reduces the amount of light passing through. By the end of the session, they’ll gain a foundational understanding of how light interacts with different objects and how this can apply in everyday life, like tinted windows or sunglasses.
Learning Objectives:
In this session, students will:
- Use the light sensor to observe how different materials (paper, fabric, foil) block or allow light to pass through.
- Begin to understand the concepts of transparency and opacity.
- Experiment by stacking transparent materials and observing how light behaves.
- Make simple predictions about whether a material will block or let light through.
- Record their observations and reflect on how light interacts with different materials
Equipment Required:
- MeasureLab with built-in light sensor.
- A light source (lamp or torch).
- Various materials for testing (paper, fabric, aluminum foil, clear plastic).
- Transparent materials for stacking (e.g., multiple layers of plastic or clear film).
- Worksheets for predictions and observations.
Teacher Resource:
Session File: ML24.plf (55.7 KB)
Teaching Aids:
- Projector (optional for displaying live plots).
Preparation:
This step has to be done before the session on each workstation/apparatus by the teacher/session instructor:
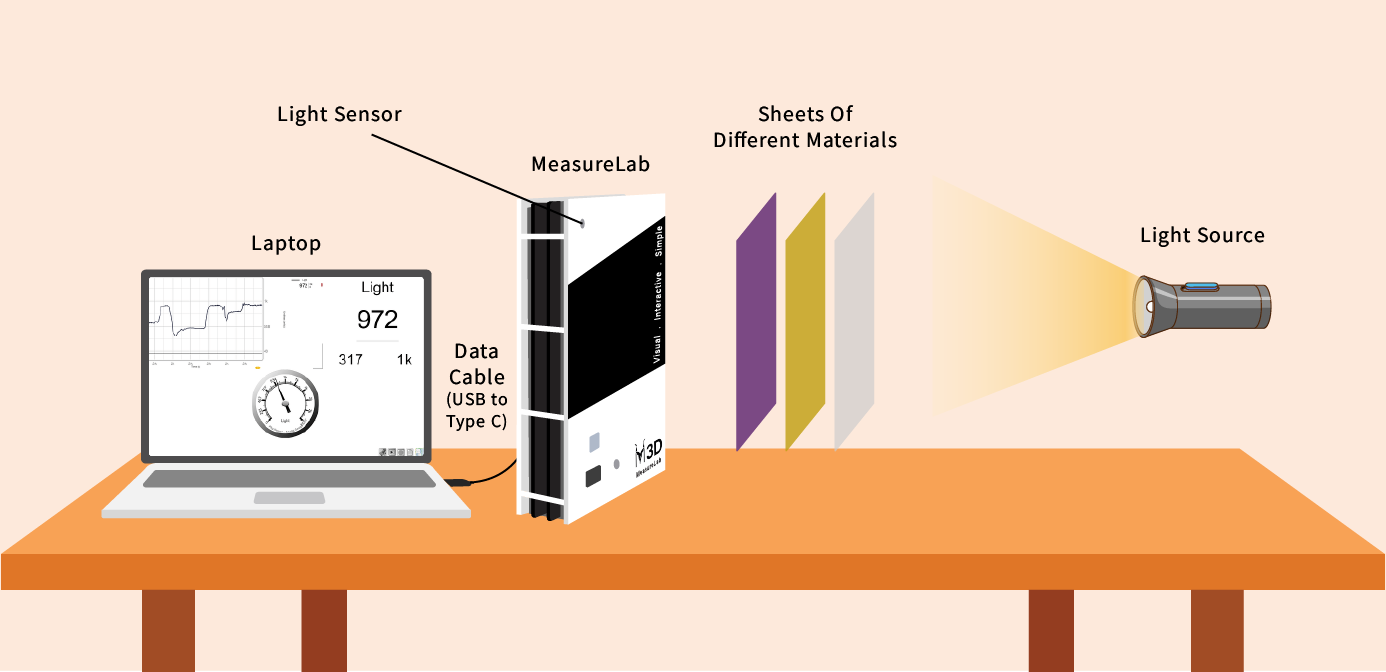
- Make sure that each computer has Physlogger installed and can detect the Measrelab when connected to it using the provided cable.
- Each Measurelab should have access to a power outlet for sensors that require external power. For this session, the light sensor will be used which does not require an external power source.
- Launch the Physlogger application and load the session file provided in the resources section.
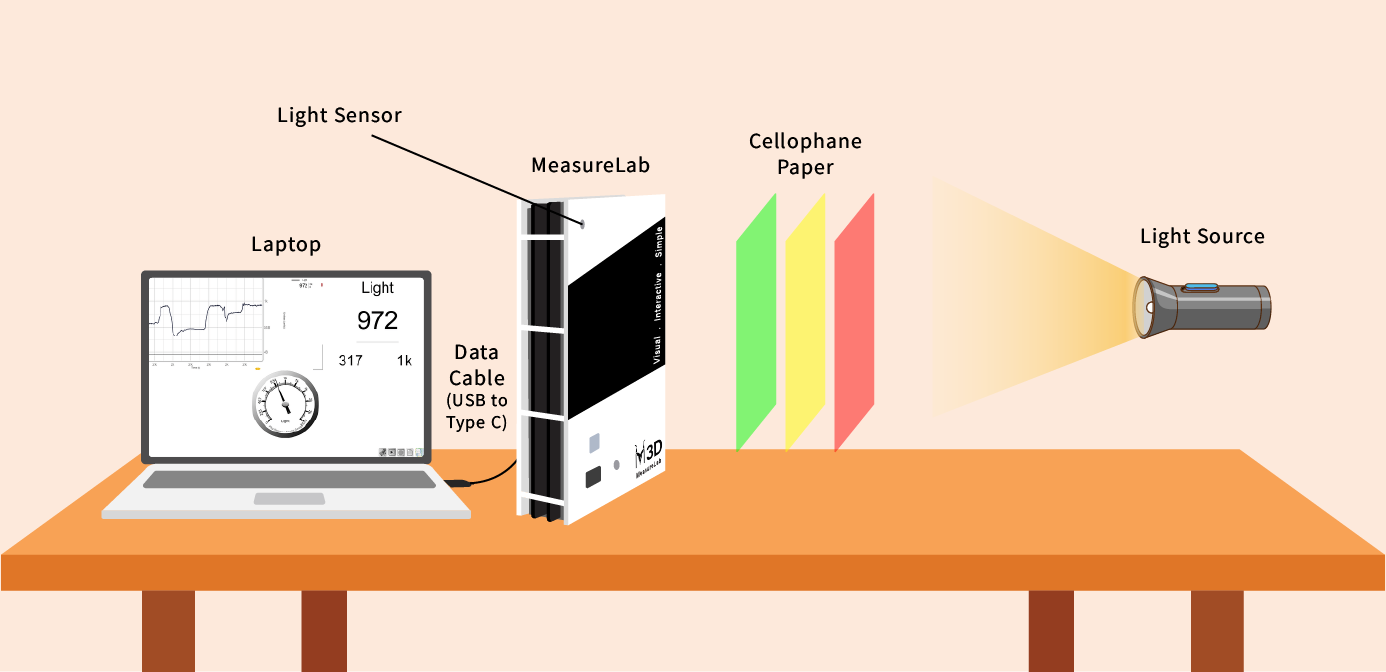
Your setup will look something like this:
Introduction: (10-15 minutes)
You may begin by asking:
“Who here has used a flashlight at night? What happens when you shine it on something? Does the light always go through?”
You may continue by saying:
“Today, we’re going to explore how different materials block or let light through. We’ll be using a special sensor that can tell us how much light is passing through different things. It will tell us how much light it can feel by displaying a number. We also have this gauge/meter that will move with light, just like the ones we see inn our bikes/cars.”
Encourage them to predict what they think will happen. Ask them to make guesses like:
“Do you think light will go through paper? How about foil?”
Hands-On Exploration: (30-35 minutes)
Step 1: Group Setup and Predictions
Each group will have a light source and a light sensor connected to MeasureLab.
You may ask students to start by making predictions about the first few materials they’ll test.
You may say:
“Before we test, let’s guess what will happen. Will light go through the paper? What about the plastic sheet?”
Step 2: Testing Materials
- Testing Paper:
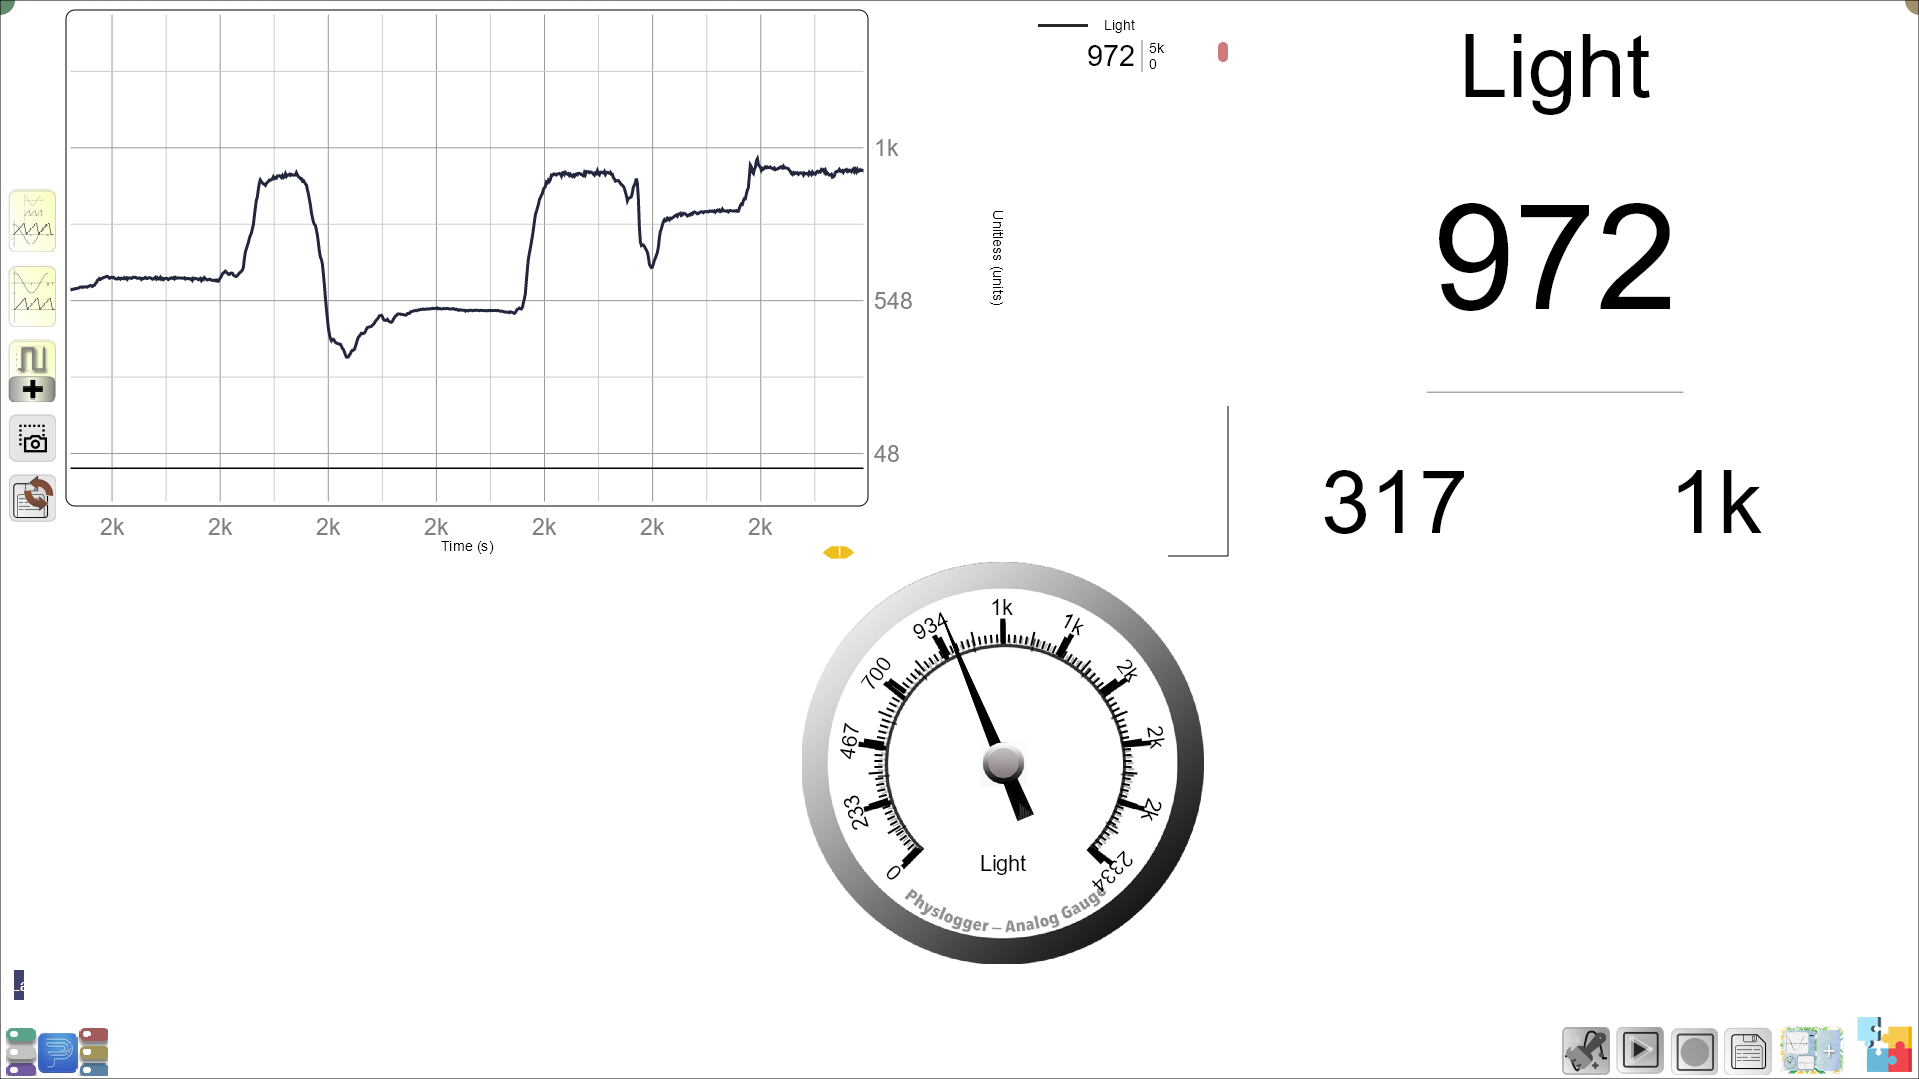
Shine the light on the paper and observe the sensor. You may ask:
“Did the light go through the paper? What do the numbers on the screen show us?”
- Testing Different Materials:
Let students experiment with fabric, foil, and plastic and cellophane sheets of different colors. Each time they test, ask them to observe the live plot on MeasureLab and note whether the number goes up or down.
Step 3: Stacking Transparent Materials
You may say:
“Now let’s see what happens when we use two transparent materials instead of one.”
As students stack two clear plastic sheets, guide them to observe the changes in the light sensor reading.
Ask while observing:
“Is there more or less light coming through when we add a second sheet? Did the number go down?”
Encourage students to think about why that happens and write down their observations.
Guided Activity: (15-20 minutes)
Worksheet Activity:
Section 1: Predictions and Observations
Students will record their predictions before the test and note down the result afterward.
| Material | Prediction (Will Light Pass Through?) | Observation (What Did the Light Sensor Show?) |
|---|---|---|
| Paper | ||
| Fabric | ||
| Foil | ||
| Plastic | ||
| Cellphane Sheet (Red) | ||
| Cellophane Sheet (Yellow) | ||
| Cellophane Sheet (Red) | ||
| Cellophane Sheets (Stacked) |
Follow-up Questions During Exploration:
- After stacking the transparent sheets:
“What do you think will happen if we keep adding more layers?” - After using sheets of different colors:
“How does the light change with different colors of the sheet? Which color blocks the most light?” - As they observe the changes:
“Can you tell why stacking more sheets blocks more light?”
Summary and Reflection: (5-10 minutes)
You may summarize by asking:
“Today, we learned that some things let light pass through, and others block it. We also found out that stacking transparent materials can block more light than just using one layer. We can call things that let light through ‘transparent,’ like clear plastic. Things that block light are ‘opaque,’ like foil.”
Reflection Questions:
These questions will be asked during the hands-on exploration to encourage students to reflect and think as they observe. Examples include:
- “What do you notice when we stack the plastic sheets?”
- “Why do you think more layers of transparent material block more light?”
- “Where might we use this idea, like stacking materials, in real life?”
Glossary:
- Transparent: A material that allows light to pass through it.
- Opaque: A material that does not allow light to pass through.
- Light Sensor: A tool that measures how much light is reaching it.
- Stacking: Putting two or more items on top of each other.