Session 3: Math & Movement with Scratch
Session Architect: Muhammad Bilal
Session Length: 50-60 minutes
Learning Objectives:
- Understand the basic idea of block coding in Scratch.
- Use basic Go/Move blocks in Scratch to control the robot’s movement.
- Create commands that move the robot based on math problems(Arithmetic operators i.e. addition and subtraction).
- Reinforce mathematical concepts through programming.
Equipment Needed:
- Laptops with Scratch pre-installed.
- M3D Go Robotics Kit with sensors.
- Printed activity sheets with math problems.
- Markers and small obstacles for robot navigation.
Teaching Aids
- Projector and screen (optional for the video demonstration).
- Scratch app running on a projector for better visual aid.
Perquisites:
- The teacher should be familiar with block coding in Scratch and it’s different categories of blocks. If not, we suggest using online resources to learn. We recommend the playlist by “ShiftClickLearn” on Youtube.
Resources:
Scratch Code File:
Grade 2 Session 3.sb3 (3.4 MB)
1. Introduction to Scratch Coding (20 minutes)
Activity: Introduction to Scratch Interface
Objective:
Familiarize students with the basic components of the Scratch coding interface.
Teacher’s Role:
You may begin by introducing Scratch and saying,
“Let’s explore how we can control the robot using Scratch.”
Show the Scratch interface on the projector, then explain the basic elements like Sprites, Blocks, and Stage. As you guide them through the interface, you can point out,
“These blocks are like instructions that tell the robot what to do when we press a button.”
Encourage the students to explore the interface and try out different blocks to see what happens.
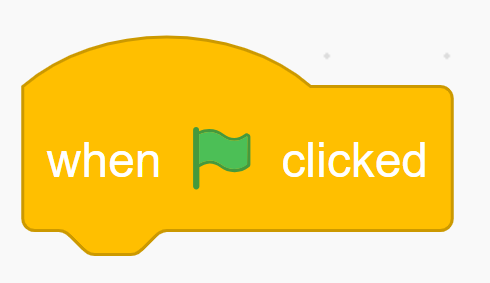
It’s helpful to begin with the “When Clicked” block, as this is how all Scratch projects start. You can explain,
“This is how we start any code. When you press this block, the robot will start following the commands you’ve given.”
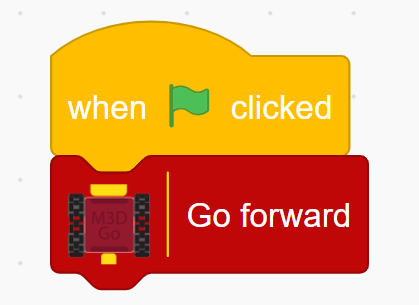
You may then combine this with simple movement blocks like “Go Forward” and “Go Backward,” allowing students to see the code in action and control the robot’s movement without using a gamepad.
Encourage them to experiment with the drag-and-drop feature, saying,
“You can drag these blocks and connect them like puzzle pieces. Notice how the shapes of the blocks help you figure out where they fit.”
Allow them to play around with the blocks and the drag-and-drop environment of Scratch.
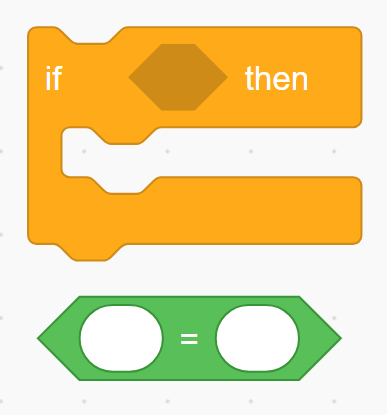
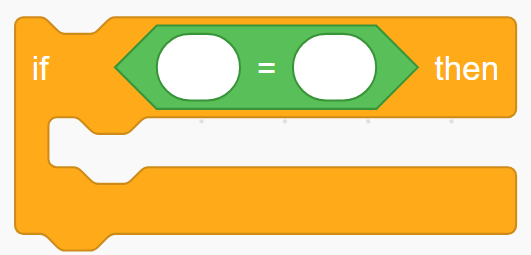
- Point out to them how different blocks have different shapes and how that tells where it can be placed.
“Notice how different blocks have different shapes, and that helps you understand where they can go.”
- Let them play around with the drag-and-drop feature of blocks to see how different blocks fit with one another.
Goal:
The purpose here is for students to understand the different blocks in Scratch and see how they can control the robot through movement instructions.
2. Guided Activity: Math-Based Robot Movement (25 minutes)
Activity: Programming the Robot Using Math Problems
Objective:
Use Scratch blocks to move the robot a certain distance based on given addition and subtraction problems.
Teacher’s Role:
You may move around the class and help students translate their math problems into Scratch commands. As they work on their math problems, encourage them to think about how they can use different types of movement blocks, such as forward, backward, and rotation. You could say,
“Let’s see how we can use this addition problem to make the robot move. How many steps do we need to take?”
You may provide each student with a math problem like:
- “The robot moves 5 cm forward, then moves another 7 cm. How far has the robot traveled in total?”
- “The robot travels 8 cm, then takes another 6 cm step. What is the total distance the robot has traveled?”
- “The robot needs to travel 20 cm, but it has already moved 8 cm. How many more centimeters does it need to go?”
- “The robot moves 15 cm forward, but then it reverses 5 cm. How far is the robot from its starting point?”
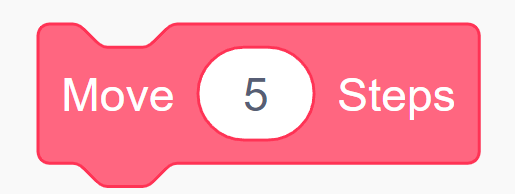
After students solve the problems, they can move the robot by using the “Move Steps” block, based on their answer. You can say,
“Now, let’s use the answer to program the robot to move forward that distance.”
- First allow them to solve the problems on the problem sheet. Then they can move the robot the number of steps their answer is using the “Move_ Steps” block.
- The teacher can place blocks or markers at certain distances based on the answer and see if the robot reaches that point. If it does, that means that their answer is correct.
You may also place markers at specific distances and ask,
“Let’s see if the robot can reach the marker based on the answer. If it does, your math is correct.”
Goal:
To allow students to practice applying math to programming and see how their answers move the robot.
3. Independent Practice: Create Custom Math Challenges (10 minutes)
Activity: Student-Created Math Problems
Objective:
Encourage students to create their own math challenges for their classmates.
Teacher’s Role:
As students work, you may monitor their progress and ensure they understand both the math and the coding aspects. You can provide guidance and praise their creative problem-solving. Encourage them to come up with new problems by saying,
“Now it’s your turn to create your own math problems! Write a problem that you think your friends will enjoy solving.”
Allow students to exchange problems with other groups. As they work on coding their robot to solve these new problems, you can say,
“Make sure you think about how to break down the problem into smaller steps, just like we did earlier.”
Goal:
To foster creativity and reinforce the connection between math and programming while giving students the opportunity to design their own challenges.
4. Robot Navigation: Numbers Dash (10 minutes)
Activity: Navigation based on answers
Objective:
Apply math and coding skills to navigate the path as fast as possible.
Teacher’s Role:
You may begin by setting up a simple course with markers, saying,
“We’re going to create a path for the robot based on math problems. Each marker is a point the robot needs to reach.”
Guide the students as they calculate and code the movements, saying,
“Use the answers to the math problems to program your robot’s path. How many steps does the robot need to take before it reaches the first marker?”
Encourage students to race their robots, saying,
“Can you get your robot to the end first? Use the math to guide it!”
Goal:
To help students apply both their math and coding skills in a fun and engaging way.
5. Reflection and Discussion (5 minutes)
Activity: Class Reflection
Objective:
Reflect on what students learned about coding and math.
Instructions:
To wrap up, you may ask the students,
“What was the most fun part of today’s session?”
and,
“What did you find challenging when using math to control the robot?”
This will give you insight into how well the students understood the material.
You can also discuss how math and coding work together by saying,
“How did programming the robot help you understand math better? Can you think of other ways we can use coding and math together in real life?”
Goal:
To provide closure and help students consolidate what they’ve learned in the session.