 D8500 Enabler Lite/Pro – Setup Guide
👋 Welcome to the M3D Family

Thank you for choosing the M3D Enabler D8500 — a powerful, reliable, and easy-to-use 3D printer designed to turn your ideas into reality.
This guide will walk you through the first-time setup process so you can start printing confidently in no time.
 What’s in the Package
When you get your D8500, you should have the following items:
-
 D8500 Lite/Pro Printer
 -
 Filament Spool Holder × 1
 -
 Power Adapter × 1
 -
 Printer Stickers (Optional)
 -
 Along with these, you will also find the add-ons you had ordered which may include additional spool holders, build plate or filaments.
 Unboxing and Physical Setup
- Carefully remove the printer and all accessories from the box.
- Detach any protective packaging, tape, or foam from moving parts.
- Place the printer on a stable, flat surface near a power outlet and your computer.
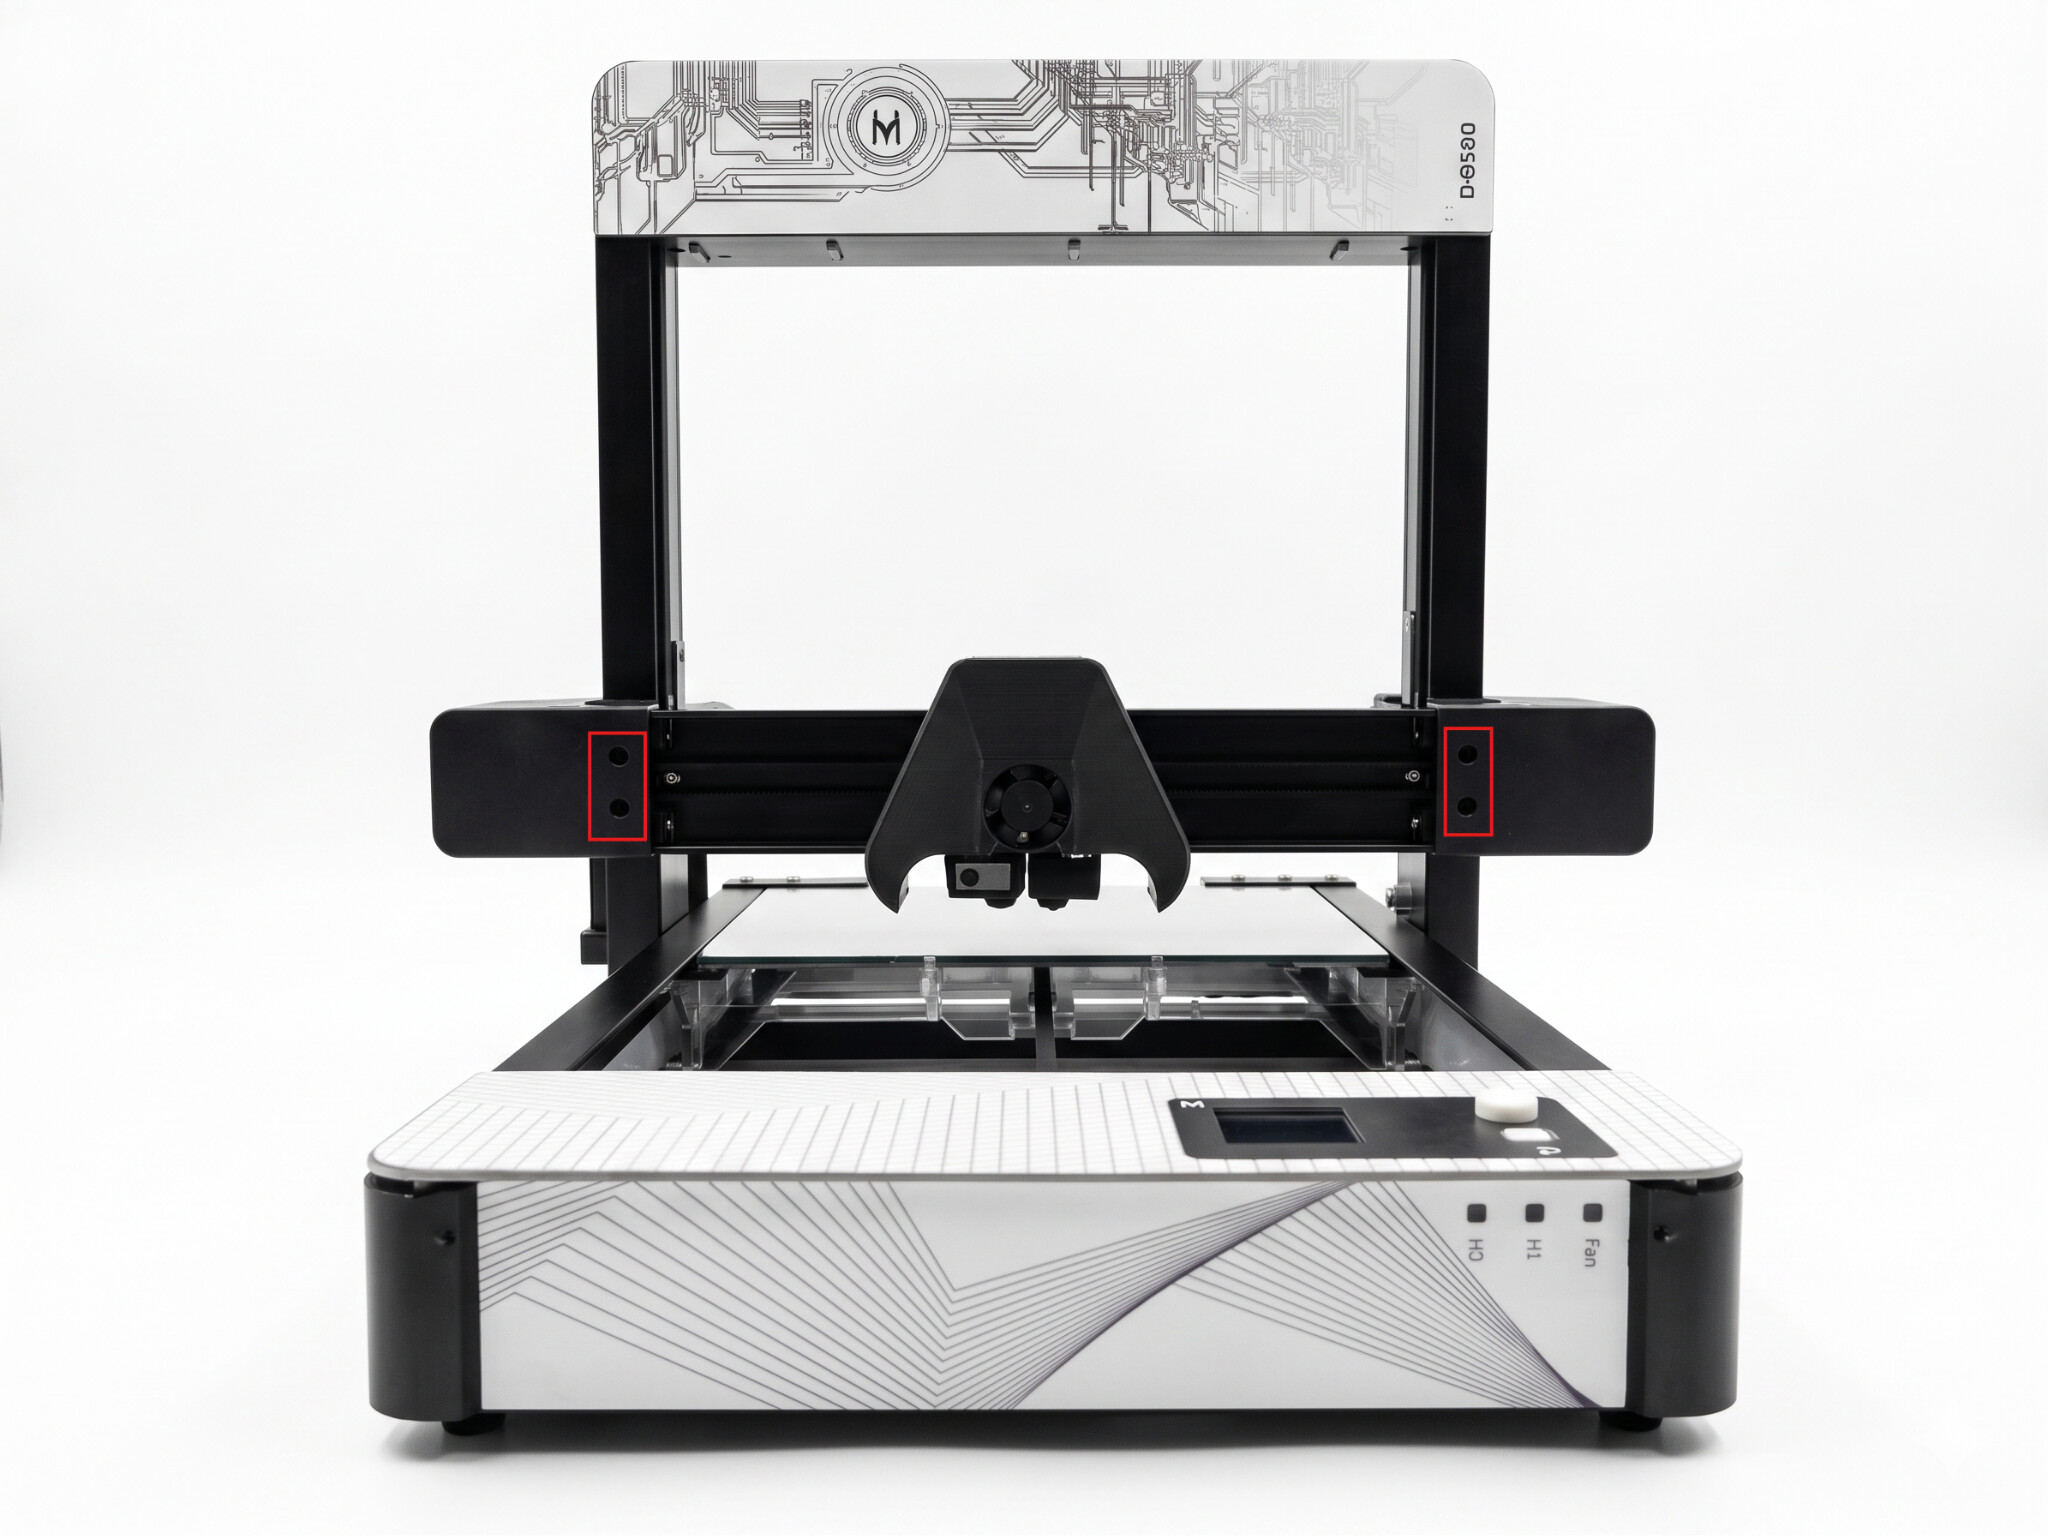
Note: If you have received the printer in any city other than Lahore, following these crucial steps:
Your printer is physically locked using 4 screws on both sides in the red highlighted area. Unscrew them before you proceed further. If not removed, any movement can physically damage the printer.
- Once done, connect the power adapter to the printer. The display and fan should turn on.
The power port is located on the right side of the printer next to the power button.
![]() Power On Check: Once connected, your printer should power up automatically — the fan will start spinning and the M3D Smart UI will light up.
Power On Check: Once connected, your printer should power up automatically — the fan will start spinning and the M3D Smart UI will light up.
If everything looks good till here, you can head towrads the first Beginners Tutorial where you will learn to set up the printer as well as the support software.
![]() Click here to access to the first tutorial.
Click here to access to the first tutorial.