Grade 6 - Session 2: “Observing Diffusion”
Session Architect: Aleeza Ayaz - Markhor3D
Session Length: 50-60 minutes
Learning Objectives:
In this session, students will:
- Understand humidity and how it relates to water vapor in the air.
- Observe diffusion by measuring the rate of diffusion of water vapor in a closed container using the humidity sensor.
- Learn about diffusion as the process of particles moving from areas of high concentration to areas of low concentration.
- Explore factors that affect the rate of diffusion (e.g., temperature, concentration).
- Record data over time using MeasureLab and analyze the relationship between time and humidity levels.
- Draw a scatter plot of humidity vs. time and interpret the trend.
- Identify independent and dependent variables, label axes, and analyze the graph.
Equipment Required:
- PC/Laptop to display measurement and live plot
MeasureLab with a built-in humidity sensor to measure water vapor levels. - A clear, closed container (e.g., a transparent plastic box, glass jar, or large beaker with a lid).
- A small cup of warm water (or a wet sponge or cloth soaked in warm water) to release water vapor inside the container.
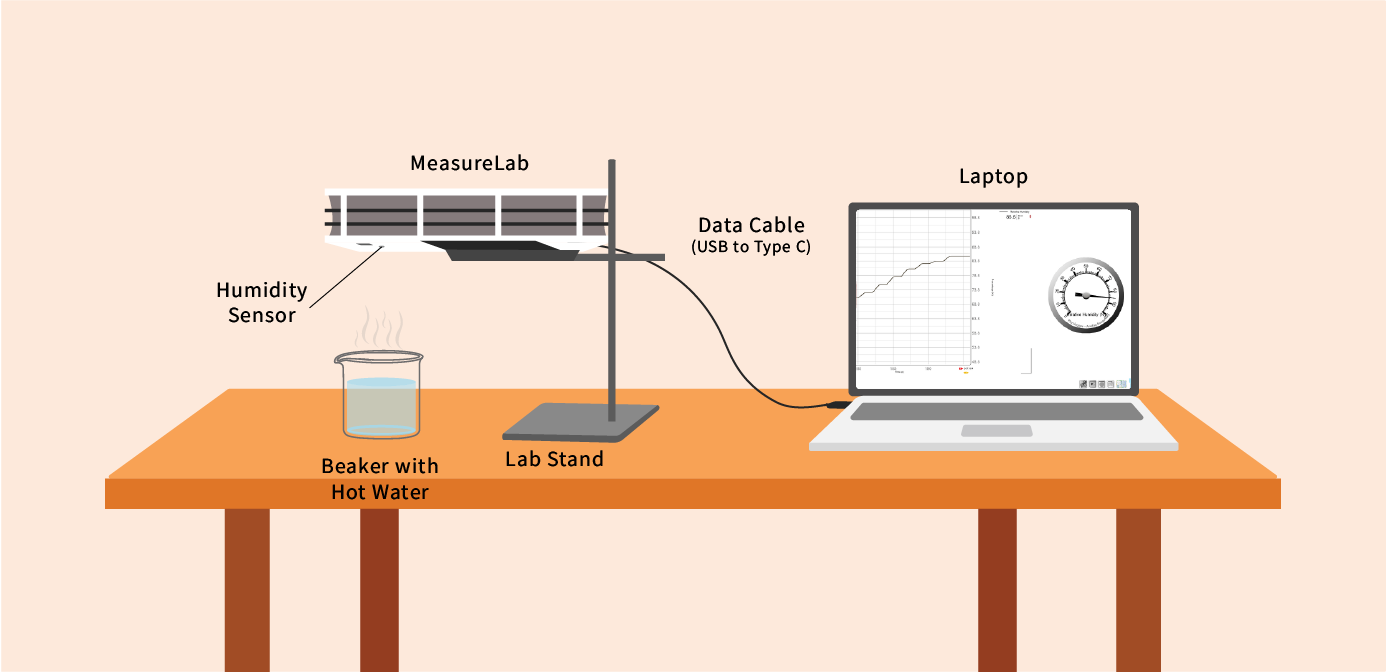
- Supports or clips to hold the humidity sensor above the water.
- Stopwatch or timer to record the time.
- Worksheet for recording data and reflecting on observations.
- Pens, pencils, markers, etc.
Teacher Resource:
Session File: ML62.plf (55.1 KB)
Teaching Aids:
- Visual aids: Diagrams of humidity, water vapor, and diffusion.
- Projector (optional).
Preparation:
This step has to be done before the session on each workstation/apparatus by the teacher/session instructor:
- Make sure that each computer has Physlogger installed and can detect the Measrelab when connected to it using the provided cable.
- Each Measurelab should have access to a power outlet for sensors that require external power. For this session, we will use the Humidity Sensor which requires an external power source.
- Launch the Physlogger application and load the session file provided in the resources section.
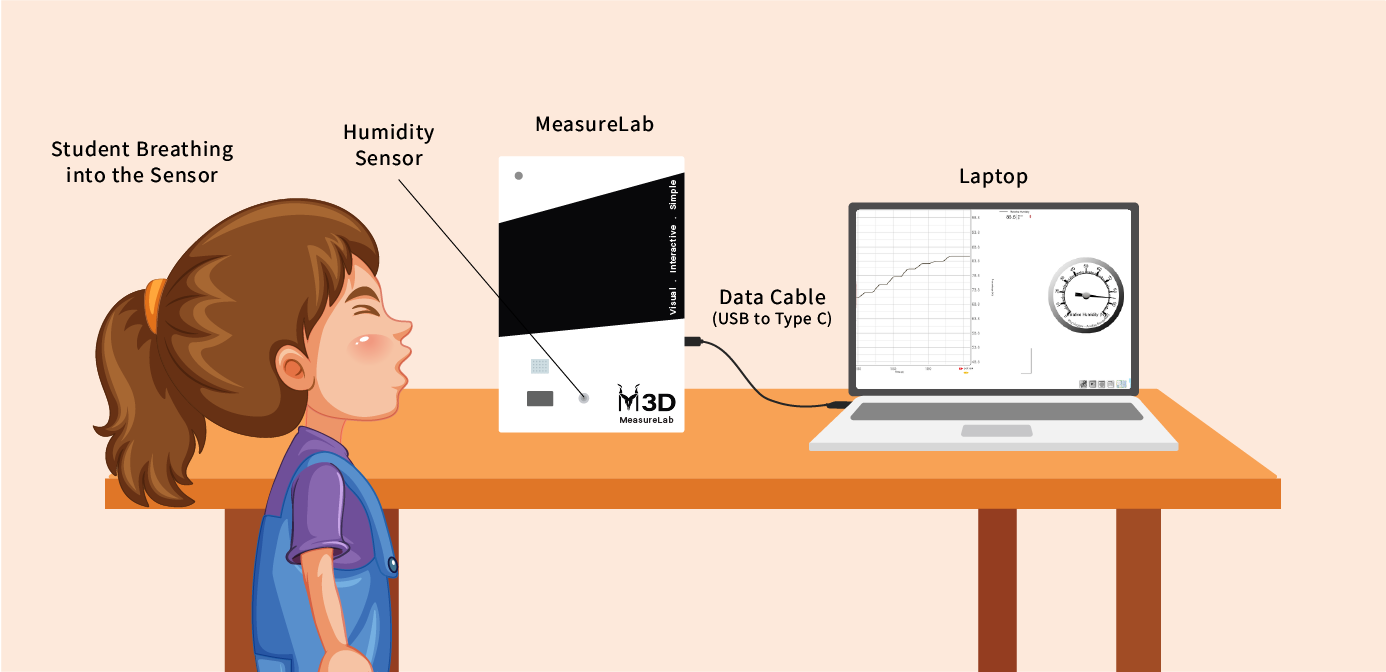
Your setup will look something like this:
Introduction and Hands-On Exploration (30-35 minutes)
-
You may start by asking:
“Have you ever felt the air on a really hot day and noticed it feels sticky or heavy? What do you think causes that?”- Let students share their experiences, guiding them toward the concept of humidity (water vapor in the air).
-
You may build on their responses by saying:
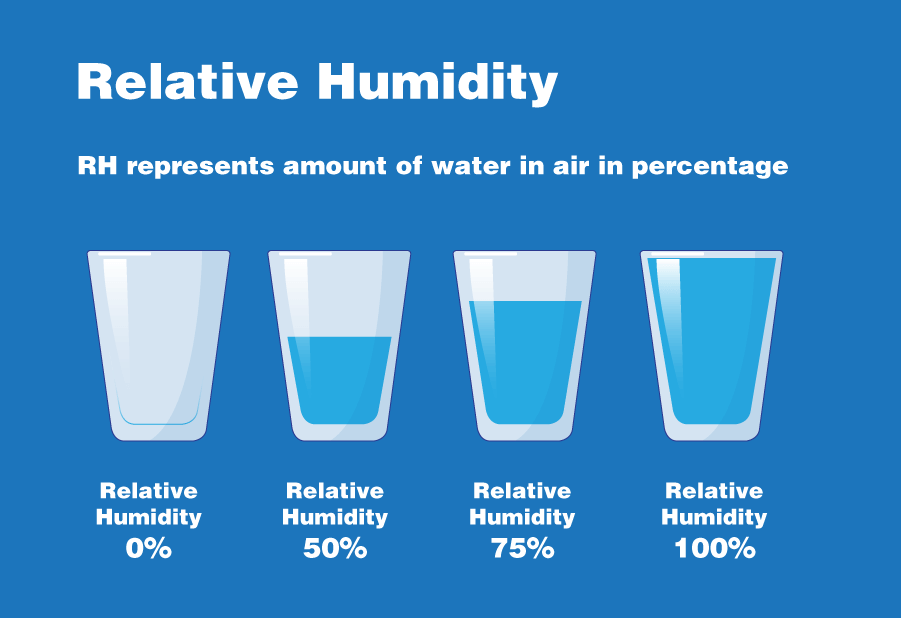
“That sticky feeling comes from water vapor in the air. We call this humidity. It’s basically water in the form of gas floating around us. Sometimes, on hot days, there’s a lot of water vapor in the air, and that’s why it feels sticky.”
Explaining Humidity in Simple Terms
-
You may ask:
“Have you ever seen water turn into steam when it’s heated? That steam is actually water vapor, which mixes with the air. The more water vapor there is, the higher the humidity.”- Show a visual aid of water vapor rising from a cup or hot surface, relating it to what students have seen in real life (e.g., fog or steam from boiling water).
-
You may say:
“Today, we’re going to use a sensor to measure humidity, or how much water vapor is in the air. We’ll do an experiment to see how water vapor spreads out in a container through a process called diffusion.”
Introducing Diffusion:
-
You may ask:
“What do you think happens when we spray perfume or air freshener in a room? How does the smell spread?”- Wait for student responses, guiding them toward the idea that the smell spreads through the air.
-
You may explain:
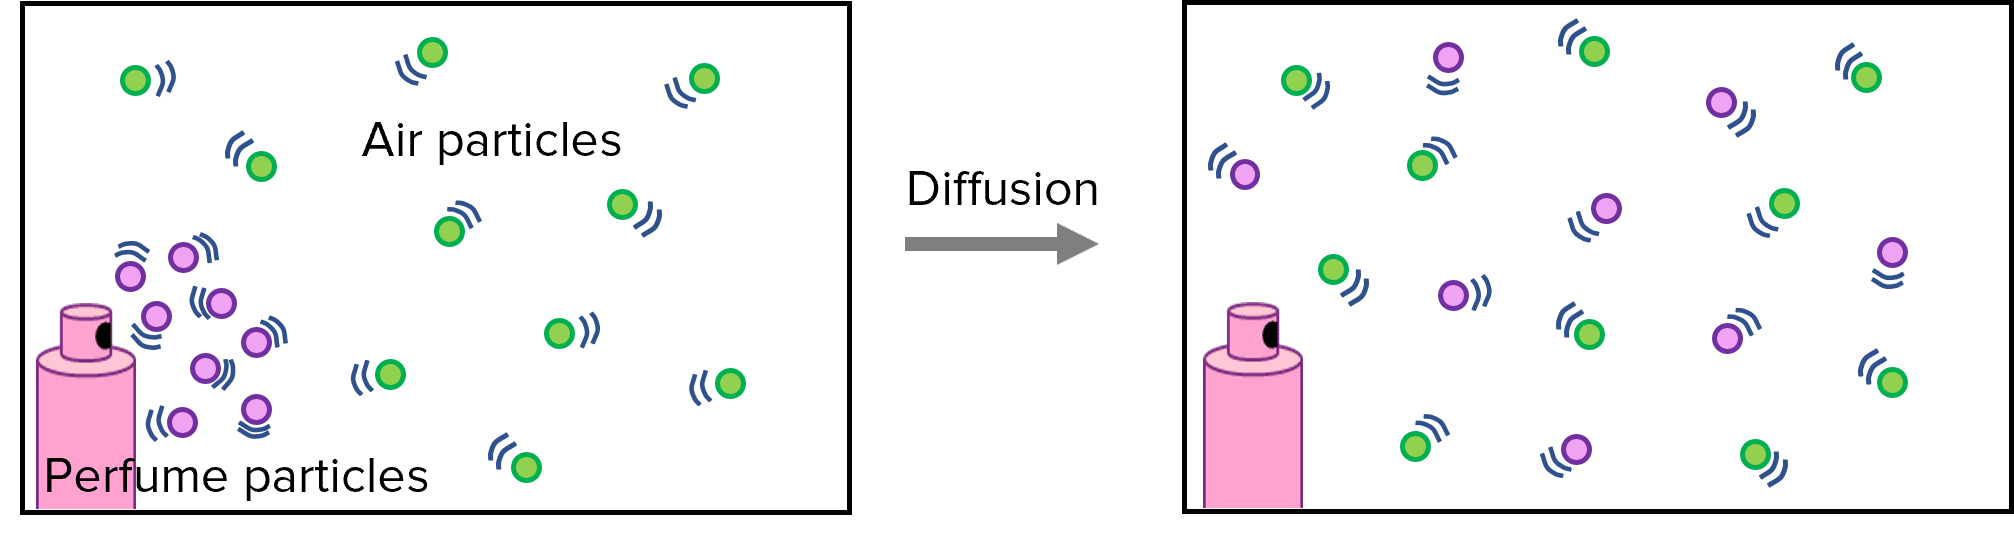
“When you spray something like perfume, the particles spread out from where they started. This spreading out is called diffusion. It happens because particles naturally move from areas where there’s a lot of them to areas where there’s fewer of them.”
Real-Life Example of Diffusion:
- You may say:
“Imagine we’re putting water vapor inside a box. At first, there’s a lot of water vapor in one spot, but over time, the water vapor will spread throughout the whole box. That’s diffusion! We’ll use the humidity sensor to see how fast water vapor spreads and fills up the box.”
Step 1: Setting Up the Experiment
-
Choose a Container:
- Select a clear, airtight container such as a plastic box with a lid, a large jar, or a beaker with a tight-fitting cover. The container needs to be transparent so that students can visually observe what’s inside.
- The size of the container should be large enough to allow diffusion to occur without filling it too quickly with water vapor (approx. 1-2 liters in volume works well).
-
Prepare the Water Vapor Source:
- Fill a small cup with warm water (the water should not be boiling but warm enough to release water vapor). Alternatively, you can use a wet sponge or cloth soaked in warm water as the source of the vapor.
- Place the cup or sponge/cloth at the bottom of the container. Ensure it is stable so that it does not spill during the experiment.
-
Positioning the Humidity Sensor:
- The humidity sensor needs to be positioned above the water source (about halfway up the container). This will ensure the sensor measures the vapor as it diffuses into the air, rather than directly measuring evaporation from the water surface.
- Options for sensor placement:
- Using clips or supports: If your humidity sensor has a stand or clip, attach it to the side of the container so that the sensor hangs freely in the air above the water surface.
- Create a platform: If the sensor does not have a clip, you can create a makeshift platform using a plastic or cardboard piece to hold the sensor above the water.
- Suspension with string: Alternatively, the sensor can be gently suspended from the lid of the container using string or tape, ensuring it is not in direct contact with the water.
-
Sealing the Container:
- Once the sensor is in place and the water is in the container, close the lid tightly to prevent the water vapor from escaping. This ensures that diffusion occurs inside the container and that the humidity levels will rise.
Step 2: Running the Experiment
- Start the Experiment:
- Before adding the water vapor, measure the initial humidity in the empty container. Use the MeasureLab humidity sensor to get a baseline humidity reading (this should be close to room humidity).
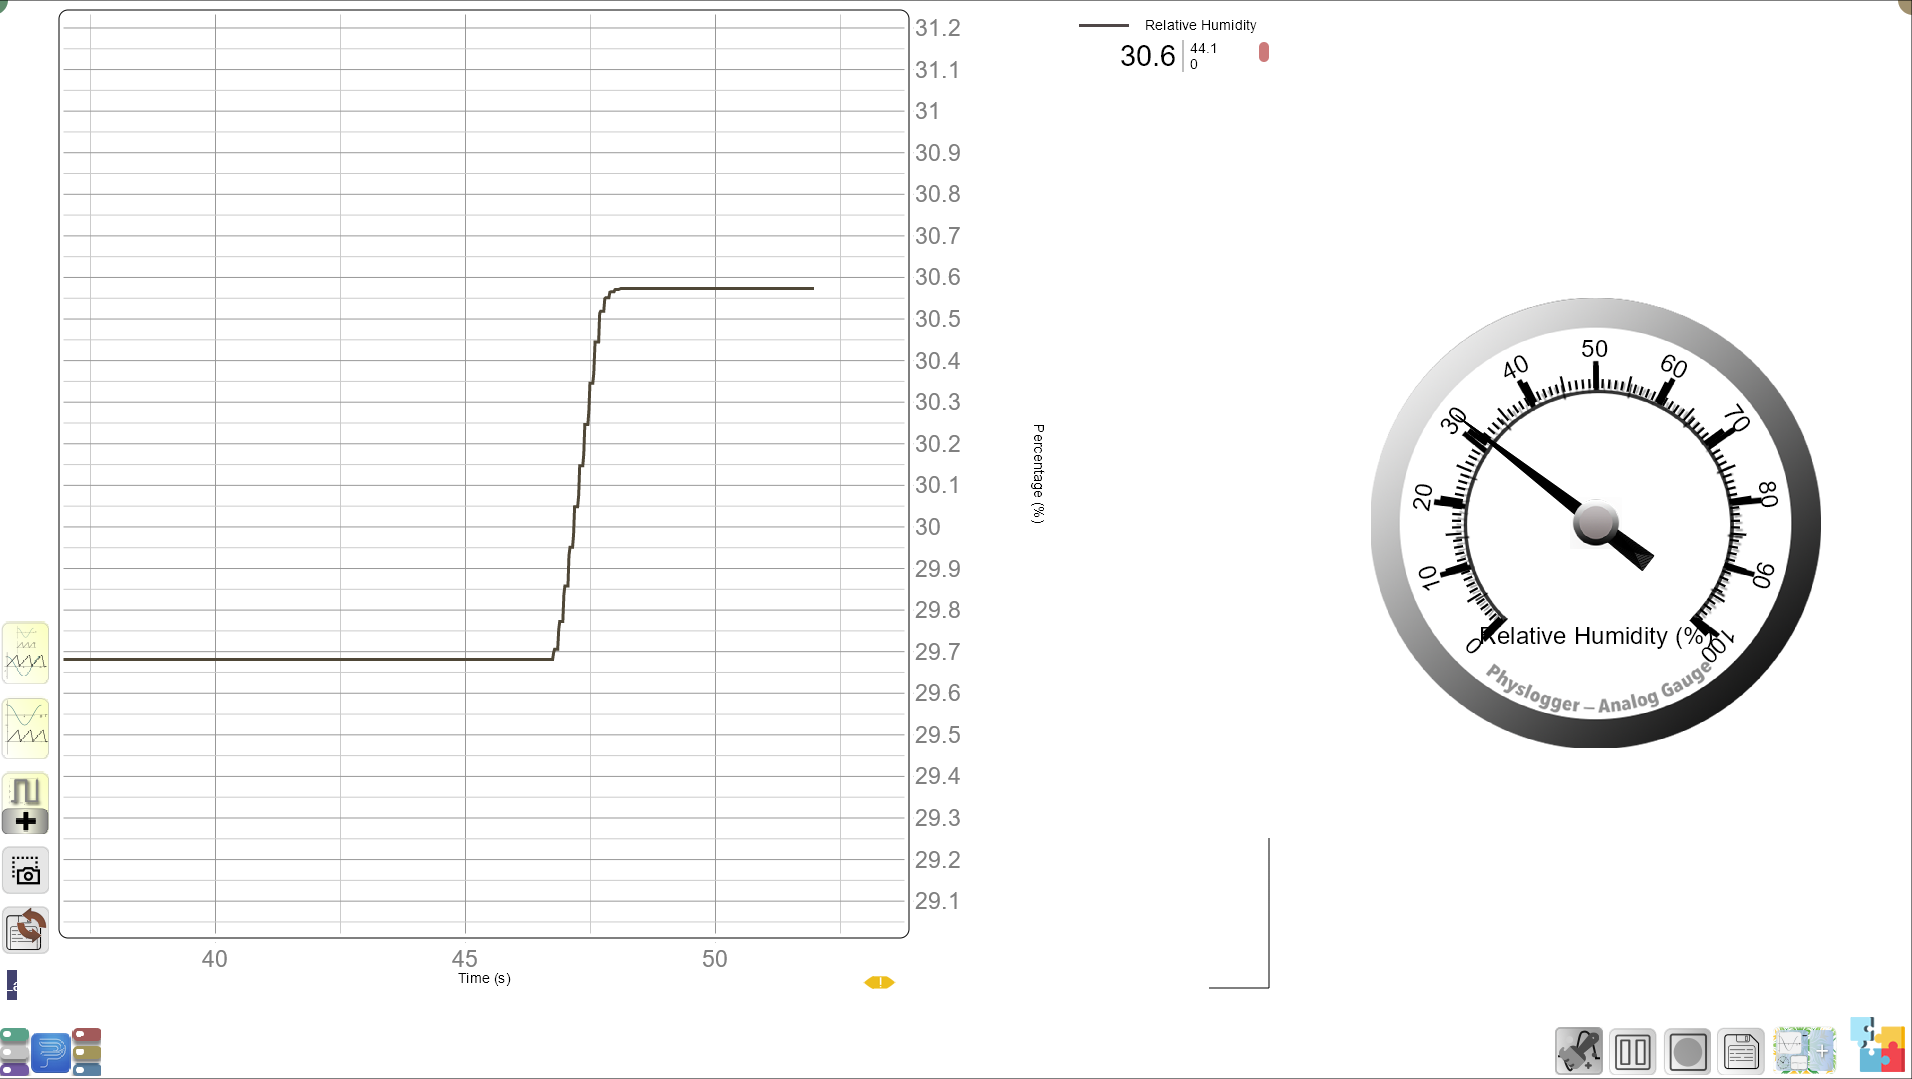
- Record this initial reading as the starting point for the experiment.
-
Introduce the Water Vapor:
- Place the cup of warm water (or wet sponge) inside the container and seal the container with the lid.
- Start the timer as soon as the container is sealed, and begin collecting live humidity data using MeasureLab.
-
Measure Humidity Over Time:
- Record the humidity levels at regular intervals (e.g., every 2-3 minutes) for a total of 10-15 minutes.
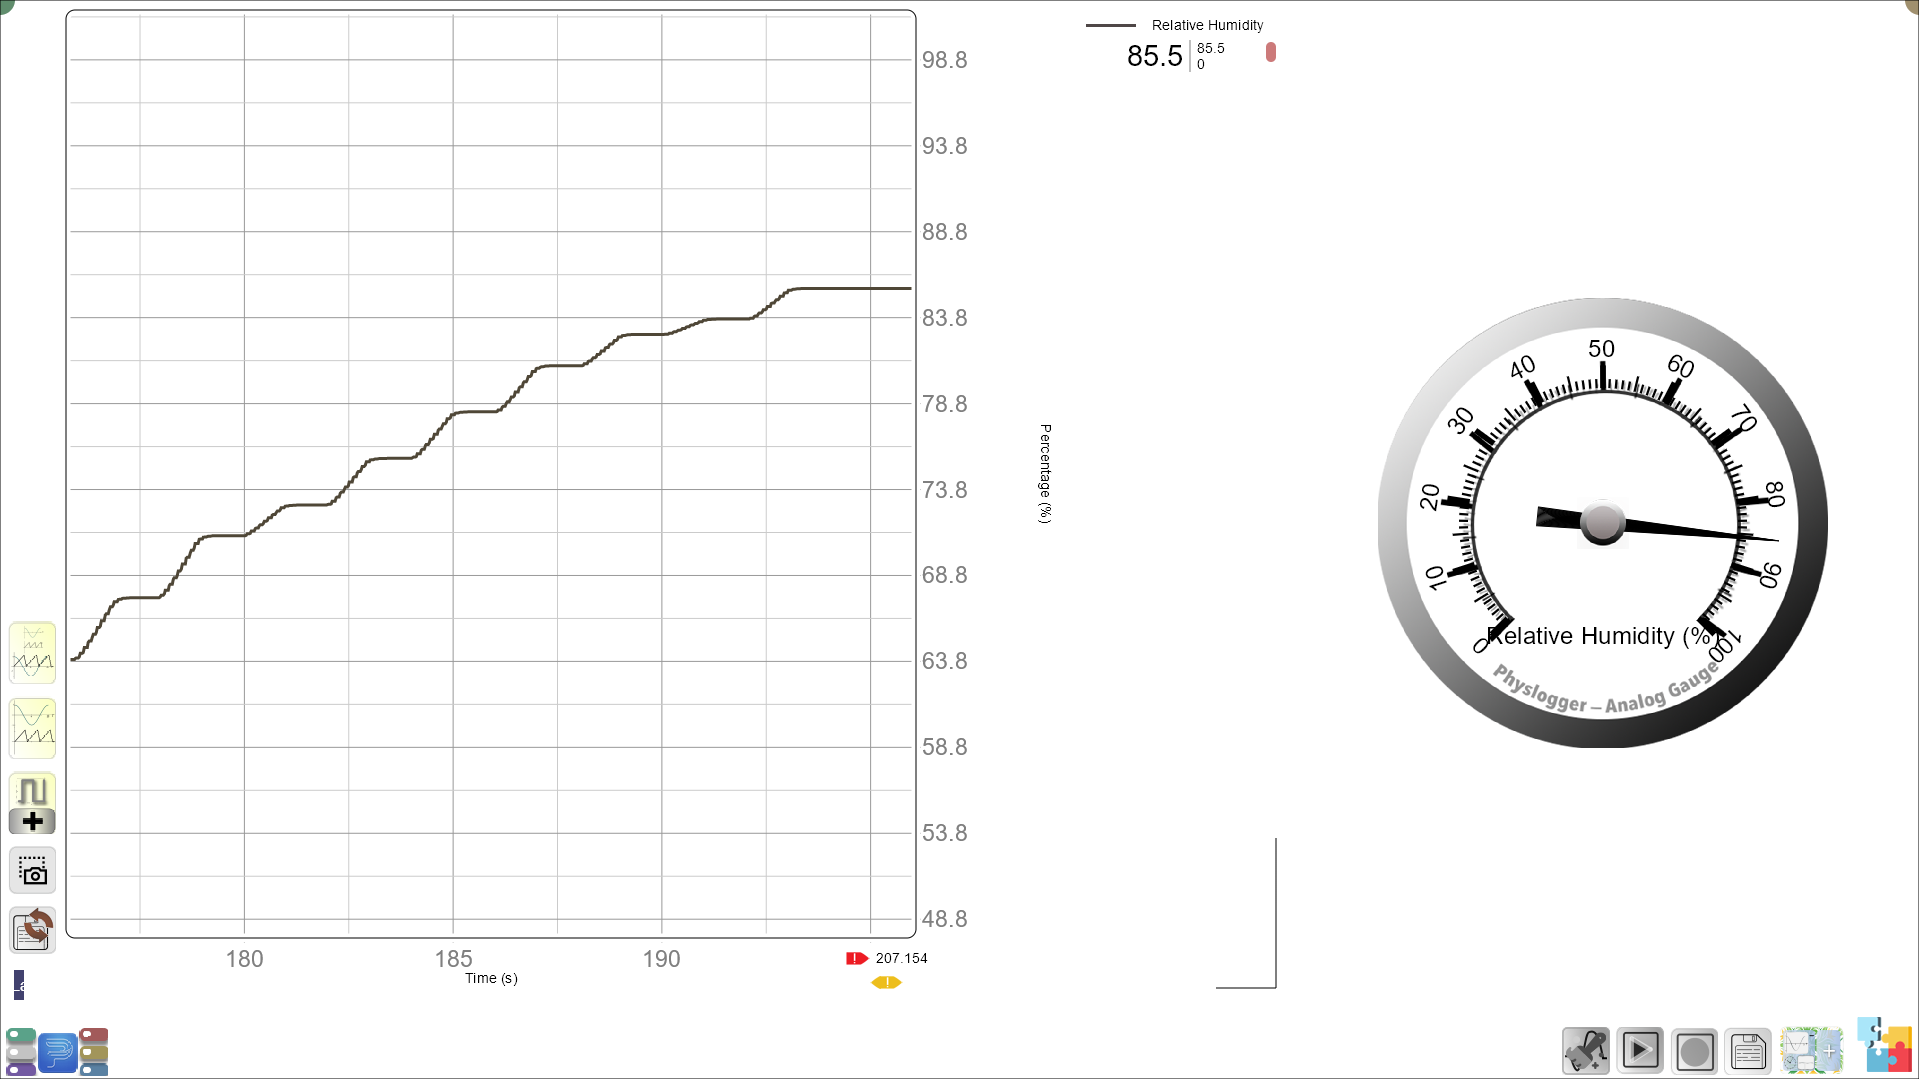
- Students should fill out the worksheet as they observe how the humidity level changes over time.
| Time (minutes) | Humidity (%) |
|---|---|
| 0 (Start) | |
| 2 | |
| 4 | |
| 6 | |
| 8 | |
| 10 |
- As the experiment progresses, students should notice the humidity levels increase as water vapor diffuses throughout the container.
- Explain to the students that the water vapor molecules are spreading out from the area of high concentration (near the water) to the rest of the container (areas of low concentration) through diffusion.
Explaining the Key Concepts of Diffusion and Humidity:
Diffusion:
-
Diffusion occurs when particles (in this case, water vapor) spread from areas where they are highly concentrated to areas where they are less concentrated. This happens because the particles are always in motion, and they naturally move to spread out evenly.
-
In the experiment: The water vapor is highly concentrated near the water or sponge and spreads to fill the rest of the container, which is why the humidity levels rise.
Humidity:
-
Humidity is the measure of how much water vapor is present in the air. As the water vapor diffuses, the humidity levels increase.
-
In the experiment: The humidity sensor measures how much water vapor is in the air inside the container. As diffusion occurs, the humidity percentage rises because more water vapor is present in the air.
Step 3: Guided Activity and Reflection: (15-20 minutes)
- Recording Data and Plotting the Scatter Plot
-
You may ask:
“Now that we’ve measured the humidity levels over time, let’s draw a scatter plot to show how the humidity changed as time passed.” -
Drawing the Scatter Plot:
- Students should create a scatter plot of humidity (%) on the y-axis and time (minutes) on the x-axis.
- You may ask:
“Which variable did we control (independent variable)? Which variable did we measure (dependent variable)?”
(Time is the independent variable, and humidity is the dependent variable.)- Have students label the axes and plot their data points on the graph.
- Analyzing the Scatter Plot:
- You may ask:
“What does the shape of the scatter plot tell you about how the humidity changed over time? Did it rise quickly or slowly?” “Did the humidity reach a certain point and level off? What might cause the diffusion to slow down?”
- You may follow up:
“How does the pattern on the scatter plot compare to the live plot you observed earlier? What are the differences and similarities?” “Can you explain why the humidity increased rapidly at first and then slowed down?”
- You may ask:
“What kind of trend do you see in your scatter plot? Is there a clear pattern or relationship between time and humidity?”- Guide students to observe whether the graph shows a gradual or rapid increase followed by leveling off.
- Real-Life Connections:
-
What happened to the humidity inside the container over time? How did it change?
-
What caused the water vapor to spread throughout the container?
-
What factors do you think would affect how fast diffusion happens (e.g., temperature, amount of water)?
-
Can you think of other examples of diffusion in everyday life?
Summary and Wrap-Up: (5-10 minutes)
-
You may summarize:
“Today, we measured how water vapor spreads out in a container through diffusion. We saw that as water vapor moves from areas of high concentration to low concentration, the humidity increases. Diffusion is a natural process that happens all around us.” -
You may end with a real-life connection:
“Next time you spray perfume or make tea, remember that the particles in the air are moving through diffusion, just like the water vapor in our experiment. Diffusion helps things spread out evenly, whether it’s smells, heat, or gases in the air.”
Glossary:
- Humidity: The amount of water vapor in the air.
- Water Vapor: Water in its gas form.
- Diffusion: The process of particles spreading out from areas of high concentration to areas of low concentration.
- Humidity Sensor: A device that measures how much water vapor is in the air.
- Concentration: The amount of a substance in a certain area.