Session 4: “Measuring and Modeling: Precision Matters”
Architect:
Syed Shayaan Haider - Markhor3D
Learning Objectives
In this session, students will:
- Understand the importance of precise measurement in 3D design and modeling.
- Learn how to use rulers and calipers to measure objects accurately.
- Input accurate dimensions into TinkerCad to create models with exact proportions.
- Refine previous designs based on measurements to ensure correct fit and functionality.
Teaching Aids
Required Equipment:
- Rulers and calipers (one per group or student)
- Computer or tablet with internet access for each student
- Projector and screen for demonstrations
- Whiteboard and markers for explaining concepts
- Printed measurement guides for students
Structure and Lesson Plan
Introduction (5 minutes)
- Encouragement:
Measure Twice, Print Once!
“Accuracy is key in design, just like when you build a puzzle. Every piece has to fit perfectly, and that’s what we’re going to learn today – how to measure and model precisely so that everything fits together just right.”
-
Review:
Recap the design process from previous sessions, focusing on how shapes were created without exact measurements. -
Overview:
Introduce the concept of precision and the role it plays in designing replacement parts, toys, or functional objects.
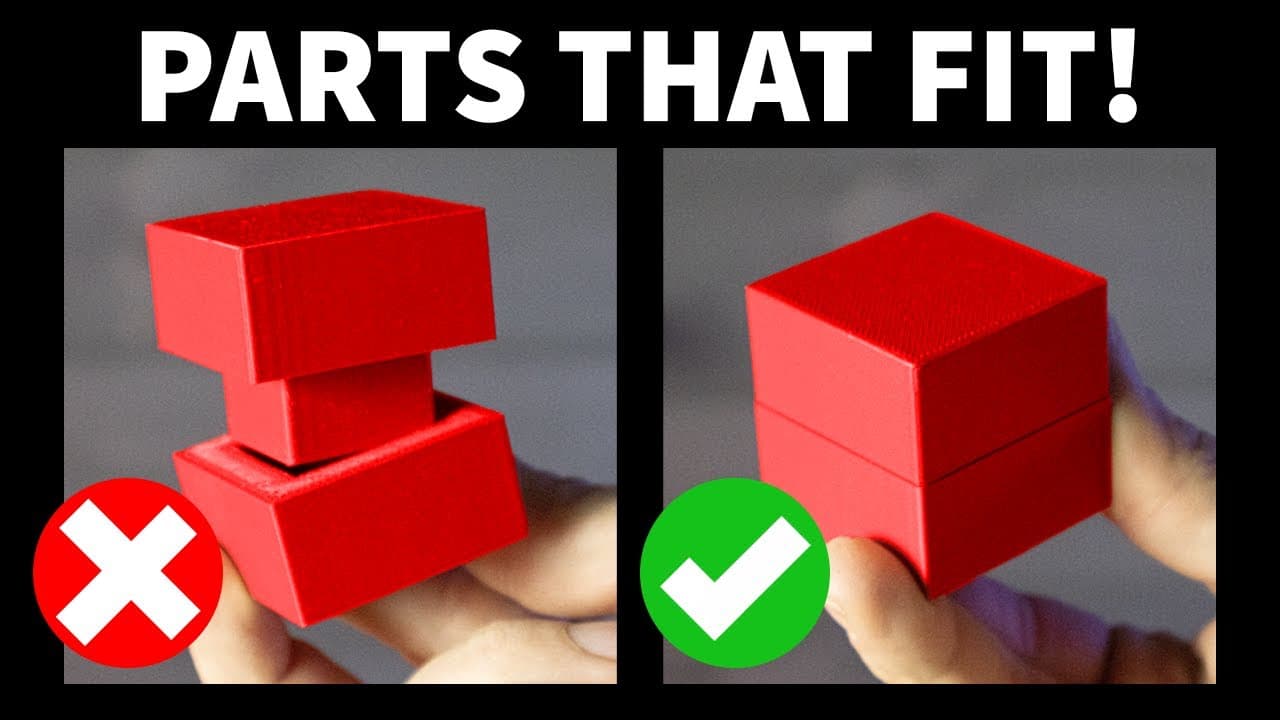
[Image of a poorly fitted part vs. a perfectly fitted part]
Recap basic features of TinkerCad:
(optional; gauge skill level and confidence of students in TinkerCad, you might need to manage time.)
- Ask students to drag and drop a shape into the build area.
- Encourage them to manipulate the view around the shape. Move, pan, orbit, zoom using mouse.
- Make the students move the object after clicking on it and draging the arrows (attatched to the center).
- Make the students manipulate and resize the object after clicking on it and draging the arrows (attatched to the corner).
- Recap Grouping objects by selecting all of them and using the group command (Ctrl+G).
- Recap creating holes in the object.
1 .Create the shape of the hole to be cut.
2 .Change the shape type to solid to hole.
3 .Place it within the area to cut the hole.
4 .Select both objects and Group.
Demonstration (10 minutes)
-
Using Measuring Tools:
- Rulers and Calipers: Demonstrate how to use both to measure simple objects like a small box or toy.
- Explain how to record measurements accurately and why slight errors can lead to incorrect designs.
-
Inputting Dimensions in TinkerCad:
- Open TinkerCad on the projector.
- Show how to input exact measurements for length, width, and height in TinkerCad to replicate real-life dimensions.
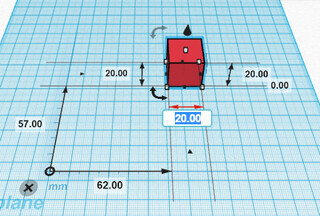
- Example Refinement:
- Present a simple 3D model that is slightly incorrect in dimensions (e.g., a lid that doesn’t fit a box).
- Measure the box and show how to modify the lid’s dimensions to fit perfectly.
Guided Practice (15 minutes)
-
Hands-On Activity:
- Distribute rulers and calipers to students.
- Give each student a small object to measure (e.g., a cube, pencil, or eraser).
-
Step-by-Step Measurement:
- Walk students through measuring their object’s dimensions (length, width, height) and recording these values.
-
Modeling in TinkerCad:
- Guide students in creating a 3D model of their measured object in TinkerCad using the precise dimensions they recorded.
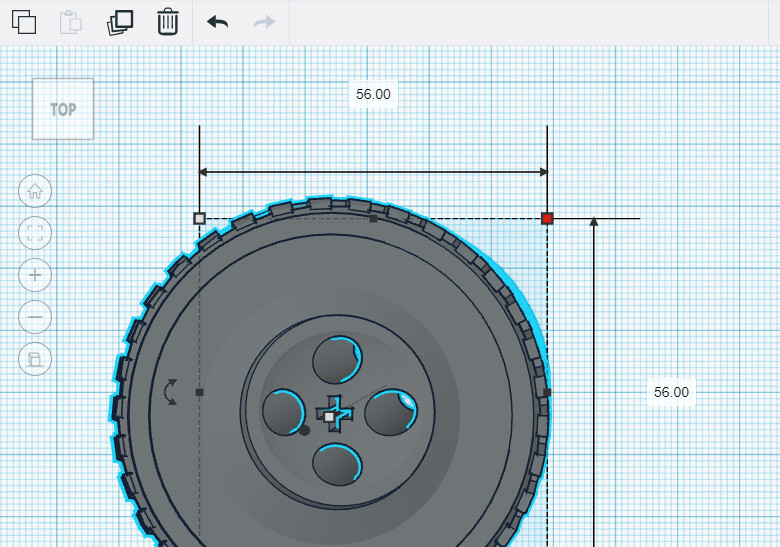
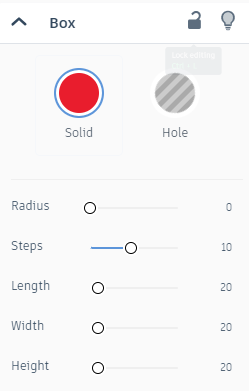
- Assistance:
- Circulate the classroom, offering help to ensure students correctly input dimensions and understand the importance of accuracy.
Independent Practice (10 minutes)
- Refining Designs:
- Ask students to open their designs from Session 1 (replacement parts, simple objects).
- Encourage them to measure the objects they are designing for (e.g., if they designed a toy wheel, they should measure the toy car it fits onto).
- Modify the designs based on these measurements for improved fit and function.
- Importing as .stl file:
We need a file format that we can send to the 3D Printer!
An .stl file is like a digital model of your design in Tinkercad. It’s a 3D picture of your object that shows all its shapes and details. The .stl file doesn’t tell the printer how to print yet—it just shows what the object looks like.
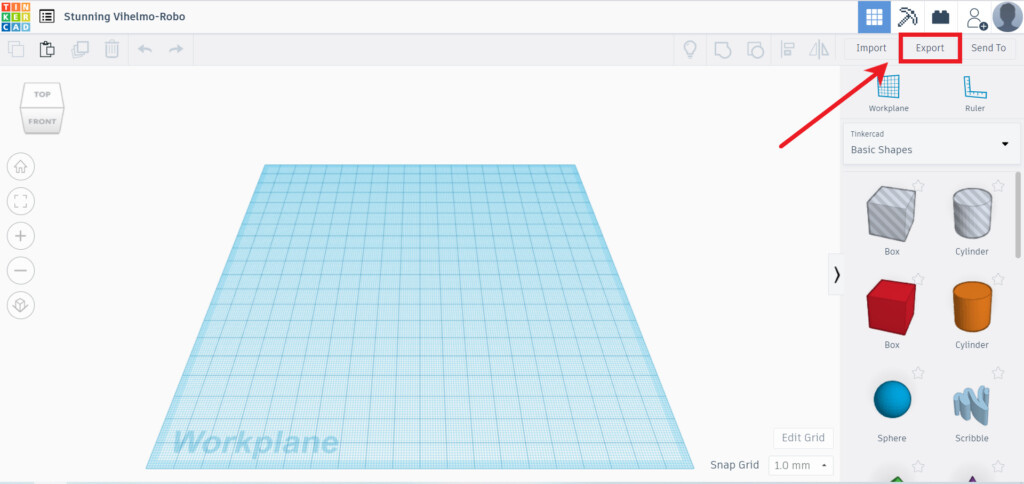
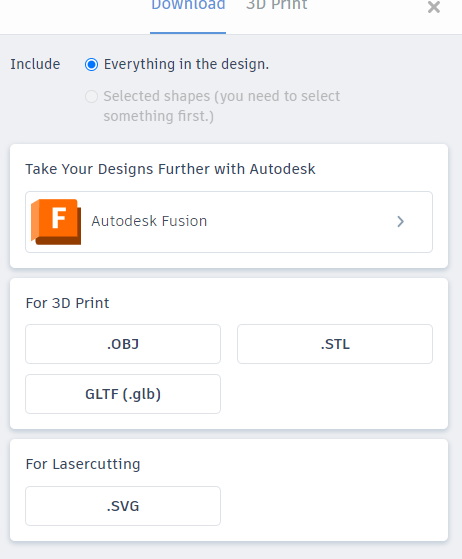
(it’s preferred to choose .stl or .obj file format - Detailed Instructions in TinkerCad Guide)
Class Discussion (5 minutes)
-
Sharing:
- Invite a few students to show their refined designs.
- Ask how measuring and inputting precise dimensions improved their models.
-
Questions:
- What challenges did you face while measuring or modeling?
- How did using accurate measurements change the outcome of your design?
-
Feedback:
- Encourage peer suggestions and constructive feedback on improving precision in future designs.
Reflection and Follow-up (5 minutes)
-
Summary:
Recap the importance of precision and how measurements translate into accurate models in TinkerCad. -
Encouragement:
Motivate students to use these skills in their future projects. Precision is key to making functional objects that work as intended. -
Homework:
Ask students to choose an object at home, measure it accurately, and sketch a design for it in their notebook. They will use TinkerCad to model it in the next session.
Glossary
I. Ruler: A measuring tool used to measure straight lines and lengths.
II. Caliper: A tool used to measure the distance between two opposite sides of an object with greater precision than a ruler.
III. Dimensions: The measurable extents of an object, such as length, width, and height.
IV. Refinement: The process of making improvements to a design based on precise measurements and testing.
Teacher’s Resources:
- Guide to TinkerCad (link to separate document)
For suggestions, improvements, and corrections feel free to reach out at shayaanhaider@gmail.com